Free Shipping on Domestic Orders $75+

Panasonic RQ-NX10 Drive Belt Replacement

What you need

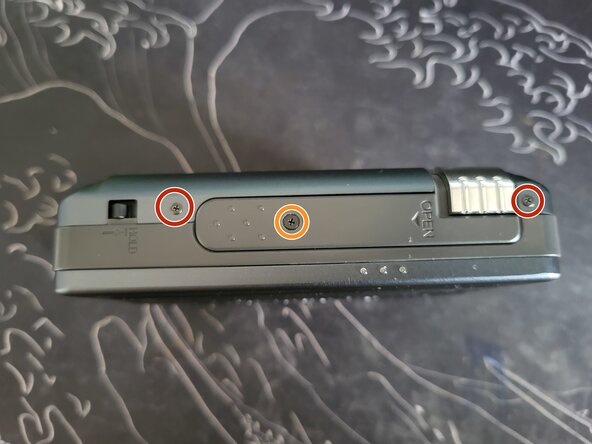
  1. Panasonic RQ-NX10 Drive Belt Replacement, Removing top case: step 1, image 1 of 2 Panasonic RQ-NX10 Drive Belt Replacement, Removing top case: step 1, image 2 of 2
    • Remove the following screws to remove the top case:

    • 2x 5mm P0 screws

    • 1x 3mm P0 screw (thin)

    • 2x 3mm P0 screws (thick)

    • Pull the case straight up to remove it.

    Ask FixBot

    Add Comment

  2. Panasonic RQ-NX10 Drive Belt Replacement, Remove eject latch: step 2, image 1 of 1
    • Remove the eject latch, which allows you to open the case to insert a cassette tape, by pulling it straight upward.

    • Do not use excessive force to remove the eject latch. Removing it may require pushing it forward or backward if stuck in place. The mechanism it covers is under tension.

    Ask FixBot

    Add Comment

  3. Panasonic RQ-NX10 Drive Belt Replacement, Disconnect motherboard: step 3, image 1 of 1
    • Remove the two brass 3mm P00 screws.

    • When reinstalling the screws, locate the "ice cream cone" symbols to find the correct screw holes.

    • Desolder the motor terminal pins.

    • Desolder the rotary switch terminal pins.

    • The top-most pin of the rotary switch terminal is meant to be soldered to the negative end of the capacitor, as shown in the image.

    • While technically not required, we highly recommend you desolder the ribbon cable to make motherboard removal easier.

    • If desoldering the ribbon cable, make sure to heat it for up to 2 seconds at a time - otherwise, the cable may be permanently damaged.

    Ask FixBot

    Add Comment

  4. Panasonic RQ-NX10 Drive Belt Replacement, Remove motherboard: step 4, image 1 of 1
    • Pull the motherboard up on the motor terminal side. Do not remove it completely yet.

    • After this is done, slide out the motherboard toward the motor terminal pins.

    • This is to prevent damage to the headphone jack connector and to the case itself.

    Ask FixBot

    Add Comment

  5. Panasonic RQ-NX10 Drive Belt Replacement, Replace belt: step 5, image 1 of 1
    • Replace the belt as marked.

    • Test the belt's function after placing it by manually rotating one of the gears. If the belt visibly moves, there is friction, or if the mechanism otherwise is not smooth, reseat the belt.

    • When installing the belt, do NOT twist it! This will cause issues when playing tapes; the belt is square-shaped and must be aligned. If it is twisted, reseat the belt where it is twisted.

    Ask FixBot

    Add Comment

Conclusion

To reassemble the cassette player, follow these instructions in reverse order.

Cancel: I did not complete this guide.

One other person completed this guide.

Alen Islamovic

Member since: 01/19/20

173 Reputation

1 Guide authored

1 Guide Comment

Well done! This is very helpful, thank you, Alen!

Jelena Falatov - Reply Share

Add Comment

View Statistics:

Past 24 Hours: 3

Past 7 Days: 8

Past 30 Days: 27

All Time: 61