Introduction
This guide will inform you with a step-by-step process on how to disassemble the Panasonic PV-GS9 body to replace the microphone on the device if needed. The reasoning of the microphone replacement is because; no sound is either emitted from the camcorder's speaker or recorded by the microphone. If no sound from the speakers are emitted by any beeps on the button push, no playback volume, etc. there may be a problem with speaker. If sound is being emitted from button pushes but no playback, there may be a problem with the microphone. The microphone is located on the front of the device, below and to the left of the lens. Make sure nothing is obstructing the microphone, and if this doesn't help the microphone may need to be replaced.
What you need
-
-
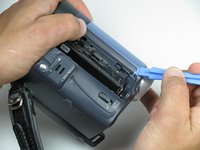
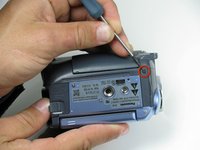
Locate the blue plastic tool opener, then remove both the round record/playback and record/power control knobs by prying it open from the camcorder.
 Ask FixBot
-
-
-
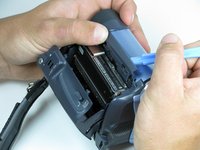
Open the tape compartment.
-
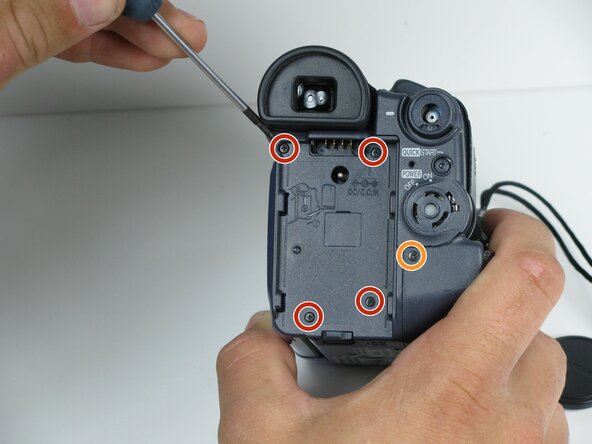
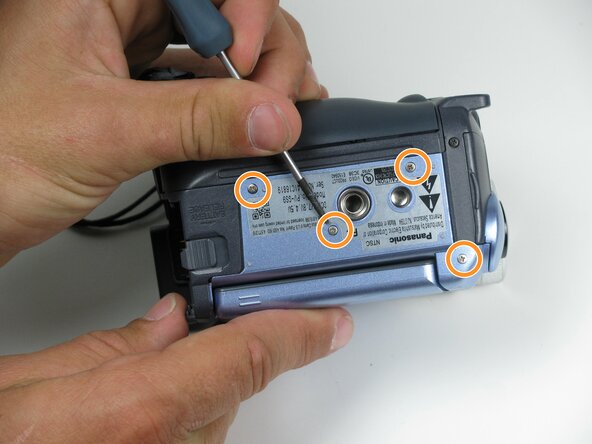
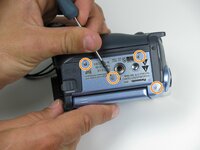
Flip over the camcorder and find the two 4.5mm screws, which are approximately 2 inches apart.
-
Using a #00 Phillips screwdriver, remove the screws
-
-
-
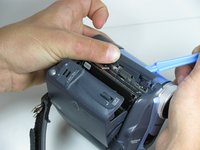
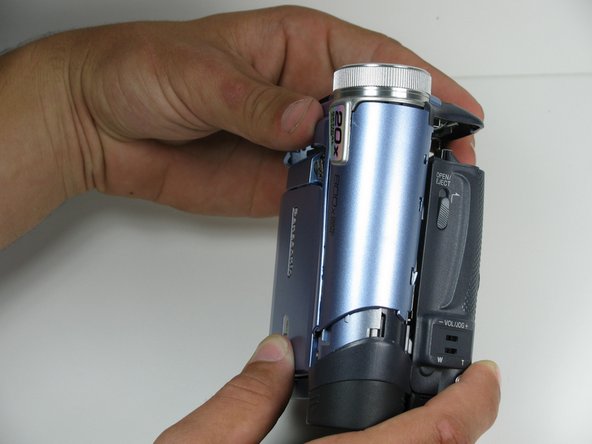
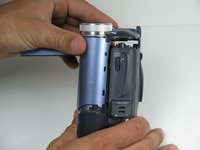
Use a plastic prying tool, remove the gray trim piece by opening and gently prying it off from top of the camcorder.
-
-
-
-
Rotate the camcorder so that the camera lens is facing you.
-
Remove the four black 4.5mm screws, sitting behind the battery.
-
Remove the 5th screw to the right of the battery dock.
-
Remove the battery by gently pulling away from the camcorder.
-
-
-
Rotate the camcorder so that the tape compartment is facing you.
-
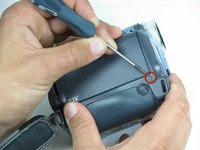
Remove the single 4.5mm black screw above the hook for the hand strap.
-
Rotate the camcorder so that the lens is facing you.
-
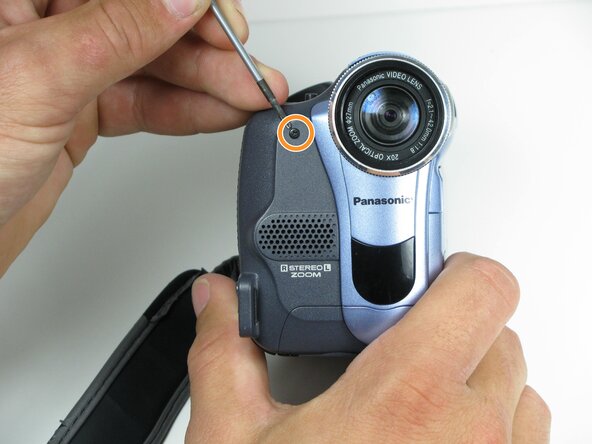
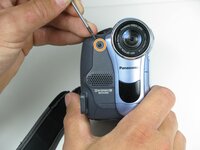
Remove the single 4.5mm black screw from the front panel.
-
-
-
Rotate the camcorder so that the bottom is facing towards you.
-
Remove the single remaining 4.5mm black screw from the bottom.
-
Remove the four silver 4.5mm screws from the body.
-
-
-
Open the LCD screen on the side of the camcorder.
-
Using a #00 screwdriver, remove the two 4.5mm silver screws located on either side of the hinge of the LCD screen.
-
-
-
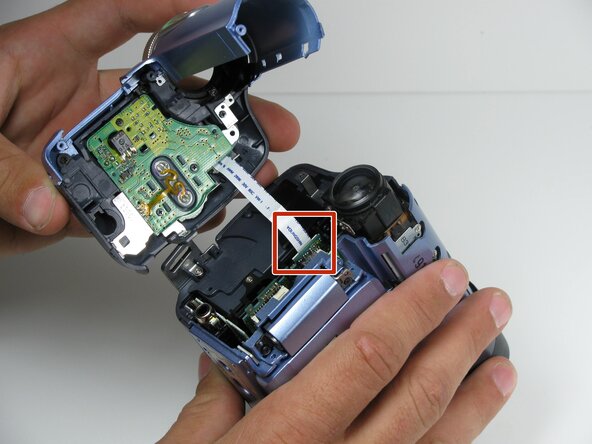
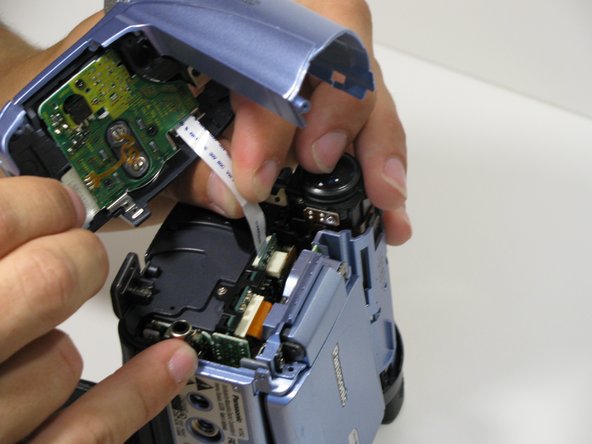
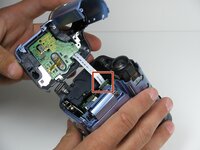
Using your fingers, carefully pull the ribbon cable away from the logic board to disconnect it.
-


To reassemble your device, follow these instructions in reverse order.
Cancel: I did not complete this guide.
One other person completed this guide.
Team

Cal Poly, Team 7-9, Maness Spring 2010 Member of Cal Poly, Team 7-9, Maness Spring 2010
CPSU-MANESS-S10S7G9
4 Members
15 Guides authored