Introduction
If your Pansonic Lumix DMC-ZS3 is producing fuzzy, blurry, flared, or otherwise degraded images, it may have a broken or damaged lens. While a slightly damage or smudged lens might result in a minor reduction in photo and video quality, a severely damaged or broken lens may need to be replaced altogether.
Lenses control the amount of light that enters the camera. The optical elements inside focus the light into a focal point, and if the lens is damaged or broken, the light cannot be properly directed to the camera's sensor, resulting in images that may look blurry or have excessive lens flare. In that case, the lens should be replaced.
Before beginning, be sure the device is not attached to any external power sources and power it down completely.
What you need
-
-
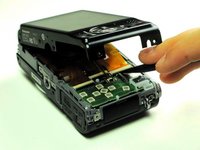
Use the flat end of a spudger to pry apart the back cover from the rest of the unit as shown.
-
-
-
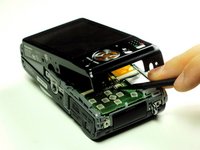
Using your fingernail or a spudger, flip up the ZIF locking flap on the two LCD ribbon cable sockets that connect the back cover to the rest of the unit.
-
-
-
-
Remove the three 3 mm black screws that surround the lens using a Phillips #00 screwdriver.
-
-
-
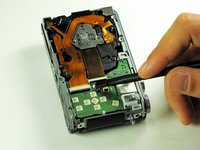
Flip up the locking flaps on the two LCD ribbon cable sockets with the spudger.
-
Use the spudger to disconnect the LCD ribbons.
-
-
-
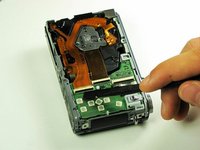
Use your fingers or a spudger to gently remove the lens mechanism from the rest of the camera.
-
Unlock lens mechanism located on the bottom of the device using your fingers.
-


 Ask FixBot




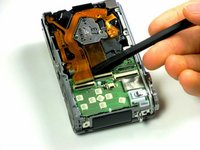


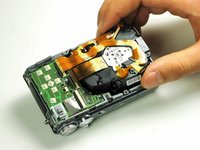
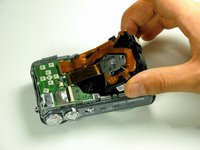
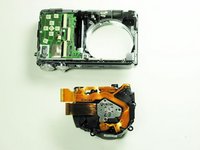
To reassemble your device, follow these instructions in reverse order.

Team

Cal Poly, Team 13-60, Johann Spring 2013 Member of Cal Poly, Team 13-60, Johann Spring 2013
CPSU-JOHANN-S13S13G60
3 Members
10 Guides authored
