Free Shipping on Domestic Orders $75+

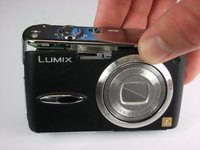
Panasonic Lumix DMC-FX01 Front Casing Replacement

What you need

  1. Panasonic Lumix DMC-FX01 Front Casing Replacement, Battery: step 1, image 1 of 1
    • Locate the memory card and battery card latch on the bottom of the camera.

    • Slide the latch to the open position.

    Ask FixBot

    Add Comment

  2. Panasonic Lumix DMC-FX01 Front Casing Replacement: step 2, image 1 of 1
    • Open the battery latch, and slide the battery release lever to the right.

    Ask FixBot

    Add Comment

  3. Panasonic Lumix DMC-FX01 Front Casing Replacement: step 3, image 1 of 1
    • Remove the battery from the camera.

    Ask FixBot

    Add Comment

  4. Panasonic Lumix DMC-FX01 Front Casing Replacement, Rear Casing: step 4, image 1 of 1
    • Remove the three 4.6 mm screws on the bottom of the camera using a Phillips #00 screwdriver.

    Ask FixBot

    Add Comment

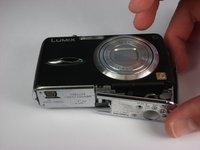
  5. Panasonic Lumix DMC-FX01 Front Casing Replacement: step 5, image 1 of 1
    • Remove the single 3.2 mm screw on the left side of the camera using a Phillips #00 screwdriver.

    Ask FixBot

    Add Comment

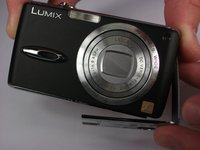
  6. Panasonic Lumix DMC-FX01 Front Casing Replacement: step 6, image 1 of 2 Panasonic Lumix DMC-FX01 Front Casing Replacement: step 6, image 2 of 2
    • Remove the left side casing.

    Ask FixBot

    Add Comment

  7. Panasonic Lumix DMC-FX01 Front Casing Replacement: step 7, image 1 of 1
    • Remove the two 3.2 mm screws on the right side of the camera using a Phillips #00 screwdriver.

    Ask FixBot

    Add Comment

  8. Panasonic Lumix DMC-FX01 Front Casing Replacement: step 8, image 1 of 1
    • Remove the bottom right panel.

    Ask FixBot

    Add Comment

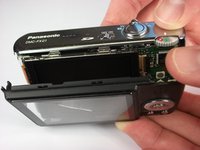
  9. Panasonic Lumix DMC-FX01 Front Casing Replacement: step 9, image 1 of 2 Panasonic Lumix DMC-FX01 Front Casing Replacement: step 9, image 2 of 2
    • Gently remove the back casing.

    • Start at the bottom and carefully pry towards the top to get this piece free.

    Ask FixBot

    Add Comment

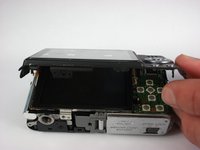
  10. Panasonic Lumix DMC-FX01 Front Casing Replacement, LCD Screen: step 10, image 1 of 1
    • Gently lift up the LCD screen.

    • Using a plastic prying tool, flip up the latch that holds the thin ribbon in place.

    • It should fall out on its own or with a gentle tug.

    Ask FixBot

    Add Comment

  11. Panasonic Lumix DMC-FX01 Front Casing Replacement: step 11, image 1 of 1
    • Gently tug the thicker ribbon to remove it from its housing.

    Ask FixBot

    Add Comment

  12. Panasonic Lumix DMC-FX01 Front Casing Replacement, Front Casing: step 12, image 1 of 2 Panasonic Lumix DMC-FX01 Front Casing Replacement, Front Casing: step 12, image 2 of 2
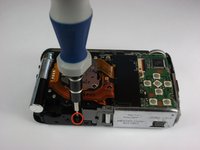
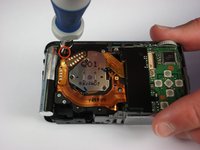
    • Remove the two black 5.4 mm screws that hold in the front faceplate using a Phillips #00 screwdriver.

    • There may be a third screw the the right of the lens assembly.

    Ask FixBot

    Add Comment

  13. Panasonic Lumix DMC-FX01 Front Casing Replacement: step 13, image 1 of 3 Panasonic Lumix DMC-FX01 Front Casing Replacement: step 13, image 2 of 3 Panasonic Lumix DMC-FX01 Front Casing Replacement: step 13, image 3 of 3
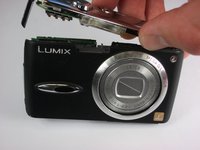
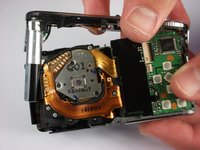
    • Carefully remove the upper assembly, which houses the buttons and the flash battery.

    Ask FixBot

    Add Comment

  14. Panasonic Lumix DMC-FX01 Front Casing Replacement: step 14, image 1 of 1
    • Carefully remove the front casing after verifying that the thin plastic around the lens is not still attached.

    Ask FixBot

    Add Comment

Conclusion

To reassemble your device, follow these instructions in reverse order.

Cancel: I did not complete this guide.

2 other people completed this guide.

Andrew

Member since: 10/11/10

396 Reputation

4 Guides authored

Team

Cal Poly, Team 9-22, Regan Fall 2010 Member of Cal Poly, Team 9-22, Regan Fall 2010

CPSU-REGAN-F10S9G22

4 Members

8 Guides authored

0 Guide Comments

Add Comment

View Statistics:

Past 24 Hours: 3

Past 7 Days: 5

Past 30 Days: 29

All Time: 4,702