Free Shipping on Domestic Orders $75+

Panasonic DMC-FZ70 Motherboard Replacement

What you need

  1. Panasonic DMC-FZ70 Motherboard Replacement, Back Panel: step 1, image 1 of 2 Panasonic DMC-FZ70 Motherboard Replacement, Back Panel: step 1, image 2 of 2
    • All screws should be removed using a Phillips #0 screwdriver.

    • Using your screwdriver, unscrew the two 5.0 mm Philips screws to the right of the LCD screen.

    Ask FixBot

    Add Comment

  2. Panasonic DMC-FZ70 Motherboard Replacement: step 2, image 1 of 2 Panasonic DMC-FZ70 Motherboard Replacement: step 2, image 2 of 2
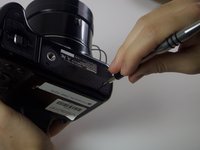
    • Flip the camera over to the left side of the screen and unscrew the 5mm Phillips screw found there.

    Ask FixBot

    Add Comment

  3. Panasonic DMC-FZ70 Motherboard Replacement: step 3, image 1 of 2 Panasonic DMC-FZ70 Motherboard Replacement: step 3, image 2 of 2
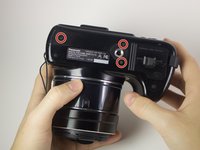
    • Turn the camera upside down and unscrew the three 5mm screws found on the bottom.

    Ask FixBot

    Add Comment

  4. Panasonic DMC-FZ70 Motherboard Replacement: step 4, image 1 of 2 Panasonic DMC-FZ70 Motherboard Replacement: step 4, image 2 of 2
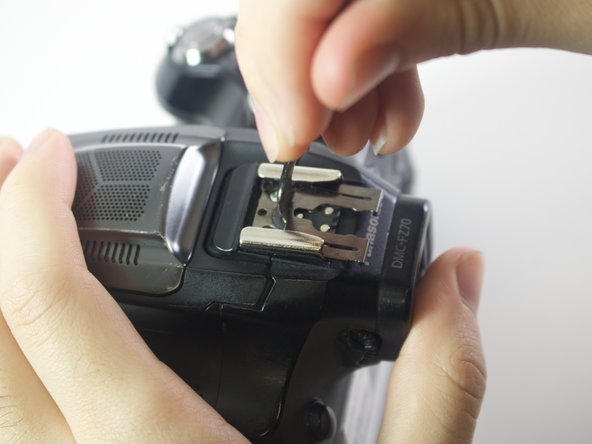
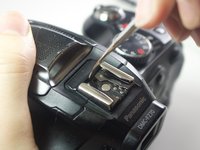
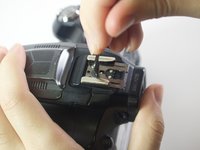
    • On the top of the camera locate the two rails with a thin sheet of metal on the floor between them.

    • With a metal spudger, lift this sheet and push it out of the rail device to detach it from the camera.

    Ask FixBot

    Add Comment

  5. Panasonic DMC-FZ70 Motherboard Replacement: step 5, image 1 of 1
    • Proceed to remove the four 5mm Phillips screws that you just uncovered.

    Ask FixBot

    Add Comment

  6. Panasonic DMC-FZ70 Motherboard Replacement: step 6, image 1 of 1
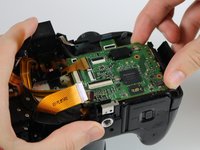
    • Slowly pull on both side of the camera, until both halves begin to separate from each other.

    • Do not pull too hard, as both halves are held together with ZIF connector cables.

    Ask FixBot

    Add Comment

  7. Panasonic DMC-FZ70 Motherboard Replacement: step 7, image 1 of 3 Panasonic DMC-FZ70 Motherboard Replacement: step 7, image 2 of 3 Panasonic DMC-FZ70 Motherboard Replacement: step 7, image 3 of 3
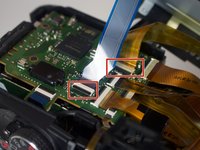
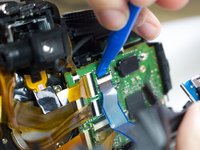
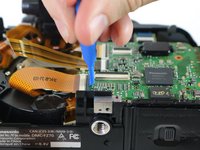
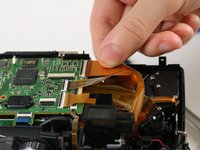
    • Using a plastic opening tool, carefully flip up the small black levers that attach the ribbon cables to the ZIF connectors on the motherboard.

    • Carefully pull the ribbon cables out of the slot once they have been released.

    • Only the two indicated connectors need to be removed to separate the two halves of the camera.

    Ask FixBot

    Add Comment

  8. Panasonic DMC-FZ70 Motherboard Replacement, Motherboard: step 8, image 1 of 1
    • Using a Torx driver, unscrew the two 5mm Phillipd screws on the motherboard

    Ask FixBot

    Add Comment

  9. Panasonic DMC-FZ70 Motherboard Replacement: step 9, image 1 of 3 Panasonic DMC-FZ70 Motherboard Replacement: step 9, image 2 of 3 Panasonic DMC-FZ70 Motherboard Replacement: step 9, image 3 of 3
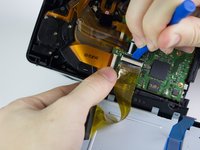
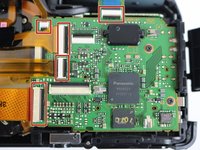
    • The five ribbon cables shown will need to be removed from the ZIF connectors. Using a plastic opening tool, unlock the cables by lifting the black strip on the rectangular connection socket.

    • Carefully pull each of the ribbon cables out of their sockets.

    • The cable should slide out smoothly- any significant resistance might signal that the locking lever has not yet released the cable.

    Ask FixBot

    Add Comment

  10. Panasonic DMC-FZ70 Motherboard Replacement: step 10, image 1 of 2 Panasonic DMC-FZ70 Motherboard Replacement: step 10, image 2 of 2
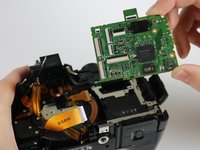
    • Once the screws and the ribbon cables have been removed, lift the mother board from its slot.

    Ask FixBot

    Add Comment

Conclusion

To reassemble your device, follow these instructions in reverse order.

Cancel: I did not complete this guide.

3 other people completed this guide.

Emily Kuzmicky

Member since: 01/24/17

469 Reputation

2 Guides authored

Team

Cal Poly, Team 21-3, Maness Winter 2017 Member of Cal Poly, Team 21-3, Maness Winter 2017

CPSU-MANESS-W17S21G3

6 Members

12 Guides authored

0 Guide Comments

Add Comment

View Statistics:

Past 24 Hours: 1

Past 7 Days: 3

Past 30 Days: 32

All Time: 2,375