
Palm TX Power Button Replacement

Spencer Lewson and 5 other contributors
Last updated on Jan 28, 2014
Views: 4K
View statistics:
- Past 24 Hours:
- 4
- Past 7 Days:
- 20
- Past 30 Days:
- 100
- All Time:
- 4,042
Comments: 2
2 guide comments.
Go to guide commentsCompleted: 0 1
No one has marked this guide "completed." Will you be the first?
1 person has marked this guide "completed." It's you — great job!
Favorites: 1 2
1 person has favorited (and subscribed to) this guide. Will you be next?
2 people have favorited (and subscribed to) this guide — including you!
Introduction
Go to step 1 ↓An unresponsive power button is a very common problem. Typically, this problem occurs when the solder between the power button and the motherboard weakens. For more information and other fixing alternatives see the link below:
What you need
Tools


-
-
-
Orient the device so that the display faces forward.
-
Remove the stylus from the right side.
 Ask FixBot
-
-
-
Turn over the device so that the back panel faces forward.
-
Use a T5 Torx screwdriver to remove the four 6.35mm corner screws.
-
-
-
Rotate the device so that the display faces forward.
-
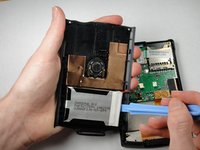
Insert a plastic opening tool with the angled tip pointing downward into the crevice on the left side of the device.
-
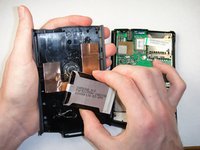
Pry along the crevice to loosen the back panel.
-
Repeat this process for the right side.
-
-
-
-
-
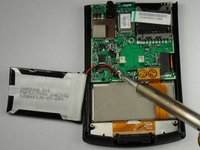
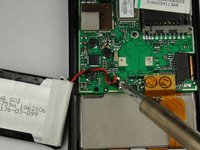
Use a soldering iron to disconnect the battery wires from the motherboard.
-
For soldering instructions, you can view the Soldering Guide.
-
-
-
-
-
-
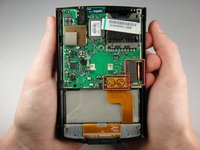
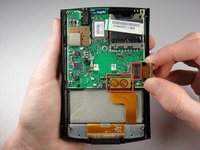
Pull straight up on the ribbon cables located on the bottom right of the motherboard to disconnect them.
-
-
-
-
-
Flip the motherboard so that the black rubber cover faces upward. The power switch is in the top right corner.
-
Remove the button with a soldering iron.
-
For soldering instructions, view the Soldering Guide.
-
-



















To reassemble your device, follow these instructions in reverse order.

Team

Cal Poly, Team 1-15, Amido Winter 2011 Member of Cal Poly, Team 1-15, Amido Winter 2011
CPSU-AMIDO-W11S1G15
4 Members
84 Guides authored
