Free Shipping on Domestic Orders $75+

Palm TX Buttons and Connector Assembly Replacement

What you need

  1. Palm TX Buttons and Connector Assembly Replacement, Back Panel: step 1, image 1 of 2 Palm TX Buttons and Connector Assembly Replacement, Back Panel: step 1, image 2 of 2
    • Orient the device so that the display faces forward.

    • Remove the stylus from the right side.

    Ask FixBot

    Add Comment

  2. Palm TX Buttons and Connector Assembly Replacement: step 2, image 1 of 1
    • Turn over the device so that the back panel faces forward.

    • Use a T5 Torx screwdriver to remove the four 6.35mm corner screws.

    Ask FixBot

    Add Comment

  3. Palm TX Buttons and Connector Assembly Replacement: step 3, image 1 of 2 Palm TX Buttons and Connector Assembly Replacement: step 3, image 2 of 2
    • Rotate the device so that the display faces forward.

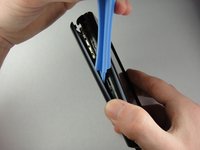
    • Insert a plastic opening tool with the angled tip pointing downward into the crevice on the left side of the device.

    • Pry along the crevice to loosen the back panel.

    • Repeat this process for the right side.

    Ask FixBot

    Add Comment

  4. Palm TX Buttons and Connector Assembly Replacement: step 4, image 1 of 2 Palm TX Buttons and Connector Assembly Replacement: step 4, image 2 of 2
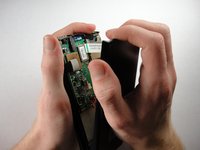
    • Carefully pry the back panel to open the device.

    • Be careful not to break the wire that connects the battery pack to the motherboard.

    • When reassembling, snap the back panel back into place and then insert the top cover.

    Ask FixBot

    Add Comment

  5. Palm TX Buttons and Connector Assembly Replacement: step 5, image 1 of 2 Palm TX Buttons and Connector Assembly Replacement: step 5, image 2 of 2
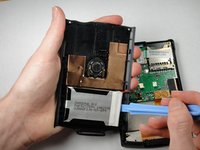
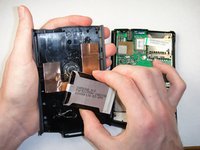
    • Use a plastic opening tool to peel the battery pack from the back panel.

    • The battery pack is glued to the back panel so removing it may require considerable effort.

    Ask FixBot

    Add Comment

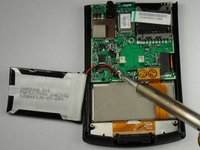
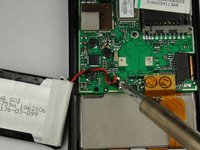
  6. Palm TX Buttons and Connector Assembly Replacement, Battery Pack: step 6, image 1 of 2 Palm TX Buttons and Connector Assembly Replacement, Battery Pack: step 6, image 2 of 2
    • Use a soldering iron to disconnect the battery wires from the motherboard.

    • For soldering instructions, you can view the Soldering Guide.

    Ask FixBot

    Add Comment

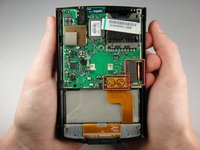
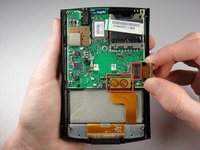
  7. Palm TX Buttons and Connector Assembly Replacement, Motherboard: step 7, image 1 of 2 Palm TX Buttons and Connector Assembly Replacement, Motherboard: step 7, image 2 of 2
    • Pull straight up on the ribbon cables located on the bottom right of the motherboard to disconnect them.

    Ask FixBot

    Add Comment

  8. Palm TX Buttons and Connector Assembly Replacement: step 8, image 1 of 2 Palm TX Buttons and Connector Assembly Replacement: step 8, image 2 of 2
    • Lift the mother board out of the device.

    • A weak adhesive attaches the motherboard to the device.

    • The red wire in the picture will not be attached to your device at this point.

    Ask FixBot

    Add Comment

  9. Palm TX Buttons and Connector Assembly Replacement, Display: step 9, image 1 of 1
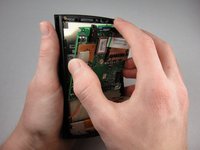
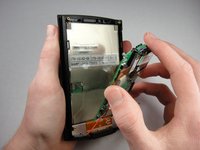
    • Orient the device sideways, as shown in the picture.

    • Lightly push the front of the display to separate it from the front panel.

    • The battery in the picture will not be attached to the device at this point.

    Ask FixBot

    Add Comment

  10. Palm TX Buttons and Connector Assembly Replacement, Buttons and Connector Assembly: step 10, image 1 of 1
    • Use a T5 Torx screwdriver to remove the 7.75mm screws at the bottom of the device.

    • It may take some manipulation to remove the screws.

    Ask FixBot

    Add Comment

  11. Palm TX Buttons and Connector Assembly Replacement: step 11, image 1 of 1
    • Lift the button and connector assembly from the front panel.

    Ask FixBot

    Add Comment

Conclusion

To reassemble your device, follow these instructions in reverse order.

Cancel: I did not complete this guide.

Spencer Lewson

Member since: 01/19/11

793 Reputation

6 Guides authored

Team

Cal Poly, Team 1-15, Amido Winter 2011 Member of Cal Poly, Team 1-15, Amido Winter 2011

CPSU-AMIDO-W11S1G15

4 Members

9 Guides authored

1 Guide Comment

Where can you buy one of these?

Sean Madawala - Reply Share

Add Comment

View Statistics:

Past 24 Hours: 1

Past 7 Days: 10

Past 30 Days: 45

All Time: 2,076