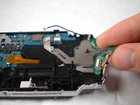
PSP 300x Power Board Replacement

mbnewsom and 12 other contributors
Last updated on Jun 8, 2023
Views: 25K
View statistics:
- Past 24 Hours:
- 6
- Past 7 Days:
- 50
- Past 30 Days:
- 253
- All Time:
- 24,958
Comments: 13
11 comments on steps, 2 guide comments.
Go to guide commentsCompleted: 8 9
8 people have marked this guide "completed." Will you be next?
9 people have marked this guide "completed." Including you — great job!
Favorites: 15 16
15 people have favorited (and subscribed to) this guide. Will you be next?
16 people have favorited (and subscribed to) this guide — including you!
Inconsistent Images
Updating the images on this guide to be more consistent with the prerequisites would increase its awesomeness.
Introduction
Go to step 1 ↓If your 3000-series PSP is having issues not turning on, this guide will explain how to replace the circuit board for the power switch.
When the power circuit board functions properly, the light next to the power switch should be illuminated after the PSP is turned on, even if there is no audio or video. A faulty circuit board can prevent the device from drawing power and beginning the startup sequence
PSP batteries have had reported issues with swelling, so remember to visually inspect the battery cover for bulging before removing the battery. For more information on swollen batteries, click here.
Before getting started with this guide, ensure that the problem is actually the circuit board itself. Follow this guide up to Step 10 to disassemble the PSP, and inspect the switch to make sure the power button on the case activates the switch on the circuit. With the screen removed, also ensure that the silver ribbon cable has a firm connection both on the power board and on the motherboard. If the cables are loose, then they can be secured with electrical tape underneath the cable and away from the connectors.
What you need


-
-
-
Place the PSP face down and locate the battery cover on the left side of the device.
-
Lift and remove the battery cover to reveal the battery.
-
Remove the battery.
 Ask FixBot
-
-
-
-
-
Peel back the warranty sticker that is behind the battery with a spudger or your fingernail.
-
-
-
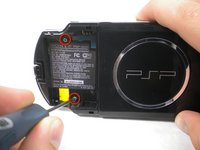
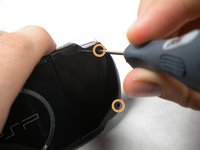
Unscrew all four screws from the back of the PSP with the Phillips #00 Screwdriver.
-
Two are located behind the battery's warranty sticker.
-
Two are located on the right side of the PSP.
-
-
-
Then, remove the single screw from the bottom edge of the PSP (which is positioned next to the barcode).
-
-
-
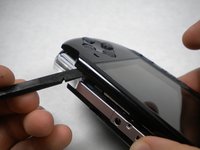
Slide the spudger in between the outer casing of the PSP, beginning at the "R" shoulder button, and gently pry off the casing.
-
Remove the front casing completely.
-
-
-
-
-
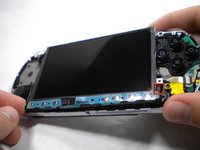
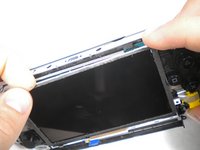
Push the homebar to the right to release the tab located on the right side of the LCD screen.
-
-
-
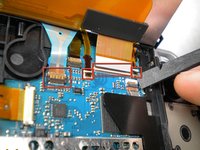
Flip the small brown locks on the four ribbon cable connectors up using a spudger or fingernail.
-
Pull all four ribbon cables out.
-
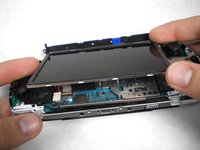
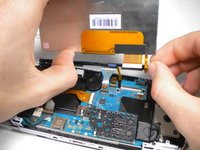
Now remove the LCD screen and homebar from the PSP.
-
-
-
-
-
-
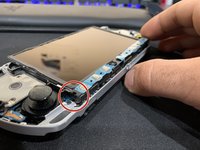
Using a spudger, lift up the lock and remove the ribbon cable from the motherboard
-
-
-
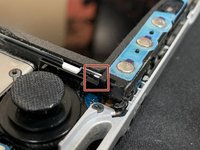
Use a Phillips #00 screwdriver to remove the screw located on the power switch board.
-
-












Cancel: I did not complete this guide.
8 other people completed this guide.

2 Guide Comments
HS : The website sell Battery for 300x but where are the AC Block and the Yellow round male plug ?
