
PSP 1000 Speakers Replacement

Chris and 6 other contributors
Last updated on May 7, 2024
Views: 30K
View statistics:
- Past 24 Hours:
- 6
- Past 7 Days:
- 74
- Past 30 Days:
- 271
- All Time:
- 30,259
Comments: 10
10 comments on steps.
Completed: 11 12
11 people have marked this guide "completed." Will you be next?
12 people have marked this guide "completed." Including you — great job!
Favorites: 21 22
21 people have favorited (and subscribed to) this guide. Will you be next?
22 people have favorited (and subscribed to) this guide — including you!
Introduction
Go to step 1 ↓This guide will show you how to remove and replace your PSP speakers.
What you need
Tools
-
-
Spudger4.9


-
-
-
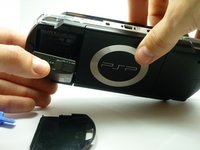
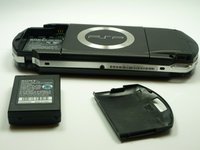
Locate the battery casing button on the rear-left side of the PSP.
-
Press down the button and remove the battery cover.
-
-
-
-
Remove the screw from the bottom side of the PSP. Keep it separated from the rest of the screws.
-
Remove the two screws from the back righthand side within the holes.
-
-
-
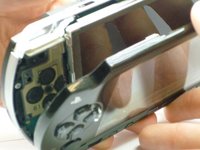
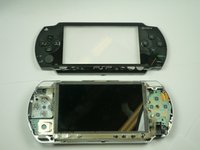
Gently separate the outer plastic casing from the rest of the system as shown.
-
-
-
-
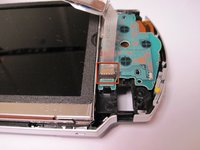
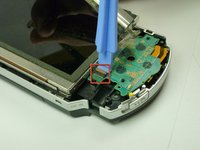
The Button Board, at the base of the LCD Screen, is held by two clips.
-
Pry these clips over the nubs using a PSP opening tool. This will release the clips.
-
-
-
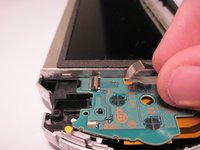
The Button Board Ribbon Cable is held down with a latch. Lift the latch open, away from the ribbon cable.
-
Pull the cable away from the latch.
-
-
-
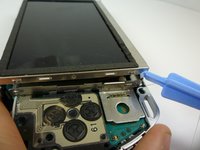
The LCD Screen is held by the LCD Frame with similar clips. Slide a thin tool between the clip and the screen and gently pry them apart while beginning to lift the screen.
-
-
-
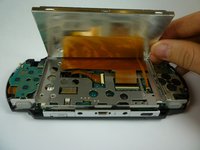
The LCD screen is still attached with ribbon cables. Gently lift up the LCD screen so you do not break them.
-
-
-
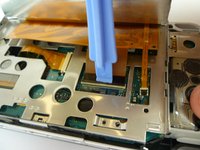
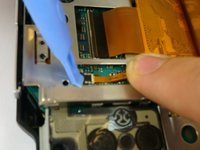
The thin Ribbon Cable opens from the opposite side in which the Ribbon Cable enters. Open up the latch towards the Ribbon Cable. The latch will pull up and release the ribbon cable. Put your tool behind the black part, then pry up the black piece of plastic.
-
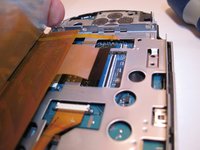
The wide Ribbon Cable opens from the same side in which the Ribbon Cable attatches, and opens away from the cable.
-
Both of these latches are the black pieces.
-
Gently pull the ribbon cables away from the latches. The LCD screen can now be removed.
-
-
-
-
-
-
Remove the screws on the top and bottom of the frame. Be sure to keep track of where you took each screw out of.
-
-
-
After the screws are removed, the bottom of the LCD frame will rise.
-
Open up the UMD Drive, and then slide the top of the LCD frame slightly to the right while pulling out.
-
-
Tool used on this step:Tweezers$4.99
-
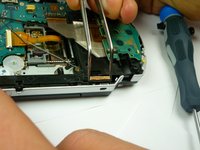
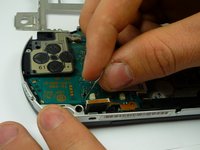
The speakers should slide out fairly easily; it may be helpful to use tweezers to begin prying them out.
-
-
-
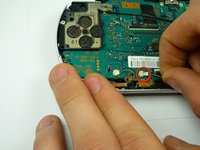
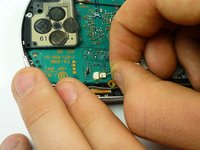
Gently unplug the speakers from the socket. The speakers are completely detatched when they are unplugged from the logic board.
-
-

 Ask FixBot














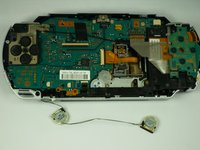
To reassemble your device, follow these instructions in reverse order.
Cancel: I did not complete this guide.
11 other people completed this guide.

Team

Cal Poly, Team 5-6, Forte Winter 2010 Member of Cal Poly, Team 5-6, Forte Winter 2010
CPSU-FORTE-W10S5G6
5 Members
72 Guides authored
