Free Shipping on Domestic Orders $75+

Ozeri Pronto ZK14-S LCD Motherboard Replacement

What you need

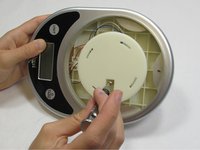
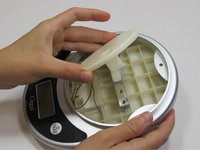
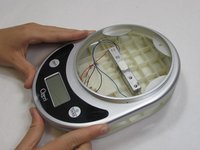
  1. Ozeri Pronto ZK14-S LCD Motherboard Replacement, Panel Removal: step 1, image 1 of 2 Ozeri Pronto ZK14-S LCD Motherboard Replacement, Panel Removal: step 1, image 2 of 2
    • Twist the plastic plate slowly to the left to pull it away.

    Ask FixBot
  2. Ozeri Pronto ZK14-S LCD Motherboard Replacement: step 2, image 1 of 1
    • Lift up the sticker at the bottom where the “Ozeri” logo is to reveal a screw.

    • The sticker does not need to be completely removed.

    Ask FixBot
  3. Ozeri Pronto ZK14-S LCD Motherboard Replacement: step 3, image 1 of 1
    • Using a 2.0 Flathead screwdriver, remove the 9.50 mm Phillips head screw under the sticker.

    Ask FixBot
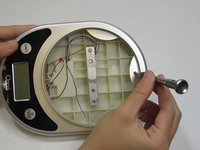
  4. Ozeri Pronto ZK14-S LCD Motherboard Replacement: step 4, image 1 of 2 Ozeri Pronto ZK14-S LCD Motherboard Replacement: step 4, image 2 of 2
    • Using a 2.0 Flathead screwdriver, remove the two 18.76 mm Phillips head screws in the plate stand.

    Ask FixBot
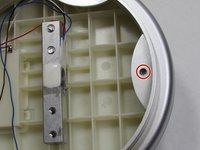
  5. Ozeri Pronto ZK14-S LCD Motherboard Replacement: step 5, image 1 of 2 Ozeri Pronto ZK14-S LCD Motherboard Replacement: step 5, image 2 of 2
    • Using a 2.0 Flathead screwdriver, remove the 9.44 mm Phillips head screw on the edge opposite to the LCD screen.

    Ask FixBot
  6. Ozeri Pronto ZK14-S LCD Motherboard Replacement: step 6, image 1 of 1
    • Turn the device over so the back panel is facing up.

    Ask FixBot
  7. Ozeri Pronto ZK14-S LCD Motherboard Replacement: step 7, image 1 of 1
    • Using the iFixit opening tool, pry off the two rubber stubs on the right side and the two rubber stubs on the left side of the bottom of the device.

    Ask FixBot
  8. Ozeri Pronto ZK14-S LCD Motherboard Replacement: step 8, image 1 of 1
    • Using a 2.0 Flathead screwdriver, remove the four 9.46 mm Phillips head screws that were under the rubber stubs.

    Ask FixBot
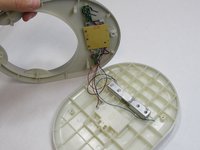
  9. Ozeri Pronto ZK14-S LCD Motherboard Replacement: step 9, image 1 of 2 Ozeri Pronto ZK14-S LCD Motherboard Replacement: step 9, image 2 of 2
    • Pry apart the two panels to separate them from each other.

    • Flip the device over so the LCD is facing up. Flip the front panel over on its side.

    • Be careful when separating the panels to avoid damaging the wires they are connected by.

    Ask FixBot
  10. Ozeri Pronto ZK14-S LCD Motherboard Replacement, LCD Motherboard: step 10, image 1 of 1
    • Stand the center motherboard up.

    • Be careful when standing up the LCD motherboard to avoid damaging the wires it is connected to.

    Ask FixBot
  11. Ozeri Pronto ZK14-S LCD Motherboard Replacement: step 11, image 1 of 1
    • Unsolder the posts to remove the wires

    • Repeat this step to remove the other two motherboards

    Ask FixBot
Conclusion

To reassemble your device, follow these instructions in reverse order.

Oneika White

Member since: 10/01/15

726 Reputation

4 Guides authored

Team

USF Tampa, Team 1-4, Leahy Fall 2015 Member of USF Tampa, Team 1-4, Leahy Fall 2015

USFT-LEAHY-F15S1G4

4 Members

5 Guides authored

0 Guide Comments

Add Comment

View Statistics:

Past 24 Hours: 1

Past 7 Days: 8

Past 30 Days: 55

All Time: 857