
Overhead Door Remote Battery Replacement

Repair Skeleton and 2 other contributors
Last updated on Jun 11, 2026
Views: 5.1K
View statistics:
- Past 24 Hours:
- 10
- Past 7 Days:
- 75
- Past 30 Days:
- 306
- All Time:
- 5,135
Comments: 0
No one has left comments on this guide. Will you be first?
Go to guide commentsCompleted: 0 1
No one has marked this guide "completed." Will you be the first?
1 person has marked this guide "completed." It's you — great job!
Favorites: 0 1
No one has favorited (and subscribed to) this guide. Will you be the first?
1 person has favorited (and subscribed to) this guide — and that's you!
Community-Contributed Guide
An awesome member of our community made this guide. It was not created by iFixit staff.
Introduction
Go to step 1 ↓Hello you wonderful ladies and gentlemen. Today we are going to be doing a simple battery replacement for a Overhead Door Remote. This is an easy repair and great if you are just starting out.
What you need
Parts

Tools
-
Flathead 3/32" or 2.5 mm Screwdriver$5.495
This is not necessary but is nice to have. Be sure to keep it small.

-
-
-
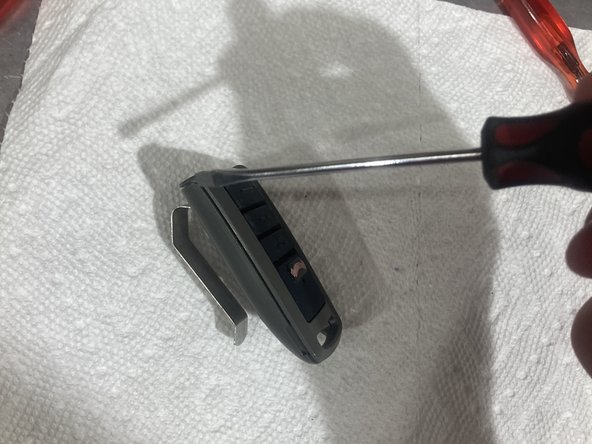
Insert your screwdriver into the plastic tab, then pull up.
-
Now go to the bottom near where it says Overhead Door and pull up, it should pop up. Once that is open push forward and the top should release
 Ask FixBot
-
-
-
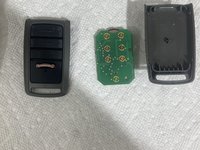
Take your screwdriver and push it into the bottom left corner of the board as shown on the picture. Once you have it in their good, pull up lightly, the board should come up and out.
-
-
-
Flip the board over, you should see the battery. Take your screwdriver and push the battery out gently.
-
Now that the old battery is out. Put the new one in, Words up.
-
-
-
-
Now flip the board over and put it in it’s case. You should feel a light click. Remember not to be too hard.
-
When you got the board on, simply take the top part, be mindful of the rubber, and snap it on, the top first then the bottom. You can use the pictures above if you don’t know where it is
-
-






There you go! A fully functioning remote. Give yourself a pat on the back and go get a drink of water.

