Free Shipping on Domestic Orders $75+

Oster 6329 Power Cord Replacement

What you need

  1. Oster 6329 Power Cord Replacement, Outer Shell Removal: step 1, image 1 of 2 Oster 6329 Power Cord Replacement, Outer Shell Removal: step 1, image 2 of 2
    • Using the Phillips-head #2 screwdriver, unscrew the three 1cm Phillips-head screws on the plastic base of the toaster to separate the outer metal shell from the plastic base.

    Ask FixBot

    Add Comment

  2. Oster 6329 Power Cord Replacement: step 2, image 1 of 1
    • Push the plastic push-down handle down and pull the plastic handle straight from metal arm.

    Ask FixBot

    Add Comment

  3. Oster 6329 Power Cord Replacement: step 3, image 1 of 1
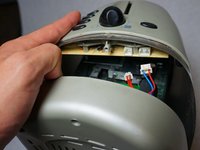
    • Loosen the outer metal shell from the plastic base by holding the plastic base while pulling up on the metal shell.

    • Only lift the outer shell a little so as not to disconnect the cables that connect the circuit board.

    Ask FixBot

    Add Comment

  4. Oster 6329 Power Cord Replacement: step 4, image 1 of 2 Oster 6329 Power Cord Replacement: step 4, image 2 of 2
    Tool used on this step:
    Tweezers
    $4.99
    Buy
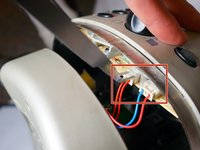
    • Disconnect the cable clips from the circuit board using the tweezers to free the outer metal shell from the plastic base.

    Ask FixBot

    Add Comment

  5. Oster 6329 Power Cord Replacement: step 5, image 1 of 2 Oster 6329 Power Cord Replacement: step 5, image 2 of 2
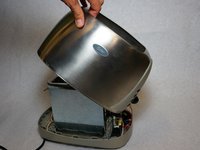
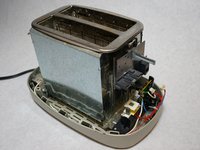
    • Lift the top outer metal shell.

    • Carefully lift the outer metal shell at an angle so as not to damage the components in the front of the toaster.

    Ask FixBot

    Add Comment

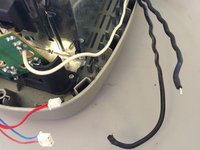
  6. Oster 6329 Power Cord Replacement, Power Cord: step 6, image 1 of 1
    • Using a flat-head screwdriver, pry the power cord from the base of the toaster.

    Ask FixBot

    Add Comment

  7. Oster 6329 Power Cord Replacement: step 7, image 1 of 1
    • Using a flat-head screwdriver, pry the white wire from the base.

    Ask FixBot

    Add Comment

  8. Oster 6329 Power Cord Replacement: step 8, image 1 of 1
    • Locate the circuit board at the front of the toaster where the power cord and white wire meet.

    • Pull the circuit board up and out to free the circuit board from the body of the toaster.

    • It is tightly fit and may take moderate force to remove.

    Ask FixBot

    Add Comment

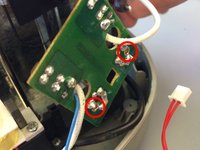
  9. Oster 6329 Power Cord Replacement: step 9, image 1 of 2 Oster 6329 Power Cord Replacement: step 9, image 2 of 2
    • Desolder the power cord from the circuit board at the locations show in the diagram.

    • For soldering instructions see the iFixit Soldering Guide.

    • The wires should be free from board when un-soldering is complete.

    Ask FixBot

    Add Comment

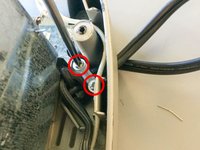
  10. Oster 6329 Power Cord Replacement: step 10, image 1 of 2 Oster 6329 Power Cord Replacement: step 10, image 2 of 2
    • Unscrew the two 1.5cm Phillips-head screws at the back of the toaster that are holding the power cord in place to remove the retaining clip.

    • Remove the plastic retaining clip that is holding the cord in place.

    Ask FixBot

    Add Comment

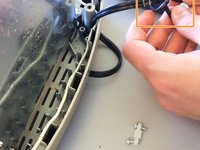
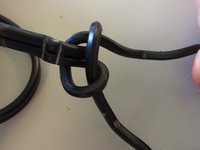
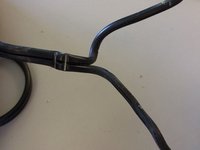
  11. Oster 6329 Power Cord Replacement: step 11, image 1 of 2 Oster 6329 Power Cord Replacement: step 11, image 2 of 2
    • Untie the knot in the power cord.

    Ask FixBot

    Add Comment

  12. Oster 6329 Power Cord Replacement: step 12, image 1 of 1
    • Pull the cord from the base to remove the cable.

    Ask FixBot

    Add Comment

Conclusion

To reassemble your device, follow these instructions in reverse order.

Cancel: I did not complete this guide.

Timothy Grijalva

Member since: 01/31/14

234 Reputation

2 Guides authored

Team

Cal Poly, Team 13-15, Regan Winter 2014 Member of Cal Poly, Team 13-15, Regan Winter 2014

CPSU-REGAN-W14S13G15

5 Members

6 Guides authored

0 Guide Comments

Add Comment

View Statistics:

Past 24 Hours: 0

Past 7 Days: 5

Past 30 Days: 30

All Time: 1,366