
Oregon Scientific RM318PA Power Switch Replacement

Maxine Holden and 3 other contributors
Last updated on Jan 11, 2015
Views: 2.1K
View statistics:
- Past 24 Hours:
- 2
- Past 7 Days:
- 19
- Past 30 Days:
- 97
- All Time:
- 2,077
Comments: 0
No one has left comments on this guide. Will you be first?
Go to guide commentsCompleted: 3 4
3 people have marked this guide "completed." Will you be next?
4 people have marked this guide "completed." Including you — great job!
Favorites: 0 1
No one has favorited (and subscribed to) this guide. Will you be the first?
1 person has favorited (and subscribed to) this guide — and that's you!
Introduction
Go to step 1 ↓This guide will assist you in removing the back casing of the clock to access the on/off switch and put it back in place.
What you need
Tools


-
-
-
Hold clock so that the clock face is facing away from you.
-
Using your thumbs, push up on the battery cover.
-
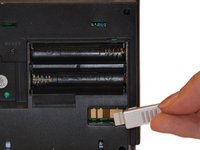
Once battery cover is removed, pull down on AC Adapter Jack.
 Ask FixBot
-
-
-
Use one hand to stabilize the clock.
-
Using your other hand, push batteries toward spring and pull out at an angle.
-
-
-
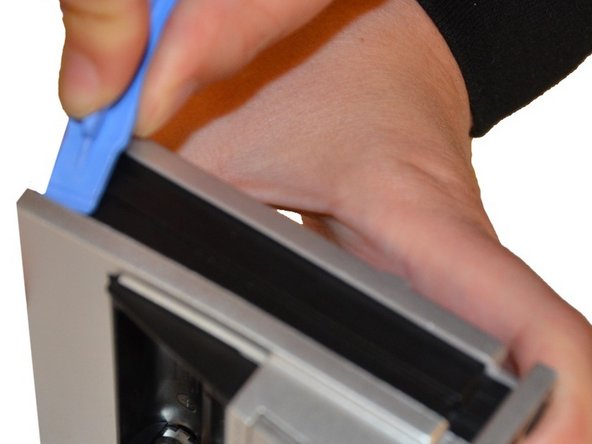
Use a Plastic Opening Tool to pry off the silver casing on the back.
-
Pry at the top of device.
-
Once the back is open at the top, pry at the side of the device closest to the battery compartment.
-
On/Off switch should come off with casing.
-
-
-
-
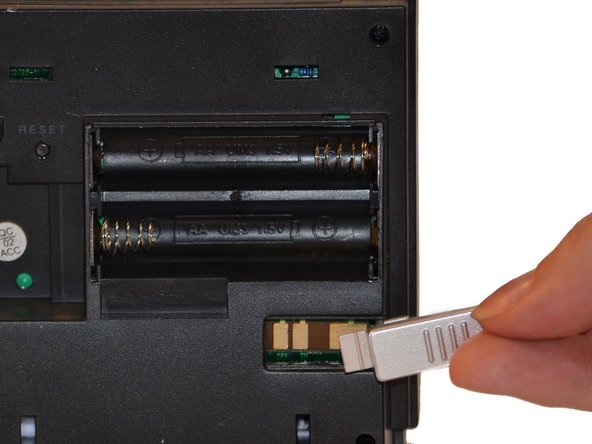
Insert switch into slot as shown in picture. Push in until you hear a "click."
-
Replace the back of the clock by pressing cover back into place.
-
-






To reassemble your device, follow these instructions in reverse order.
Cancel: I did not complete this guide.
3 other people completed this guide.

