Free Shipping on Domestic Orders $75+

Optoma HD20 Light Bulb Replacement

What you need

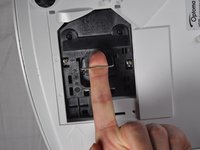
  1. Optoma HD20 Light Bulb Replacement, Rear Panel: step 1, image 1 of 2 Optoma HD20 Light Bulb Replacement, Rear Panel: step 1, image 2 of 2
    • Use a Phillips #1 screwdriver to loosen the screws that secure the panel on the bottom of the Optoma HD20.

    Ask FixBot

    Add Comment

  2. Optoma HD20 Light Bulb Replacement: step 2, image 1 of 1
    • Lift the panel off of the device.

    Ask FixBot

    Add Comment

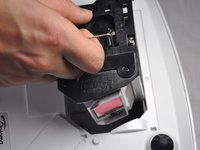
  3. Optoma HD20 Light Bulb Replacement, Light Bulb Casing: step 3, image 1 of 1
    • Use a Phillips #1 screwdriver to loosen the two screws securing the black casing.

    • The screws don't come out all the way.

    Ask FixBot

    Add Comment

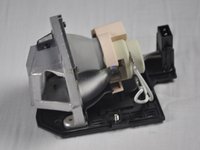
  4. Optoma HD20 Light Bulb Replacement: step 4, image 1 of 3 Optoma HD20 Light Bulb Replacement: step 4, image 2 of 3 Optoma HD20 Light Bulb Replacement: step 4, image 3 of 3
    • Remove the light bulb casing from the device.

    • Steps 5-9 are unnecessary if the replacement light bulb comes with housing.

    Ask FixBot

    Add Comment

  5. Optoma HD20 Light Bulb Replacement, Light Bulb: step 5, image 1 of 1
    • Remove the three 4.5 mm screws on the light bulb case.

    Ask FixBot

    Add Comment

  6. Optoma HD20 Light Bulb Replacement: step 6, image 1 of 1
    • Carefully remove the light bulb insulator from the light bulb casing.

    Ask FixBot

    Add Comment

  7. Optoma HD20 Light Bulb Replacement: step 7, image 1 of 1
    Tool used on this step:
    Tweezers
    $4.99
    Buy
    • Gently pull the wires off of the pins using tweezers.

    Ask FixBot

    Add Comment

  8. Optoma HD20 Light Bulb Replacement: step 8, image 1 of 1
    • Remove the 4 screws on the back of the light bulb casing using a Phillips #1 screwdriver.

    Ask FixBot

    Add Comment

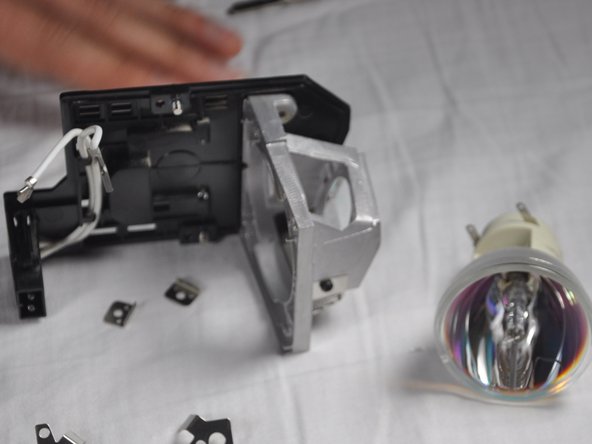
  9. Optoma HD20 Light Bulb Replacement: step 9, image 1 of 2 Optoma HD20 Light Bulb Replacement: step 9, image 2 of 2
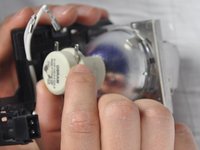
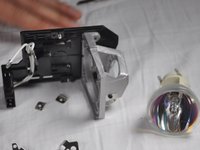
    • Remove the casing, then gently pull out the old light bulb and replace it with the new one.

    Ask FixBot

    Add Comment

Conclusion

To reassemble your device, follow these instructions in reverse order.

Cancel: I did not complete this guide.

7 other people completed this guide.

Trever

Member since: 01/22/15

1,282 Reputation

6 Guides authored

Team

Cal Poly, Team 21-23, Maness Winter 2015 Member of Cal Poly, Team 21-23, Maness Winter 2015

CPSU-MANESS-W15S21G23

4 Members

6 Guides authored

5 Guide Comments

I recently replaced my bulb for the third time and the insulator had grown brittle I am guessing from the heat and it broke. I can't seem to find this part for sale anywhere. Does anyone know if is possible to purchase it?

Thomas - Reply Share

The screws in step 8 are extremely hard to get off. I went and bought proper screwdrivers before even attempting since theyre small, but in a day I've only managed to get one off and I'm having to resort to other tactics, even using a drill to just grind the heads off.

dv01_ - Reply Share

king@okinlamps.com

Need LAD60 20PCS

kingshen92 - Reply Share

The manual says the new light won’t come back on until a lamp reset I’d done via menu , but how can you see the text if the light isn’t on?????

Taringajohn - Reply Share

my hd 20 projects dull images i recently replaced my bulb for the first time successfully and i followed as per menu trying to bulb reset but it is not working and still image is dull how to solve the problem

kumar - Reply Share

Add Comment

View Statistics:

Past 24 Hours: 2

Past 7 Days: 11

Past 30 Days: 67

All Time: 12,770