
Omaker M4 Front Case Replacement
![[deleted]](https://assets.cdn.ifixit.com/static/images/avatars/User/ifixit/avatar-4.thumbnail)
[deleted] and 3 other contributors
Last updated on May 3, 2016
Views: 1.3K
View statistics:
- Past 24 Hours:
- 2
- Past 7 Days:
- 16
- Past 30 Days:
- 100
- All Time:
- 1,258
Comments: 0
No one has left comments on this guide. Will you be first?
Go to guide commentsCompleted: 3 4
3 people have marked this guide "completed." Will you be next?
4 people have marked this guide "completed." Including you — great job!
Favorites: 0 1
No one has favorited (and subscribed to) this guide. Will you be the first?
1 person has favorited (and subscribed to) this guide — and that's you!
Introduction
Go to step 1 ↓The front case of the Omaker M4 provides a protective layer for the speaker cone. Once the front case is removed, the speaker can be accessed.
What you need
Tools


-
-
-
Flip the device over so the front of the device is facing upwards. Make sure to place the speaker on a flat surface
 Ask FixBot
-
-
-
Use a T6 Torx Screwdriver to remove the four screws from the front of the device.
-
-
-
Use a magnet to remove the screws after unscrewing them and place them aside.
-
-
-
-
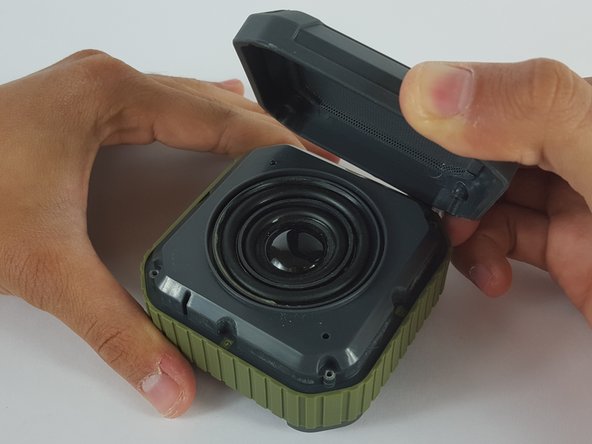
Carefully remove the front case by gently pulling it from the body of the device.
-
-



To reassemble your device, follow these instructions in reverse order.
Cancel: I did not complete this guide.
3 other people completed this guide.

