
Omaker M4 Back Case Replacement
![[deleted]](https://assets.cdn.ifixit.com/static/images/avatars/User/ifixit/avatar-4.thumbnail)
[deleted] and 5 other contributors
Last updated on May 7, 2024
Views: 1.4K
View statistics:
- Past 24 Hours:
- 2
- Past 7 Days:
- 16
- Past 30 Days:
- 85
- All Time:
- 1,401
Comments: 0
No one has left comments on this guide. Will you be first?
Go to guide commentsCompleted: 3 4
3 people have marked this guide "completed." Will you be next?
4 people have marked this guide "completed." Including you — great job!
Favorites: 0 1
No one has favorited (and subscribed to) this guide. Will you be the first?
1 person has favorited (and subscribed to) this guide — and that's you!
Missing Details
Some of this guide's details are missing. Help users by adding tools, difficulty, or time.
Introduction
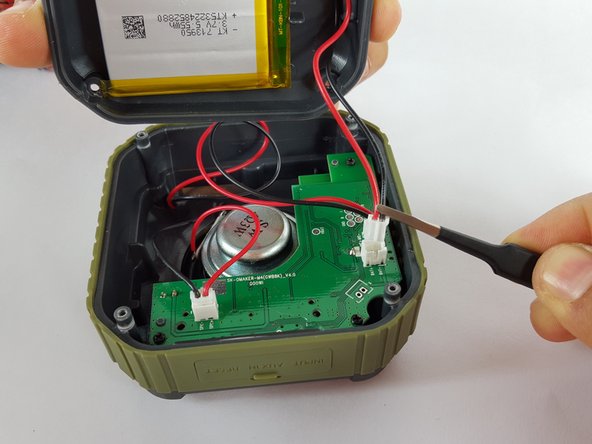
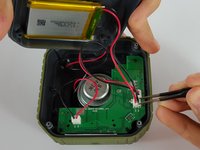
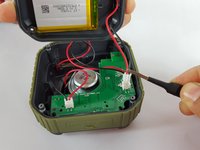
Go to step 1 ↓Removing the back case from the speaker is relatively easy. Once you unscrew the four back screws, there is a wire that is attached to the back case. Before pulling the back case completely off, disconnect the wire from the back case by carefully pulling it out with tweezers. This will allow the back case to be completely removed from the device.
What you need
Tools


-
-
-
Flip the device over so the front of the speaker is facing down. Make sure to place the speaker on a flat surface
 Ask FixBot
-
-
-
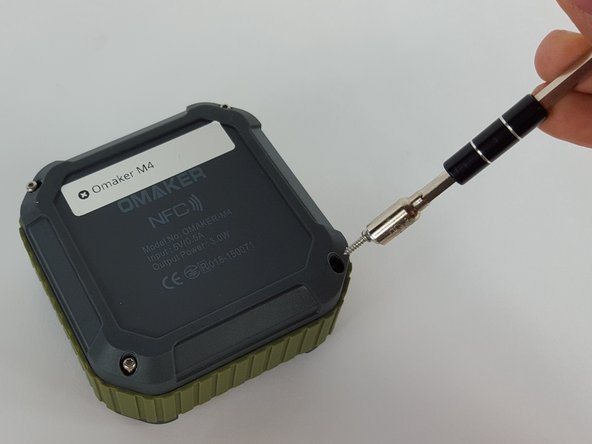
Use a T6 Torx screwdriver to remove the four 9mm screws from the back of the device.
-
-
-
Use a magnet to remove the screws after unscrewing them and place them aside.
-
-
-
Tool used on this step:Tweezers$4.99
-
Remove the end of the battery connection from the motherboard by holding the end of the wire and carefully pulling it out of the socket using tweezers.
-
-




To reassemble your device, follow these instructions in reverse order.
Cancel: I did not complete this guide.
3 other people completed this guide.

