Free Shipping on Domestic Orders $75+

Olympus Tough TG-1 Screen Replacement

What you need

  1. Olympus Tough TG-1 Screen Replacement, Clip Side Repair: step 1, image 1 of 2 Olympus Tough TG-1 Screen Replacement, Clip Side Repair: step 1, image 2 of 2
    • Remove both 6 mm screws from the clip side of the camera.

    • After you have removed the two screws, remove both the clip and the plate behind the clip so that the inside of the camera is exposed.

    • If one of more of the clips appear to be broken, the back plate might need to be replaced.

    Ask FixBot

    Add Comment

  2. Olympus Tough TG-1 Screen Replacement, Top of Camera: step 2, image 1 of 1
    • The top of the camera does not contain screws. You do not need to remove anything from the top of the camera.

    Ask FixBot

    Add Comment

  3. Olympus Tough TG-1 Screen Replacement, Plug Side: step 3, image 1 of 3 Olympus Tough TG-1 Screen Replacement, Plug Side: step 3, image 2 of 3 Olympus Tough TG-1 Screen Replacement, Plug Side: step 3, image 3 of 3
    • Remove the two 5 mm screws on the side of the camera with the plug.

    • Open the compartment door and remove both 6 cm screws inside of the compartment door. This will allow you to remove the tan piece held by the screws.

    Ask FixBot

    Add Comment

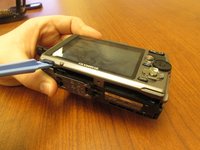
  4. Olympus Tough TG-1 Screen Replacement, Bottom: step 4, image 1 of 1
    • Turn the camera so that you are looking at the bottom of the camera.

    • Remove the two 4 mm screws from the bottom of the camera.

    • The screws are different. The rear screw is has an unthreaded shank to locate the outer shell while screwing into the inner frame.

    Ask FixBot

    Add Comment

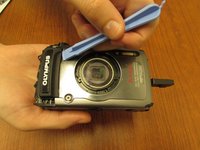
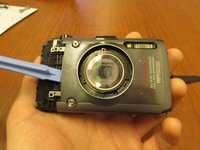
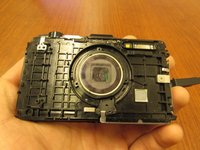
  5. Olympus Tough TG-1 Screen Replacement, Front Panel: step 5, image 1 of 3 Olympus Tough TG-1 Screen Replacement, Front Panel: step 5, image 2 of 3 Olympus Tough TG-1 Screen Replacement, Front Panel: step 5, image 3 of 3
    • Use the plastic opening tool to remove both components of the front panel. This includes the black part on the outside of the front panel and the main silver panel.

    • Once every screw and panel is removed, you can replace the backplate to make your camera weatherproof again.

    Ask FixBot

    Add Comment

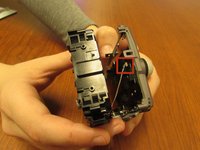
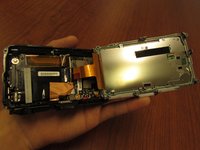
  6. Olympus Tough TG-1 Screen Replacement, Opening the Internal Case: step 6, image 1 of 3 Olympus Tough TG-1 Screen Replacement, Opening the Internal Case: step 6, image 2 of 3 Olympus Tough TG-1 Screen Replacement, Opening the Internal Case: step 6, image 3 of 3
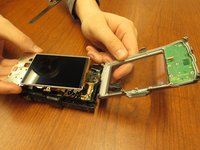
    • Using the plastic opening tools, carefully open the case.

    • Do not tear the white circuit ribbon.

    Ask FixBot

    Add Comment

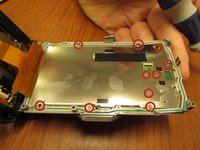
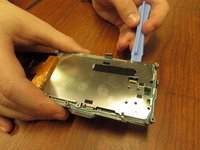
  7. Olympus Tough TG-1 Screen Replacement, Opening the Screen's Protective Cover: step 7, image 1 of 3 Olympus Tough TG-1 Screen Replacement, Opening the Screen's Protective Cover: step 7, image 2 of 3 Olympus Tough TG-1 Screen Replacement, Opening the Screen's Protective Cover: step 7, image 3 of 3
    • Using the screwdriver, remove the ten 3mm anchor screws.

    • Using the plastic opening tool, open the protective cover so that the screen is exposed.

    Ask FixBot

    Add Comment

  8. Olympus Tough TG-1 Screen Replacement, Unclipping the Screen from the Circuit Ribbon: step 8, image 1 of 1
    • Carefully unclip the screen from its circuit ribbon.

    Ask FixBot

    Add Comment

Conclusion

To reassemble your device, follow these instructions in reverse order.

Cancel: I did not complete this guide.

Emily Gensch

Member since: 01/21/15

116 Reputation

1 Guide authored

Team

USF Tampa, Team 4-6, Brown Winter 2015 Member of USF Tampa, Team 4-6, Brown Winter 2015

USFT-BROWN-W15S4G6

4 Members

12 Guides authored

0 Guide Comments

Add Comment

View Statistics:

Past 24 Hours: 2

Past 7 Days: 13

Past 30 Days: 63

All Time: 3,284