Introduction
Novation Launchkey mini MK3 / FLkey mini disassembly guide. I went in to fix two broken keys on an old Launchkey. In the process I compared the internals with the newer FLkey. Spoiler: There is no difference in hardware.
Ye be warned!!! Sometimes there are some fragile ribbon cables connected out of sight. Seperate parts slowely and with care, to prefent damaging them!
What you need
-
-
This manual goes for both Lauchkey mini MK3 and FLkey, as they are similar in build.
-
Flipping it upside down, shows 4 screws. After removing these screws, the whole thing still feels just as rigid.
 Ask FixBot
-
-
-
Next up are the clippings. I found that starting at a corner works best for me. Then carfully with a pick or screwdriver work yourway around.
-
There's 4 clips on the long sides and 3 on the short sides. Be careful not to open up after undoing all clips.
-
-
-
When all clips are undone, and the top and bottom shells are lose, carefully lift the back a little and then slide the top shell towards the key-bed.
-
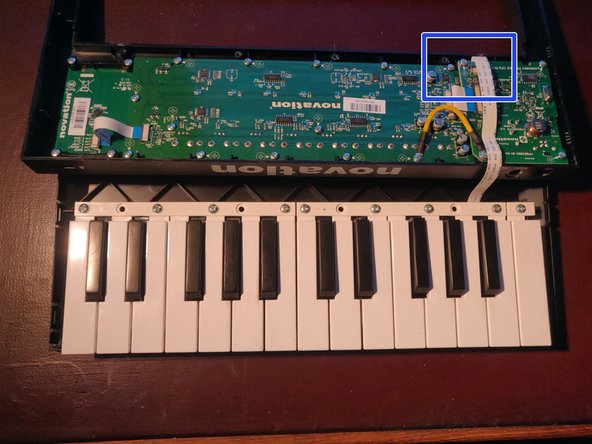
Carefully flip the top and undo the ribbon cable connecting the key-bed with the top shell.
-
-
-
-
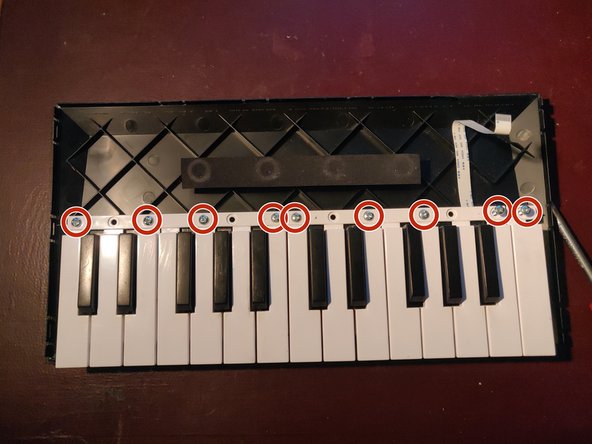
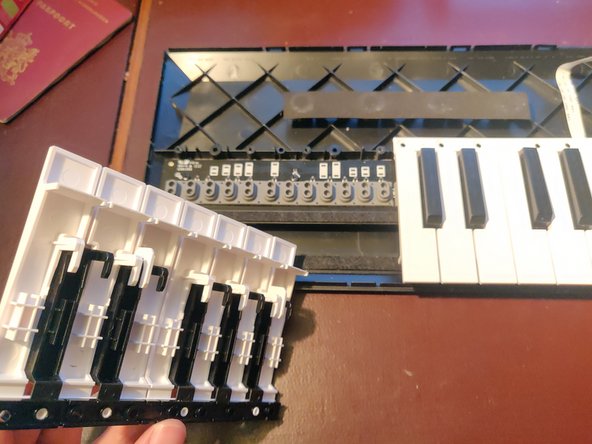
The keyboard is undone by unscrewing 9 screws. The keys can then be wiggled out.
-
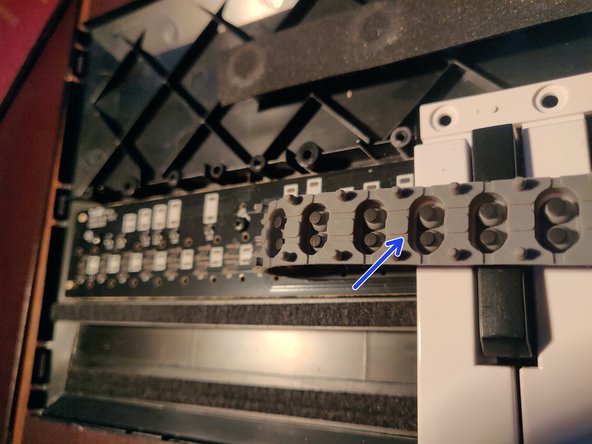
Mind that the rubber strip has a short and long feet. The short one goes to the front of the board.
-
-
-
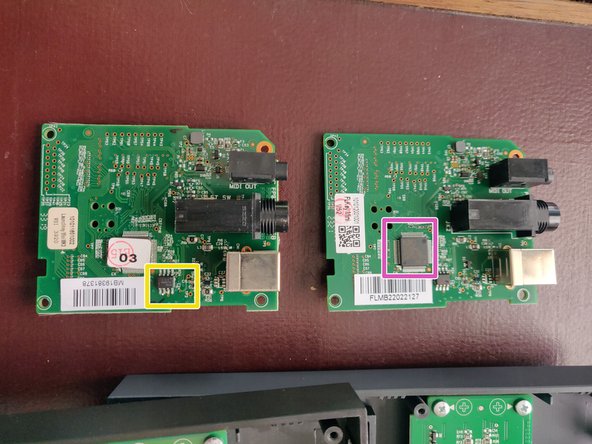
CY8C4024LQ ARM Microcontroller
-
HC595 bit-shifter
-
74HC4051D 8-channel analog multiplexer/demultiplexer
-
74HC165D 8-bit parallel-in/serial out shift register
-
74HC238D - 3-to-8 line decoder/demultiplexermxic
-
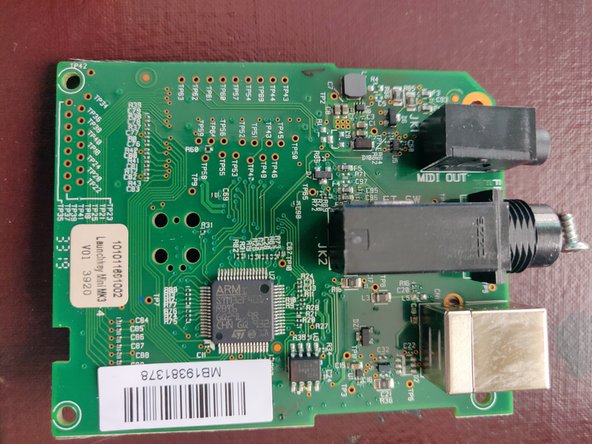
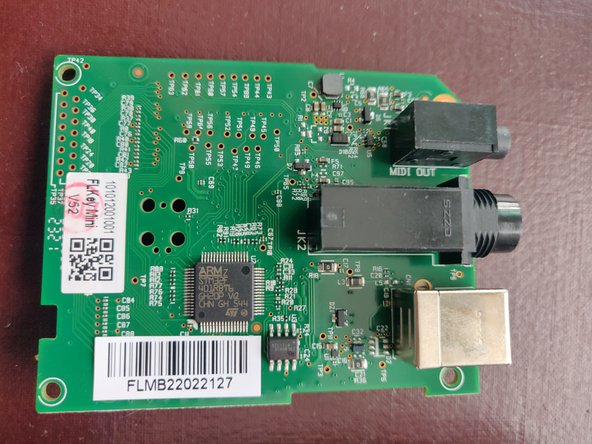
STM32F401RB - STMicroelectronics STM32F401RB - High-performance access line, Arm Cortex-M4 core with DSP and FPU, 128 Kbytes of Flash memory, 84 MHz CPU, ART Accelerator. Yes, apperently it accelerates art :)
-
MXIC MX25L8006E - 3V, 8M-bit[x 1/x 2] CMOS Serial flash memory
-
-
-
Unscrew the four screw
-
Undo the ribon cable by pulling the black clamp ever so carefull.
-
Remove CPU board.
-
-
-
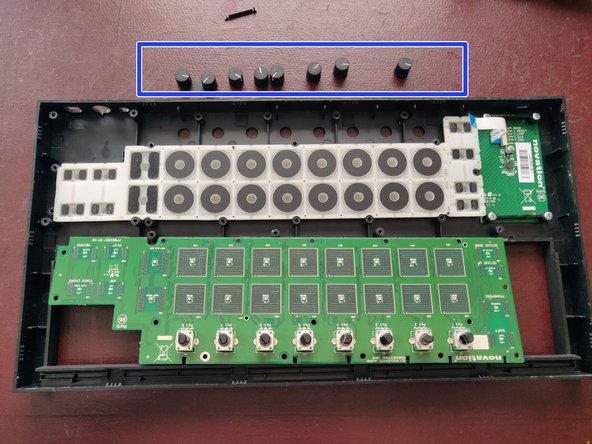
Unscrew 15 screws.
-
Remove the 8 rotary knob caps from the from of the board, by simply pulling on them. The main board can now be removed.
-
Removing the silicon pads as last, the midi keyboard is now fully disassembled.
-










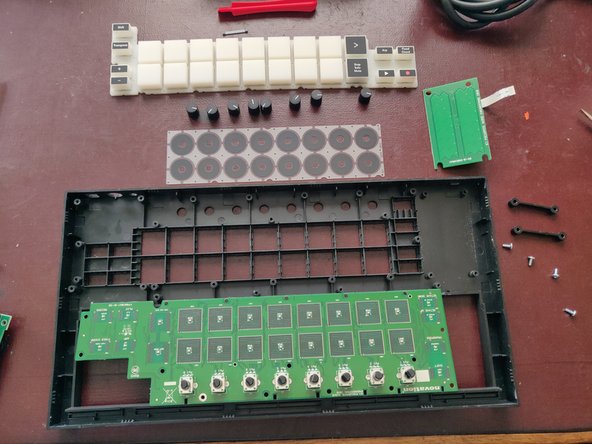


To reassemble your device, follow these instructions in reverse order.
I applaud Novation for making a device that is easy to open. No hidden screws and many screw indicators make this easily to repair. Just be careful with the ribbon cables.
What I don't understand is that I had to buy a complete new Novation FLKey to get features that work better with FL Studio. But looking inside, there seems to be no difference in hardware. So why not simply release a FL Studio driver? Maybe the firmware can be snarfed...
Cancel: I did not complete this guide.
9 other people completed this guide.

7 Guide Comments
Hello Dude, the driver files you got with your new keyboard could be altered to work with your old keyboard. I had to to play around with a usb audio interface driver once some time ago that i got working like this.
Bill
This article mostly applies to the larger 37 key model as well, but there are 2 screws in the front row that are hidden by the sticky feet. Not in the rear however. So 5 screws in the front row, 4 in the middle, and 2 in the back.
I would just add that there is a little black clip on both boards holding the ribbon cable between the two shell pieces. I yanked it out thinking there wasn't a clip and damaged the cable trying to put it back in. No fault of these instructions, they were excellent (as always).
Couldn't find a replacement anywhere online so I ended up just buying the MK4 off of Amazon...
Hey, TheDude, thanks for the guide! And thanks to IfitFixItSits for the tip about the hidden screws in the FLKey 37. Let me know how I can send pictures to you, if you still want them; I have the keys disassembled for cleaning and it's basically a sandwich of 3 different plastic pieces. Black keys are the top layer, then middle layer is C, E, G, B, finally D, F, A. (Hopefully I've named the keys correctly!)
