
Nook Tablet Display Replacement

Michael Mooney and 7 other contributors
Last updated on Apr 14, 2016
Views: 33K
View statistics:
- Past 24 Hours:
- 1
- Past 7 Days:
- 22
- Past 30 Days:
- 113
- All Time:
- 33,265
Comments: 5
3 comments on steps, 2 guide comments.
Go to guide commentsCompleted: 12 13
12 people have marked this guide "completed." Will you be next?
13 people have marked this guide "completed." Including you — great job!
Favorites: 7 8
7 people have favorited (and subscribed to) this guide. Will you be next?
8 people have favorited (and subscribed to) this guide — including you!
Introduction
Go to step 1 ↓This guide will show easy ways to access the nook tablet visual display, replace the screen or reconnect the display if it is not working properly.
What you need
Tools


-
-
-
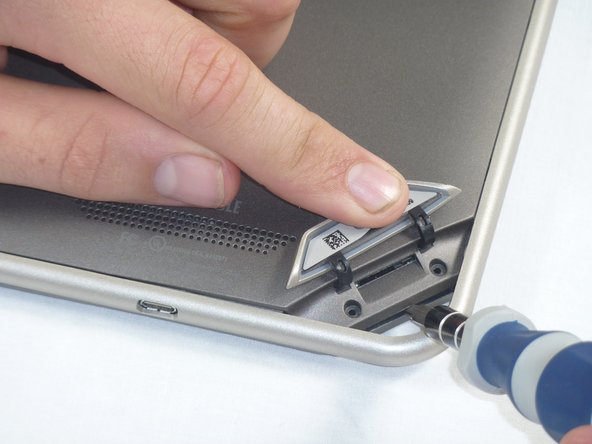
Lift the flap that reads "Nook" to reveal the tape that is underneath. Remove the memory card if one is present.
-
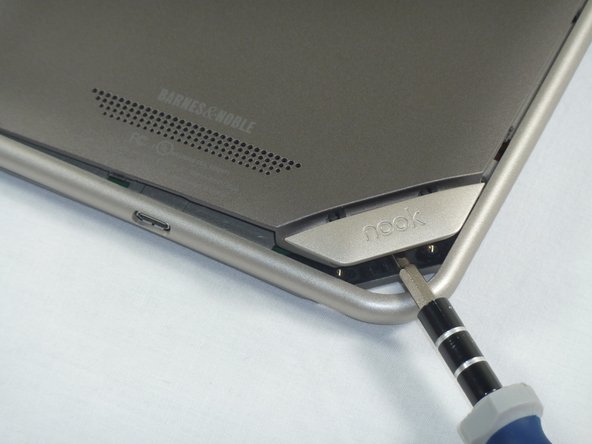
Remove the tape covering the round holes to reveal two T5 Torx screws.
-
Remove the two T5 Torx screws securing the back cover.
-
-
-
Insert the flat end of a spudger between the front panel and the rear assembly.
-
Use a spudger to lift the the back panel from the rest of the Nook.
-
-
-
-
Using the T5 Torx screwdriver, remove the ten T5 screws from around the edges of the silver midframe.
-
-
-
Using a spudger or plastic opening tool, carefully pry the screen bezel away from the silver midframe.
-
-
-
-
-
Lift up the foam pad at the corner of the battery to reveal the battery connector.
-
Use a spudger or plastic opening tool to disconnect the battery cable from the motherboard.
-
-
-
-
-
Lift up the foam that covers the power connector and volume connector.
-
Disconnect the power and volume cables from their sockets on the motherboard.
-
-
-
Carefully lift the silver midframe away from the motherboard and display assembly.
-
-
-
-
-
-
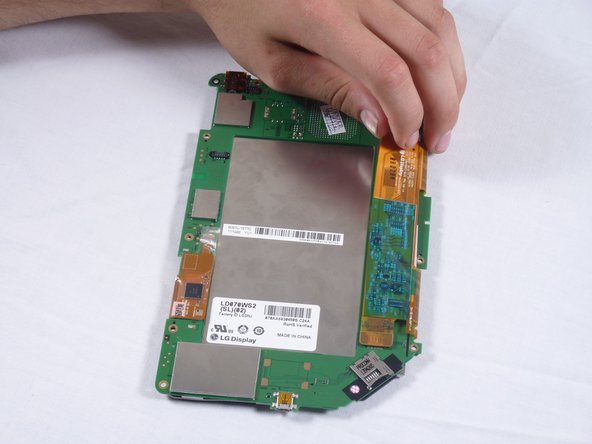
Orient the mother board as shown, so that the screen is facing downwards.
-
Grab the corner of the orange strip on the right side of the mother board as shown.
-
The orange strip is adhered to the mother board, gently lift the strip so that the adhesion is broken.
-
The strip will still be attached by the circuit connection to the mother board, proceed to the next step.
-
-
-
The orange strip will still be attached at this point
-
Insert the end of a flat head screw driver between the connection of the strip and mother board and pry upward.
-
Grab the strip and gently pull upward to finish the disconnection.
-
-
-
On the left side of the motherboard, you will see another orange strip, this one is taped down to the motherboard.
-
Remove the tape.
-
-
-
After the tape has been removed, the strip will still be attached to the motherboard by the hinge pictured here.
-
Slide the tip of a flat head screwdriver under the hinge and pry the hinge upward.
-
The orange strip should now be detached from the mother board.
-
-
-
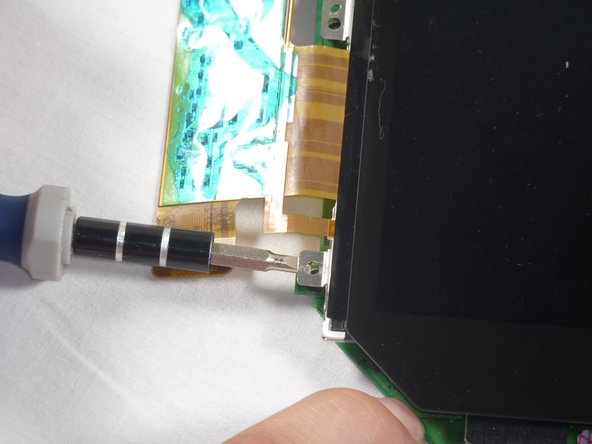
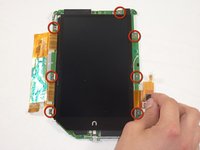
The screen is adhered to the mother board at the screw holes marked
-
Break the adhesion by inserting the edge of a flat head screwdriver inbetween the motherboard and the pieces of the screen at the marked holes
-
Lift the screen from the display.
-
-

 Ask FixBot










To reassemble your device, follow these instructions in reverse order.
Cancel: I did not complete this guide.
12 other people completed this guide.

Team

Cal Poly, Team 1-4, Propen Fall 2012 Member of Cal Poly, Team 1-4, Propen Fall 2012
CPSU-PROPEN-F12S1G4
4 Members
84 Guides authored
