
Nokia 6085h Front LCD Display

Brett Balcer and 11 other contributors
Last updated on Jan 4, 2023
Views: 1.9K
View statistics:
- Past 24 Hours:
- 1
- Past 7 Days:
- 21
- Past 30 Days:
- 112
- All Time:
- 1,861
Comments: 0
No one has left comments on this guide. Will you be first?
Go to guide commentsCompleted: 2 3
2 people have marked this guide "completed." Will you be next?
3 people have marked this guide "completed." Including you — great job!
Favorites: 0 1
No one has favorited (and subscribed to) this guide. Will you be the first?
1 person has favorited (and subscribed to) this guide — and that's you!
Introduction
Go to step 1 ↓Use this guide to replace a damaged front LCD display on your Nokia 6085H.
The front LCD display is the screen that displays the images of your phone. When an LCD display is damaged or broken, the screen may have a blank white or blue screen. If your screen has been cracked, it may display a white or blue screen with black lines running across. Before starting this guide, check out the Nokia 6085H troubleshooting page.
If replacement of the front LCD display does not restore your screen, this may indicate an issue with the inner LCD display.
What you need
Tools


-
-
-
Flip over the phone so that the back is facing up.
-
Pressing your thumb against the back cover, slide the cover off of the phone.
 Ask FixBot
-
-
-
-
-
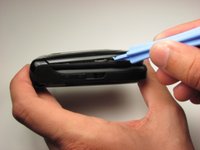
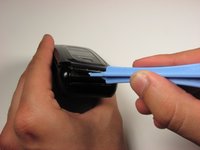
With the phone closed, run a plastic opening tool along the seam of the top half of the phone.
-
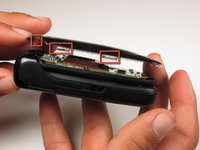
Make sure to disconnect each of the five clips before proceeding to the next step.
-
-
-
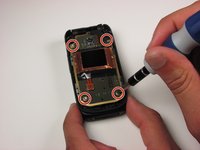
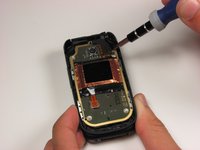
Remove the four 3.2 mm screws from the front panel using a T6 Torx screwdriver.
-
-
-
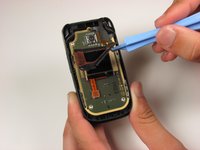
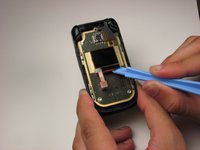
Starting in the lower right corner, slowly begin to lift the tape that is holding down the front LCD and cables.
-
Lift the tape from the board.
-
-
-
-
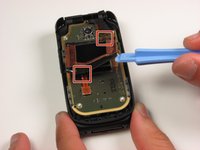
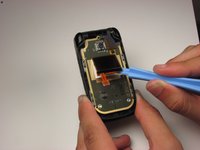
Using a plastic opening tool, lift the ribbon cable connection below the front LCD.
-
-
-
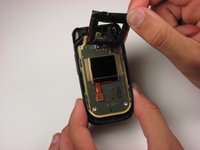
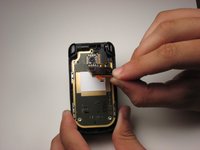
Using a plastic opening tool, slowly pry the LCD display from the bottom, releasing it from the glue that is holding it to the board.
-
-








To reassemble your device, follow these instructions in reverse order.
Cancel: I did not complete this guide.
2 other people completed this guide.

Team

Cal Poly, Team 4-46, Amido Fall 2010 Member of Cal Poly, Team 4-46, Amido Fall 2010
CPSU-AMIDO-F10S4G46
4 Members
84 Guides authored
