
Nokia 6010 Keypad Replacement

Nicholas Hanne and 4 other contributors
Last updated on Feb 19, 2016
Views: 3.7K
View statistics:
- Past 24 Hours:
- 2
- Past 7 Days:
- 17
- Past 30 Days:
- 96
- All Time:
- 3,663
Comments: 1
1 comment on steps.
Completed: 2 3
2 people have marked this guide "completed." Will you be next?
3 people have marked this guide "completed." Including you — great job!
Favorites: 0 1
No one has favorited (and subscribed to) this guide. Will you be the first?
1 person has favorited (and subscribed to) this guide — and that's you!
Introduction
Go to step 1 ↓Use this guide to remove and replace the Nokia 6010's keypad.
What you need
Tools
-
Spudger4.9

-
-
-
Press the small tab on the bottom of the back of the phone.
-
Push the back case upward towards the power button. The back case will then pop off.
 Ask FixBot
-
-
-
-
-
With one hand, press the ridged tab near the visible side of the SIM card.
-
Slide the card out with your other hand.
-
-
-
-
-
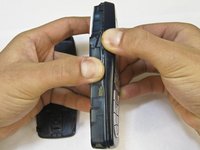
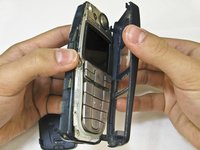
Grip the phone on either the sides, the top, or the bottom.
-
Pull the front case away from the rest of the phone.
-
-
-



To reassemble your device, follow these instructions in reverse order.
Cancel: I did not complete this guide.
2 other people completed this guide.

Team

Cal Poly, Team 14-45, Regan Winter 2010 Member of Cal Poly, Team 14-45, Regan Winter 2010
CPSU-REGAN-W10S14G45
5 Members
96 Guides authored
