Introduction
Follow this guide to replace the charging port of your Nokia 2780 Flip.
The charging port is part of the Nokia 2780 Flip where the charging cable connects to provide power to the battery. Over time, dust, debris, or physical damage can cause the port to stop working properly. If the phone charges slowly or does not charge at all, the charging port may need to be replaced.
If the charging port is completely broken, you can use a universal Lithium-ion external battery charger to charge the battery directly.
Caution: This is a more advanced repair because the charging port is soldered to the motherboard. You may replace only the charging port by desoldering it from the board, but if you are not comfortable with soldering, replacing the entire board may be a better option.
If you plan to replace only the jack, review the How to Solder and Desolder Connections guide for information on safely using a soldering iron.
Before you begin the repair, power off the phone and disconnect the charger.
What you need
-
-
Insert an iFixit opening tool into the seam between the back case and the bottom edge of the phone.
 Ask FixBot
-
-
-
Slide the opening tool or spudger around the edge of the phone to release the clips securing the bottom case.
-
Gently pry the bottom case from the phone to remove it.
-
-
-
Use a Torx T5 screwdriver to remove the six visible 1.4 mm screws that secure the internal rear housing.
-
-
-
-
Insert a plastic opening tool in the seam between the top case and midframe and slide it around the perimeter to release the clips holding them together.
-
Remove the midframe from the phone.
-
-
-
Place a spudger or an opening tool under the edge of the press connector and pry straight up to disconnect it.
-
-
-
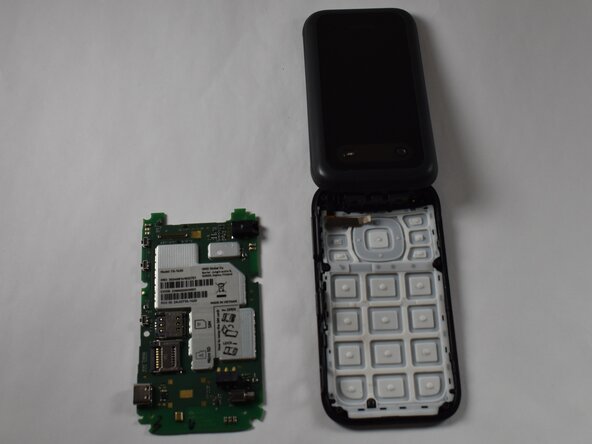
Pull back the frame surrounding the motherboard from both sides and gently remove the motherboard.
-
-
-
Use a soldering iron to desolder the solder joints on the back of the charging port.
-


To reassemble your device, follow these instructions in reverse order. Take your e-waste to an R2 or e-Stewards certified recycler.
Team

Purdue University Northwest, Team 7-5, Dieterle Spring 2026 Member of Purdue University Northwest, Team 7-5, Dieterle Spring 2026
PNW-DIETERLE-S26S7G5
4 Members
10 Guides authored