Introduction
These instructions may also help with other Nivona models and with coffee makers from Melitta, Siemens, and Miele—they are all made by the same manufacturer and have a very similar design.
The grinder is the same as in many devices from Jura, Siemens, Bosch, Melitta, etc... The pictures of the grinder are therefore from a Jura, but the repair is basically the same.
What you need
-
-
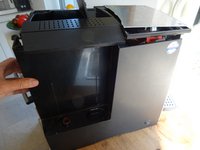
Remove all attachments such as water reservoir, coffee compartment lid, trestle drawer. Remove all coffee beans in the storage container.
-
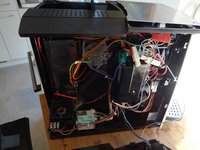
Unscrew the five Torx T10 screws on the back.
 Ask FixBot
-
-
-
Unscrew the two Torx T10 screws on the front edge of the heat plate.
-
Lift the front edge of the heat plate and slide it forward a bit to clear the tabs on the back edge.
-
Put the heat plate back down, but in such a way that you can reach the screws underneath.
-
Unscrew the two Torx T10 screws located under the heat plate.
-
-
-
Gently lift the upper side a bit and put it back down.
-
Push the side panel on the water tank back about 2 cm.
-
Place the side panel next to the machine. Do not remove it completely yet, the cables of the switch are still connected.
-
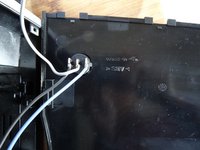
Disconnect the flat plugs from the switch. Be sure to note the order of the cables for later reassembly.
-
Remove the side panel.
-
-
-
Loosen the two insulated flat plugs with which the heat plate is connected.
-
Lift the top slightly upwards and loosen the nut that secures the eyelet to the green-yellow grounding cable. Remove the eyelet.
-
-
-
Lift the top side slightly.
-
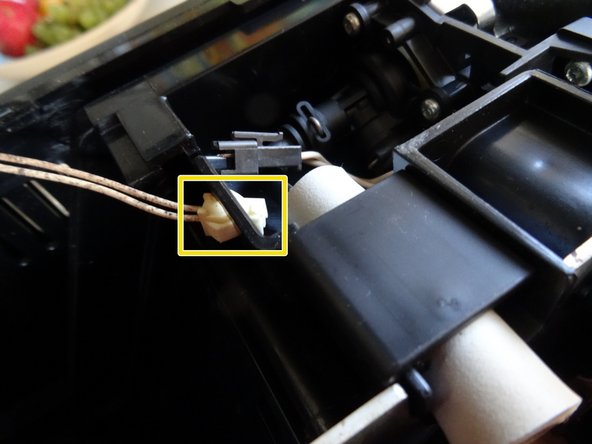
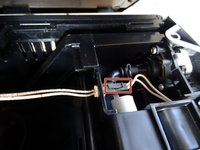
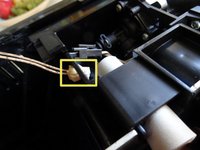
Press down the locking tab on the plug of the white sensor cable and pull off the black plug towards the front of the machine.
-
Press the two catches of the counterpart on the sides together and slide it out of the opening towards the back.
-
Now the top is free and you can remove it.
-
-
-
-
Slide the side panel with the service door back about 2 cm and remove it.
-
This may jam a little.
-
-
-
The grinder is damped with foam mats. One mat just rests on top. Remove it.
-
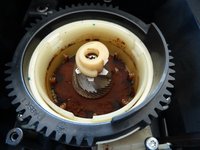
The grinder is open in front of you.
-
-
-
Now the grinder is free. Again take a picture, then pull out the axis of the adjuster with moderate force.
-
Depending on the model you will find a silicon sealing on top of the grinder ring, remove it.
-
Watch the fabrication signs , here green. This alignment must be restored later. Now turn the great black gear about 90 degrees counterclockwise. The grinder ring is free and can be lifted off.
-
-
-
The grinding cone is fastened with a long Torx T20 screw. The screw head is often covered with remnants of coffee beans. Expose the head and turn the screw out counterclockwise.
-
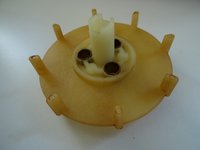
Now the bean feeder (the small white snail) can be removed. The grinder cone and drive can now also be lifted up carefully.
-
-
-
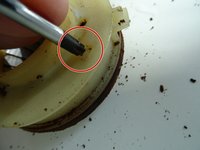
The grinder is usually filled with old, sticky coffee grounds. Clean everything carefully for an excellent coffee aroma.
-
Gently lift the felt ring around the drive shaft with a needle, then wipe it clean with a damp cloth. Do not attempt to wash it, as there is a risk that it will swell. When first used, turn it over with the clean side up.
-
Clean the inside of the grinder with a brush and damp cloth, and the blades with a dishwashing brush. Ensure it is properly dried before use.
-
-
-
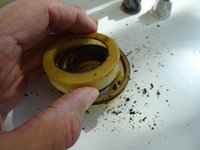
Push both of the small latches alternately. Then the ring cover should come out.
-
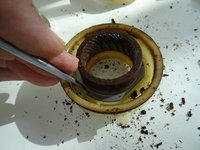
Two clamps hold the grinder ring in its place, push them aside and it should come free.
-
Again clean everything. Press the new ring and cover in its place. With that the grinder ring is exchanged.
-
-
-
First insert the cleaned driver, then the three sleeves, springs and balls. Now fit the grinding cone on the three balls.
-
Then fit the auger, screw in central screws. When screwing in, push the cone downwards and make sure that everything meshes.
-
-
-
Insert grinding ring. The black gear is turned to the right again until the three marks are aligned. Then reinstall the adjuster drive shaft as it was originally.
-
Then install the remaining parts in reverse order.
-
You can set the grinding degree nicely by placing an empty roll of toilet paper perpendicular to the open mill and filling it with a few coffee beans. Plug in the plug (be careful!), choose a cup of coffee and watch as the coffee grounds fall out of the grinder.
-
-
-
These two pictures are no fake: Before repairing the grinder the coffee is thin and transparent. With new stones the coffee is strong and has a fine crema. The repair was a real success!
-












Work through the steps in reverse order to reassemble your device.
Special thanks to these translators:
100%


These translators are helping us fix the world! Want to contribute?
Start translating ›

