Free Shipping on Domestic Orders $75+

Nintendo Wii U Wireless Module Replacement

Views: 15K

View statistics:

Past 24 Hours:
9
Past 7 Days:
36
Past 30 Days:
194
All Time:
15,339
Comments: 37

23 comments on steps, 14 guide comments.

Go to guide comments
Completed: 5

5 people have marked this guide "completed." Will you be next?

Favorites: 4

4 people have favorited (and subscribed to) this guide. Will you be next?

Time Required: 30 - 45 minutes
Difficulty: Moderate
Nintendo Wii U Wireless Module Replacement

Introduction

Go to step 1 ↓

The wireless module is a component in the Wii U's wireless connectivity with the gamepad. This guide will show you how to replace this important component of the Wii U.

What you need

Parts

Tools

    1. Nintendo Wii U Wireless Module Replacement, Console Outer Case: step 1, image 1 of 1
      • With the bottom of the console facing up, remove the following 6 screws hidden underneath the white square stickers:

      • Three 5.1mm Phillips #000 screws

      • Two 6.1mm Tri-wing Y0 screws

      • One 13.2mm Tri-wing Y1 screw

      Ask FixBot

      Add Comment

    2. Nintendo Wii U Wireless Module Replacement: step 2, image 1 of 1
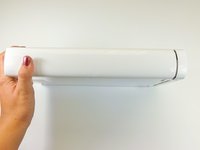
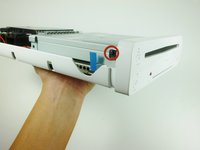
      • Rotate the console 180 degrees so that the exhaust vents are facing you.

      • Remove the two 7.1mm Phillips #00 screws.

      Ask FixBot

      Add Comment

    3. Nintendo Wii U Wireless Module Replacement: step 3, image 1 of 2 Nintendo Wii U Wireless Module Replacement: step 3, image 2 of 2
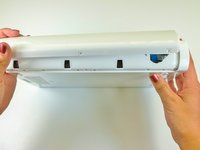
      • On the side opposite of the exhaust vents, slide the cover faceplate towards the back of the console and pull upwards to release it.

      Ask FixBot

      Add Comment

    4. Nintendo Wii U Wireless Module Replacement: step 4, image 1 of 1
      • On the bottom of the console beneath the previously removed faceplate, remove the three 13.2mm Tri-wing Y1 screws.

      Ask FixBot

      Add Comment

    5. Nintendo Wii U Wireless Module Replacement: step 5, image 1 of 3 Nintendo Wii U Wireless Module Replacement: step 5, image 2 of 3 Nintendo Wii U Wireless Module Replacement: step 5, image 3 of 3
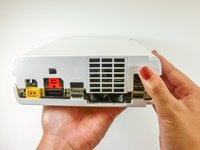
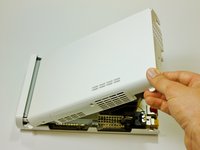
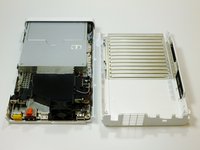
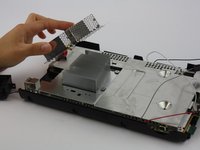
      • On the back of the console, lift up and release the main top cover.

      Ask FixBot

      Add Comment

    1. Nintendo Wii U Wireless Module Replacement, Front Faceplate: step 6, image 1 of 2 Nintendo Wii U Wireless Module Replacement, Front Faceplate: step 6, image 2 of 2
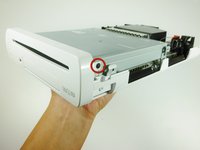
      • Rotate the device so that the front plate is facing you.

      • On each side of the console, remove the 3.5mm Phillips #0 screw connecting the DVD drive to the faceplate.

      Ask FixBot

      Add Comment

    2. Nintendo Wii U Wireless Module Replacement: step 7, image 1 of 1
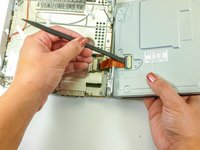
      • Rotate the device so that the front plate is on the right side and the ribbon cable is visible.

      • The ribbon cable is connected to the system by a latch which holds in the blue tab. Flip this latch up to unlock it.

      • Lift up on the blue tab to release the ribbon cable.

      Ask FixBot

      Add Comment

    3. Nintendo Wii U Wireless Module Replacement: step 8, image 1 of 1
      • Remove the front faceplate.

      Ask FixBot

      Add Comment

    1. Nintendo Wii U Wireless Module Replacement, DVD Drive: step 9, image 1 of 1
      • On each side of the DVD drive, remove the two 4.6mm Phillips #0 mounting screws.

      Ask FixBot

      Add Comment

    2. Nintendo Wii U Wireless Module Replacement: step 10, image 1 of 2 Nintendo Wii U Wireless Module Replacement: step 10, image 2 of 2
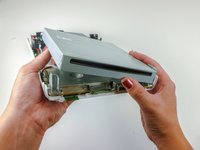
      • Rotate the device so that the disc drive slot is visible.

      • A ribbon cable is attached to the bottom right side of the disc drive. The ribbon cable can rip if it isn't removed properly.

      • Lift the disc drive out of the mount and turn over to the right so it lies like a book.

      • Use a spudger to release the ribbon cable.

      Ask FixBot

      Add Comment

    3. Nintendo Wii U Wireless Module Replacement: step 11, image 1 of 1
      • Remove the disc drive.

      Ask FixBot

      Add Comment

    1. Nintendo Wii U Wireless Module Replacement, Motherboard: step 12, image 1 of 3 Nintendo Wii U Wireless Module Replacement, Motherboard: step 12, image 2 of 3 Nintendo Wii U Wireless Module Replacement, Motherboard: step 12, image 3 of 3
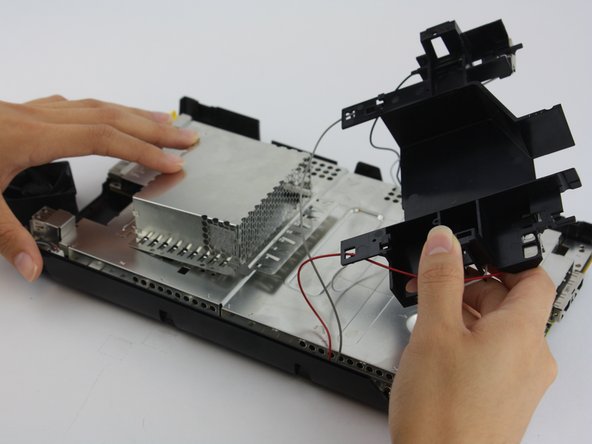
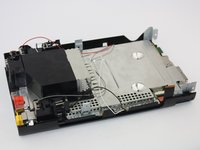
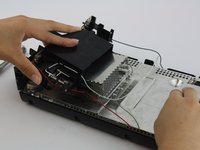
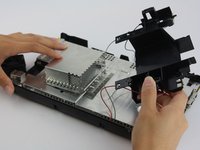
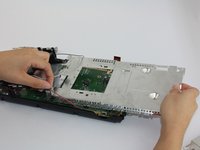
      • Remove the black plastic shielding by unscrewing connecting screws with a Phillip's Head screwdriver.

      • You will have to carefully adjust the antenna cables out of the way in order to proceed comfortably.

      Ask FixBot

      Add Comment

    2. Nintendo Wii U Wireless Module Replacement: step 13, image 1 of 3 Nintendo Wii U Wireless Module Replacement: step 13, image 2 of 3 Nintendo Wii U Wireless Module Replacement: step 13, image 3 of 3
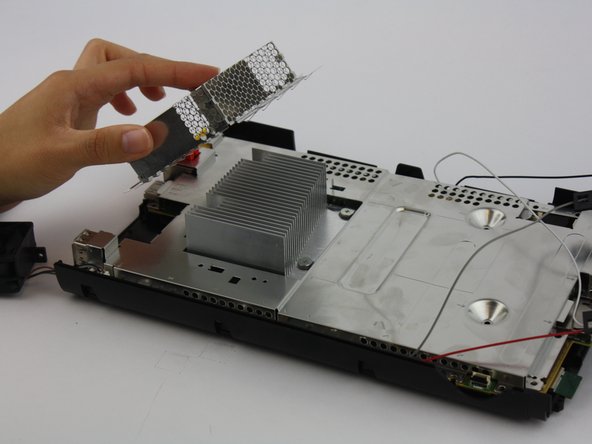
      • The metal cap does not require unscrewing and should lift up with ease.

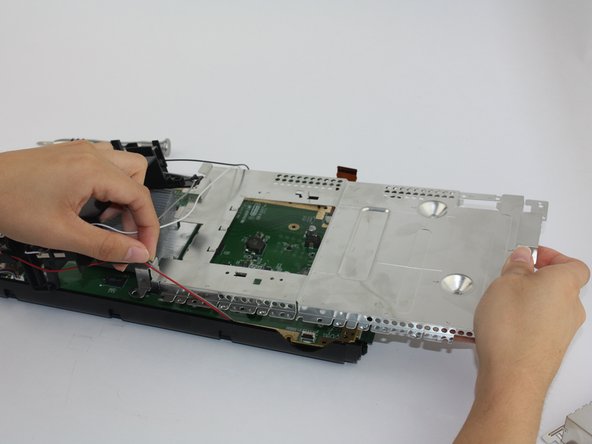
      • Unscrew all the screws that outline the perimeter of the board using a Phillips Head (PH1) screwdriver.

      • Remove the silver shielding plate once all screws are removed. Be careful when pulling it under the affixed antenna cables.

      Ask FixBot

      Add Comment

    3. Nintendo Wii U Wireless Module Replacement: step 14, image 1 of 2 Nintendo Wii U Wireless Module Replacement: step 14, image 2 of 2
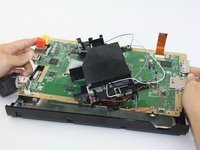
      • At this point, the motherboard should easily separate from the lower tray.

      Ask FixBot

      Add Comment

    1. Nintendo Wii U Wireless Module Replacement, Wireless 5ghz Module: step 15, image 1 of 3 Nintendo Wii U Wireless Module Replacement, Wireless 5ghz Module: step 15, image 2 of 3 Nintendo Wii U Wireless Module Replacement, Wireless 5ghz Module: step 15, image 3 of 3
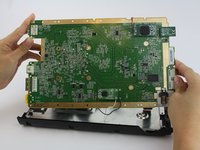
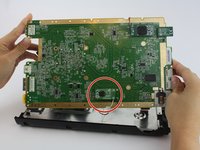
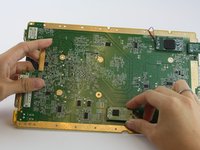
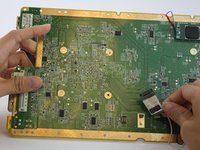
      • Flip the motherboard over to view the underside where the Wii U's wireless modules are located. The Bluetooth module is circled in red.

      • This module is affixed with strong adhesive, so in order to remove it you will need to wiggle the module with slight force for a couple of minutes.

      Ask FixBot

      Add Comment

Conclusion

To reassemble your device, follow these instructions in reverse order.

Cancel: I did not complete this guide.

5 other people completed this guide.

Emily Vasquez

Member since: 02/24/16

1,058 Reputation

3 Guides authored

Team

USF Tampa, Team 1-2, Leahy Spring 2016 Member of USF Tampa, Team 1-2, Leahy Spring 2016

USFT-LEAHY-S16S1G2

3 Members

48 Guides authored

14 Guide Comments

Where would be able to buy this replacement part? Anyone know?

Salvador Mora - Reply Share

I found on aliexpress

Rodrigo Mafort - Reply Share

I actually just bought a secondary Wii U just to be sure I don't get a cheap part, it was like $65 with a credit on eBay

Salvador Mora - Reply Share

Which one of these is for the module for control pad?:

Broadcom BCM43237KMLG Wireless LAN module

Broadcom BCM43362KUB6 802.11n Wireless Module—the same one used in the Roku 2 XS

Broadcom BCM20702 Bluetooth 4.0

Dan - Reply Share

bcm43362kub6

Rodrigo Mafort - Reply Share

Add Comment

View Statistics:

Past 24 Hours: 9

Past 7 Days: 36

Past 30 Days: 194

All Time: 15,339