Free Shipping on Domestic Orders $75+

Nintendo Wii Remote Shell Replacement

Views: 7.5K

View statistics:

Past 24 Hours:
9
Past 7 Days:
49
Past 30 Days:
227
All Time:
7,507
Comments: 1

1 guide comment.

Go to guide comments
Completed: 5

5 people have marked this guide "completed." Will you be next?

Favorites: 0

No one has favorited (and subscribed to) this guide. Will you be the first?

Time Required: 45 minutes - 1 hour
Difficulty: Moderate
Community-Contributed Guide

An awesome member of our community made this guide. It was not created by iFixit staff.

Nintendo Wii Remote Shell Replacement

Introduction

Go to step 1 ↓

This Guide shows how to change a Wii Remote Shell. There are many reasons to change the shell. Such as

  • Not liking the color
  • Shell is cracked
  • White Shell turned yellowish

Lets get right into the guide!

What you need

Tools

    1. Nintendo Wii Remote Shell Replacement, Removing the strap (Optional, but recommended.): step 1, image 1 of 1
      • Remove the Safety strap to prevent it into getting in our way

      Ask FixBot

      Add Comment

    2. Nintendo Wii Remote Shell Replacement, Removing the batteries: step 2, image 1 of 2 Nintendo Wii Remote Shell Replacement, Removing the batteries: step 2, image 2 of 2
      • Remove the battery using a fingernail.

      Ask FixBot

      Add Comment

    3. Nintendo Wii Remote Shell Replacement, Removing the screws: step 3, image 1 of 2 Nintendo Wii Remote Shell Replacement, Removing the screws: step 3, image 2 of 2
      • This is where the disassembly begins, Grab your Y1 Screwdriver and unscrew the following screws

      Ask FixBot

      Add Comment

      • Gently take out the front cover

      Ask FixBot

      Add Comment

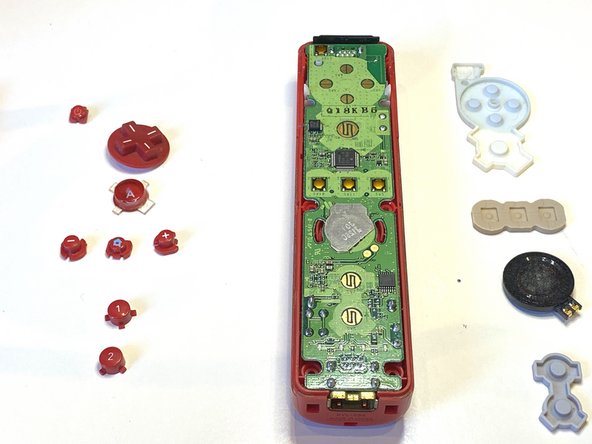
    4. Nintendo Wii Remote Shell Replacement, Removing the buttons: step 5, image 1 of 2 Nintendo Wii Remote Shell Replacement, Removing the buttons: step 5, image 2 of 2
      • Remove all of the buttons on the motherboard

      Ask FixBot

      Add Comment

    5. Nintendo Wii Remote Shell Replacement, Removing Rubber: step 6, image 1 of 2 Nintendo Wii Remote Shell Replacement, Removing Rubber: step 6, image 2 of 2
      • Remove all of the rubber.

      Ask FixBot

      Add Comment

    6. Nintendo Wii Remote Shell Replacement, Removing the Motherboard: step 7, image 1 of 3 Nintendo Wii Remote Shell Replacement, Removing the Motherboard: step 7, image 2 of 3 Nintendo Wii Remote Shell Replacement, Removing the Motherboard: step 7, image 3 of 3
      • Take out the motherboard

      Ask FixBot

      Add Comment

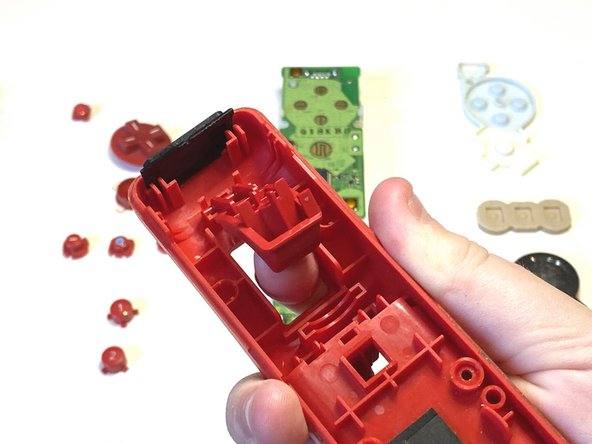
    7. Nintendo Wii Remote Shell Replacement, Taking out the B Button: step 8, image 1 of 3 Nintendo Wii Remote Shell Replacement, Taking out the B Button: step 8, image 2 of 3 Nintendo Wii Remote Shell Replacement, Taking out the B Button: step 8, image 3 of 3
      • Take out the B button

      Ask FixBot

      Add Comment

    8. Nintendo Wii Remote Shell Replacement, Removing the B Button: step 9, image 1 of 2 Nintendo Wii Remote Shell Replacement, Removing the B Button: step 9, image 2 of 2
      • Remove the B Button

      Ask FixBot

      Add Comment

    9. Nintendo Wii Remote Shell Replacement, Getting new shell: step 10, image 1 of 1
      • Grab your new shell

      Ask FixBot

      Add Comment

    10. Nintendo Wii Remote Shell Replacement, Inserting the components: step 11, image 1 of 2 Nintendo Wii Remote Shell Replacement, Inserting the components: step 11, image 2 of 2
      • Insert all of the buttons

      • Make sure they fit in properly and are clickable.

      Ask FixBot

      Add Comment

    11. Nintendo Wii Remote Shell Replacement, Inserting Rubber: step 12, image 1 of 2 Nintendo Wii Remote Shell Replacement, Inserting Rubber: step 12, image 2 of 2
      • Put on all of the rubber on the buttons

      Ask FixBot

      Add Comment

      • Connect the B button

      Ask FixBot

      Add Comment

      • Carfully place the back cover on your wii remote

      Ask FixBot

      Add Comment

    12. Nintendo Wii Remote Shell Replacement, Screwing In: step 15, image 1 of 1
      • Screw in the Y1 Screws into the following places

      Ask FixBot

      Add Comment

Conclusion

Thats it!

Cancel: I did not complete this guide.

5 other people completed this guide.

Artem Ivat

Member since: 02/05/20

3,975 Reputation

13 Guides authored

Team

Kid fixers Member of Kid fixers

Community

227 Members

2,148 Guides authored

1 Guide Comment

muchas gracias

Aniki Panda - Reply Share

Add Comment

View Statistics:

Past 24 Hours: 9

Past 7 Days: 49

Past 30 Days: 227

All Time: 7,507