
Nintendo Wii Remote Sensor Screen Replacement

Emily and 5 other contributors
Last updated on May 11, 2021
Views: 29K
View statistics:
- Past 24 Hours:
- 12
- Past 7 Days:
- 72
- Past 30 Days:
- 383
- All Time:
- 29,003
Comments: 5
3 comments on steps, 2 guide comments.
Go to guide commentsCompleted: 16 17
16 people have marked this guide "completed." Will you be next?
17 people have marked this guide "completed." Including you — great job!
Favorites: 6 7
6 people have favorited (and subscribed to) this guide. Will you be next?
7 people have favorited (and subscribed to) this guide — including you!
Featured Student Guide
This guide has been the hard work of our awesome students and is found to be exceptionally cool by the iFixit staff.
Introduction
Go to step 1 ↓These instructions are for an original Nintendo Wii remote, model number RVL-003, also called Wiimote. Nintendo Wii Remote users who have problems controlling the movement of the controller and/or connecting to the sensor bar can fix the issue by replacing the sensor screen within the remote.
Users should first look for dust blocking the LED lens or inspect the remote for other signs of corrosion or deterioration, check the battery, recalibrate the remote, and make sure the sensor bar is connected and not being blocked. If all checks out, it is possible that the sensor screen may need to be replaced.
Inside the Wii remote are built in optics that mimic a camera that connects to the sensor bar’s infrared LED. In addition, the remote contains a silicone anchor that controls the movement of tiny chips that are called accelerometers. Moving the remote up, down, and side to side move the accelerometers inside, which result in movement on the game screen. The remote also contains a stable Bluetooth chip that communicates with the console.
Replacing the sensor requires the user the obtain a new sensor screen part. Wii remote parts may be found on eBay.
What you need


-
-
-
Flip the Wii Remote over so the battery cover faces you.
-
Push up on the bottom tab.
-
Remove the battery cover.
 Ask FixBot
-
-
-
Remove the first battery by pressing down on the positive end and pulling the battery out.
-
Remove the second battery by pushing up on the positive end and pulling the battery out.
-
-
-
Using a tri-point Y1 Screwdriver, remove the two center 7mm screws by turning them counterclockwise.
-
Repeat with the two bottom screws.
-
-
-
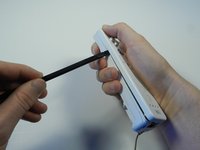
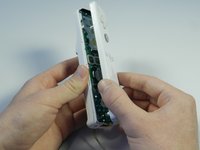
With the flat end of a spudger, gently apply pressure to the tabs located on left side of the controller.
-
Open the front plate like a book.
-
-
-
-
-
-
Tilt the remote, without the front cover plate, upward so the handle strap is at the bottom and the black screen is facing you.
-
Grip the outward edge of the screen with your fingers.
-
Gently, pull the screen straight outward from its housing. The screen will slide directly out.
-
-




To reassemble your device, follow these instructions in reverse order.
Cancel: I did not complete this guide.
16 other people completed this guide.

Team

Cal Poly, Team 3-44, Amido Spring 2013 Member of Cal Poly, Team 3-44, Amido Spring 2013
CPSU-AMIDO-S13S3G44
4 Members
72 Guides authored
