
Nintendo WaveBird Wireless Controller Front Panel Replacement

JT Gryder and 12 other contributors
Last updated on May 24, 2022
Views: 2.3K
View statistics:
- Past 24 Hours:
- 3
- Past 7 Days:
- 19
- Past 30 Days:
- 105
- All Time:
- 2,332
Comments: 0
No one has left comments on this guide. Will you be first?
Go to guide commentsCompleted: 3 4
3 people have marked this guide "completed." Will you be next?
4 people have marked this guide "completed." Including you — great job!
Favorites: 1 2
1 person has favorited (and subscribed to) this guide. Will you be next?
2 people have favorited (and subscribed to) this guide — including you!
Featured Student Guide
This guide has been the hard work of our awesome students and is found to be exceptionally cool by the iFixit staff.
Better Introduction
Improve this guide by completing or revising its introduction.
Introduction
Go to step 1 ↓This guide will help you remove the front panel of the controller. It is a prerequisite guide only.
What you need
Tools

-
-
-
Pull down on the battery cover release lever and pull back to remove the cover.
 Ask FixBot
-
-
-
-
-
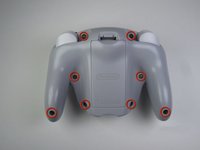
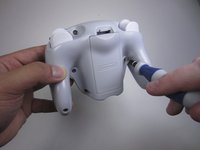
Remove the eight 9 mm screws from the back panel using the Tri-point Y1 screwdriver.
-
-
-
-
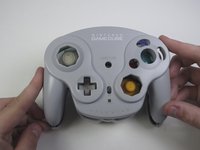
Carefully turn over the controller and place it on a flat surface.
-
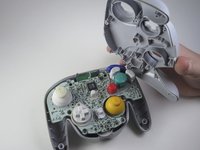
Slowly separate the top panel from the bottom panel.
-
Once separated, set aside the top panel.
-
-




To reassemble your device, follow these instructions in reverse order.
Cancel: I did not complete this guide.
3 other people completed this guide.

Team

Cal Poly, Team 10-40, Amido Spring 2013 Member of Cal Poly, Team 10-40, Amido Spring 2013
CPSU-AMIDO-S13S10G40
4 Members
180 Guides authored
