
Nintendo GameCube Front and Back Panel Replacement

dcarlin and 24 other contributors
Last updated on May 8, 2024
Views: 20K
View statistics:
- Past 24 Hours:
- 7
- Past 7 Days:
- 49
- Past 30 Days:
- 195
- All Time:
- 19,607
Comments: 9
9 comments on steps.
Completed: 6 7
6 people have marked this guide "completed." Will you be next?
7 people have marked this guide "completed." Including you — great job!
Favorites: 8 9
8 people have favorited (and subscribed to) this guide. Will you be next?
9 people have favorited (and subscribed to) this guide — including you!
Introduction
Go to step 1 ↓Removing these panels allows further access to the GameCube's components.
What you need
Tools


-
-
-
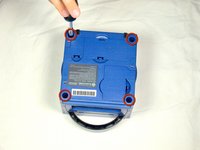
Turn over the Gamecube so that the bottom side is facing up.
-
Use the 4.5 mm Gamebit screwdriver to remove all four screws.
 Ask FixBot
-
-
-
With the bottom side of the GameCube facing upward and the screws removed, carefully pull the outer shell of the unit away from the top half.
-
Move the GameCube so that the inside is facing upwards.
-
-
-
-
-
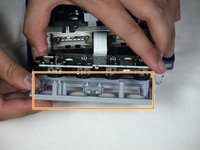
Gently press down on the clips located on either side of the back panel.
-
Carefully remove the back panel from the GameCube.
-
-
-
-
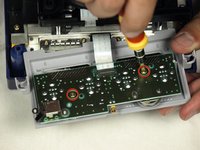
Use a Phillips #2 screwdriver to remove the two screws on the back of the control port.
-
Carefully separate the gray outer casing of the control port and the circuit board.
-
-




To reassemble your device, follow these instructions in reverse order.
Cancel: I did not complete this guide.
6 other people completed this guide.

Team

Cal Poly, Team 6-2, Maness Fall 2009 Member of Cal Poly, Team 6-2, Maness Fall 2009
CPSU-MANESS-F09S6G2
4 Members
96 Guides authored
