Free Shipping on Domestic Orders $75+

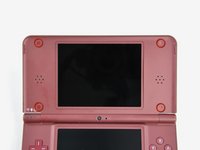
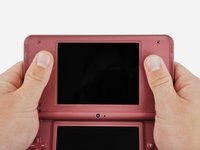
Nintendo DSi XL Speakers Replacement

What you need

    1. Nintendo DSi XL Speakers Replacement, Battery: step 1, image 1 of 2 Nintendo DSi XL Speakers Replacement, Battery: step 1, image 2 of 2
      • Remove the two Phillips screws securing the battery cover to the back of the handheld console.

      • Lift the battery cover off the back of the DSi XL.

      Ask FixBot

      Add Comment

    2. Nintendo DSi XL Speakers Replacement: step 2, image 1 of 1
      • Lift the battery from the DSi XL.

      Ask FixBot

      Add Comment

    1. Nintendo DSi XL Speakers Replacement, Rear Bezel: step 3, image 1 of 3 Nintendo DSi XL Speakers Replacement, Rear Bezel: step 3, image 2 of 3 Nintendo DSi XL Speakers Replacement, Rear Bezel: step 3, image 3 of 3
      • Use a push pin to remove the four plastic screw covers on the front bezel.

      Ask FixBot

      Add Comment

    2. Nintendo DSi XL Speakers Replacement: step 4, image 1 of 1
      • Remove four Phillips screws securing the front bezel to the rear bezel.

      Ask FixBot

      Add Comment

    3. Nintendo DSi XL Speakers Replacement: step 5, image 1 of 2 Nintendo DSi XL Speakers Replacement: step 5, image 2 of 2
      • Using two hands, gently slide the rear bezel upwards.

      • The rear bezel will move only about 2 mm.

      Ask FixBot

      Add Comment

    4. Nintendo DSi XL Speakers Replacement: step 6, image 1 of 2 Nintendo DSi XL Speakers Replacement: step 6, image 2 of 2
      • Insert a spudger into the gap between the front and rear bezel

      • Rotate the spudger away from the DSi XL, prying the two bezels apart.

      Ask FixBot

      Add Comment

    5. Nintendo DSi XL Speakers Replacement: step 7, image 1 of 1
      • In the same manner as described above, continue prying along the top edge of the front and rear bezels.

      Ask FixBot

      Add Comment

    6. Nintendo DSi XL Speakers Replacement: step 8, image 1 of 1
      • Separate the rear bezel from the front bezel.

      • Do not attempt to completely remove the rear bezel yet. It is still attached to the front bezel by the rear-facing camera.

      Ask FixBot

      Add Comment

    7. Nintendo DSi XL Speakers Replacement: step 9, image 1 of 1
      • Use the flat end of a spudger to pry the rear camera off the rear bezel.

      • Remove the rear bezel.

      Ask FixBot

      Add Comment

    1. Nintendo DSi XL Speakers Replacement, Speakers: step 10, image 1 of 1
      • Use a spudger to lift the antenna from the front bezel to make room for lifting the speaker cables up.

      Ask FixBot

      Add Comment

    2. Nintendo DSi XL Speakers Replacement: step 11, image 1 of 1
      • Use a spudger to lift the right speaker from its housing in the front bezel.

      Ask FixBot

      Add Comment

    3. Nintendo DSi XL Speakers Replacement: step 12, image 1 of 1
      • Use a spudger to lift the left speaker from its housing in the front bezel.

      Ask FixBot

      Add Comment

    4. Nintendo DSi XL Speakers Replacement: step 13, image 1 of 2 Nintendo DSi XL Speakers Replacement: step 13, image 2 of 2
      • De-route the left speaker cable along the top edge of the upper LCD.

      Ask FixBot

      Add Comment

    5. Nintendo DSi XL Speakers Replacement: step 14, image 1 of 1
      • Open the display slightly, and lift the LCD out of the front bezel.

      • Lay the LCD down next to the DSi XL.

      • Don't attempt to remove the LCD, it is still attached to the front bezel via the display data ribbon cable.

      Ask FixBot

      Add Comment

    6. Nintendo DSi XL Speakers Replacement: step 15, image 1 of 1
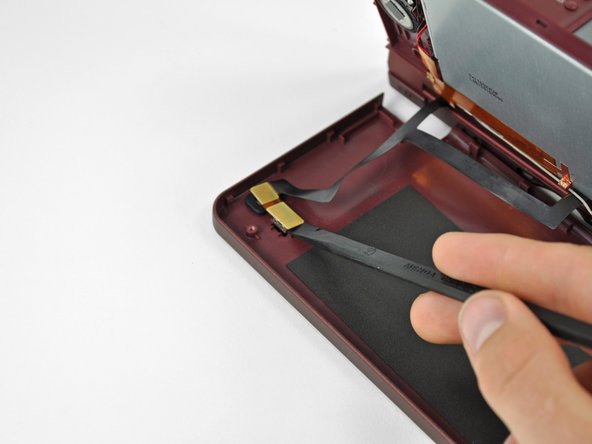
      • Desolder the two solder joints to separate the speakers from the LCD.

      • Right Speaker

      • Left Speaker

      • For both speakers, the red wire (positive lead) is soldered to the left contact. The black wire (negative lead) is soldered to the right contact point.

      • For detailed instructions on how to solder this type of connection, see our guide for repairing soldered connections.

      Ask FixBot

      Add Comment

Conclusion

To reassemble your device, follow these instructions in reverse order.

Cancel: I did not complete this guide.

4 other people completed this guide.

Matthew Newsom

Member since: 01/05/10

43,003 Reputation

67 Guides authored

4 Guide Comments

Thank you for this video but I need some more help cause I dont know if my problem are the speakers or the earphones jack how can I solve this just one clue i need thanks again

Josh - Reply Share

In my case, it turned out there was nothing wrong with my speaker… one of the wires that feeds around the screen was bad.

Dave Horlick - Reply Share

is there anyway of adding two more speaker?

vincent johnson - Reply Share

Awesome guide. Thanks for doing this.

Dandelion - Reply Share

Add Comment

View Statistics:

Past 24 Hours: 1

Past 7 Days: 31

Past 30 Days: 143

All Time: 8,413