Free Shipping on Domestic Orders $75+

Nintendo 2DS Trigger Button Replacement

Views: 37K

View statistics:

Past 24 Hours:
10
Past 7 Days:
91
Past 30 Days:
370
All Time:
36,643
Comments: 23

20 comments on steps, 3 guide comments.

Go to guide comments
Completed: 23

23 people have marked this guide "completed." Will you be next?

Favorites: 4

4 people have favorited (and subscribed to) this guide. Will you be next?

Time Required: 20 - 30 minutes
Difficulty: Moderate
Nintendo 2DS Trigger Button Replacement

Introduction

Go to step 1 ↓

This guide for the Nintendo 2DS will teach you how to access the trigger buttons to remove them for cleaning or replacement.

What you need

Tools

    1. Nintendo 2DS Trigger Button Replacement, Battery: step 1, image 1 of 1
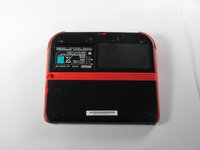
      • Remove the two Phillips captive screws securing the upper rear panel.

      • The captive screws will not completely detach from the back panel.

      Ask FixBot

      Add Comment

    2. Nintendo 2DS Trigger Button Replacement: step 2, image 1 of 2 Nintendo 2DS Trigger Button Replacement: step 2, image 2 of 2
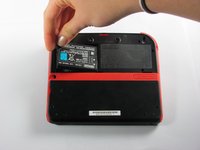
      • Hinge the upper rear panel upwards and outwards to remove it.

      Ask FixBot

      Add Comment

    3. Nintendo 2DS Trigger Button Replacement: step 3, image 1 of 3 Nintendo 2DS Trigger Button Replacement: step 3, image 2 of 3 Nintendo 2DS Trigger Button Replacement: step 3, image 3 of 3
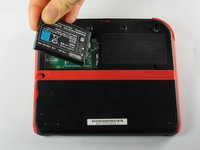
      • Remove the battery from its housing by lifting it up from the side closest to the outside edge.

      Ask FixBot

      Add Comment

    1. Nintendo 2DS Trigger Button Replacement, Rear Panel: step 4, image 1 of 1
      • Remove the ten Phillips screws attaching the rear panel.

      Ask FixBot

      Add Comment

    2. Nintendo 2DS Trigger Button Replacement: step 5, image 1 of 1
      • The rear panel is attached to the motherboard by a ribbon cable, so be careful not to lift the rear panel too far from the device.

      • Carefully pull the rear panel straight up from the device.

      Ask FixBot

      Add Comment

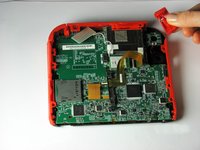
    3. Nintendo 2DS Trigger Button Replacement: step 6, image 1 of 1
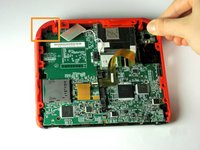
      • Use your fingernail or the flat end of a spudger to flip up the connector securing the ribbon cable to the motherboard

      • Remove the cable from the connector

      • Take the opportunity to remove the Left and Right triggers, they have hinges that may break and springs that may jump away.

      Ask FixBot

      Add Comment

    1. Nintendo 2DS Trigger Button Replacement, Remove trigger button: step 7, image 1 of 2 Nintendo 2DS Trigger Button Replacement, Remove trigger button: step 7, image 2 of 2
      • The trigger buttons have small springs attached to them, so be careful when removing the buttons from the device.

      • Pull the trigger button away from the device to remove it.

      Ask FixBot

      Add Comment

Conclusion

To reassemble your device, follow these instructions in reverse order.

Cancel: I did not complete this guide.

23 other people completed this guide.

Fina Beauchamp

Member since: 01/12/15

3,415 Reputation

6 Guides authored

Team

Cal Poly, Team 70-1, Forte Winter 2015 Member of Cal Poly, Team 70-1, Forte Winter 2015

CPSU-FORTE-W15S70G1

4 Members

72 Guides authored

3 Guide Comments

Nice job! My right button was jammed for at least two years. Now I can finally demolish my friends in Mariokart.

Minecrafter Pig - Reply Share

Can’t seem to get the second set of screws to budge at all.

Zom baygal - Reply Share

now what????

Karim Eltaib - Reply Share

Add Comment

View Statistics:

Past 24 Hours: 10

Past 7 Days: 91

Past 30 Days: 370

All Time: 36,643