Free Shipping on Domestic Orders $75+

Nikon D90 Rear Case Replacement

What you need

  1. Nikon D90 Rear Case Replacement, Rear Case: step 1, image 1 of 2 Nikon D90 Rear Case Replacement, Rear Case: step 1, image 2 of 2
    • Slide the eyepiece up and off the viewfinder.

    Ask FixBot

    Add Comment

  2. Nikon D90 Rear Case Replacement: step 2, image 1 of 1
    • Using a PH000 screwdriver, remove the two 4.8mm Phillips screws from the back of the viewfinder.

    • Some screws may be JIS. Be wary of this if your PH000 does not feel like it is properly gripping the screws.

    Ask FixBot

    Add Comment

  3. Nikon D90 Rear Case Replacement: step 3, image 1 of 1
    • Remove the two 6.4mm Phillips screws on the right side of the camera, near the SD card slot.

    Ask FixBot

    Add Comment

  4. Nikon D90 Rear Case Replacement: step 4, image 1 of 1
    • Remove the two 6.4mm Phillips screws on the left side of the camera, near the I/O ports.

    Ask FixBot

    Add Comment

  5. Nikon D90 Rear Case Replacement: step 5, image 1 of 1
    • On the bottom of the camera,

    • remove the two 5.3mm Phillips screws

    • and the other two 6.3mm Phillips screws.

    Ask FixBot

    Add Comment

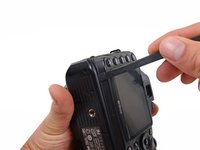
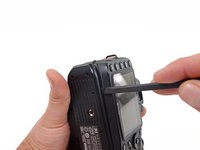
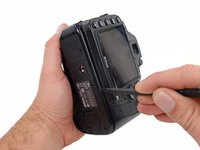
  6. Nikon D90 Rear Case Replacement: step 6, image 1 of 3 Nikon D90 Rear Case Replacement: step 6, image 2 of 3 Nikon D90 Rear Case Replacement: step 6, image 3 of 3
    • Using a spudger, separate the bottom panel from the rear case just enough to clear the two clips on the rear casing in the next step.

    Ask FixBot

    Add Comment

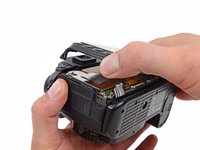
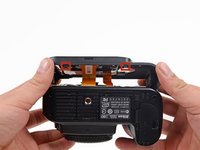
  7. Nikon D90 Rear Case Replacement: step 7, image 1 of 2 Nikon D90 Rear Case Replacement: step 7, image 2 of 2
    • Lift the rear case off of the back of the camera.

    • Don't pull the casing completely off yet, as the ribbon cables are still connected.

    • Be mindful of the two clips, making sure to keep the bottom panel far enough away to clear them.

    Ask FixBot

    Add Comment

  8. Nikon D90 Rear Case Replacement: step 8, image 1 of 1
    • Set the rear casing off to the side so you can access the ZIF connectors.

    • The orientation shown in the picture seems to be the best position for the casing to sit comfortably without stressing the ribbon cable connections.

    Ask FixBot

    Add Comment

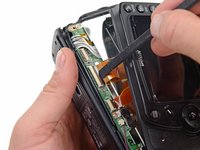
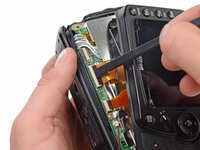
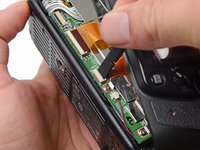
  9. Nikon D90 Rear Case Replacement: step 9, image 1 of 3 Nikon D90 Rear Case Replacement: step 9, image 2 of 3 Nikon D90 Rear Case Replacement: step 9, image 3 of 3
    • Use a spudger to lift the black tab on the ZIF connector.

    • Disconnect the ribbon cables from their respective ZIF connectors on the logic board.

    Ask FixBot

    Add Comment

  10. Nikon D90 Rear Case Replacement: step 10, image 1 of 1
    • Separate the rear casing from the camera.

    Ask FixBot

    Add Comment

Conclusion

To reassemble your device, follow these instructions in reverse order.

Cancel: I did not complete this guide.

8 other people completed this guide.

Ryan Lutz

Member since: 09/27/11

3,095 Reputation

3 Guides authored

2 Guide Comments

good guidance,easy to follow,thanks

ramalingeswarao kaza - Reply Share

I want to replace my Nikon D90 DSLR bad LCD, this guide will save me from costly repairs.

ramalingeswarao kaza - Reply Share

Add Comment

View Statistics:

Past 24 Hours: 1

Past 7 Days: 10

Past 30 Days: 42

All Time: 5,080