Free Shipping on Domestic Orders $75+

Nikon D7000 Motherboard Replacement

What you need

  1. Nikon D7000 Motherboard Replacement, Motherboard: step 1, image 1 of 1
    • When loosening the screws, start pressing the screwdriver firmly for the first 1-2 turns (highest torque) until the screw is 'unlocked'. Failing to do so can damage the screw head and make it impossible to disengage that screw.

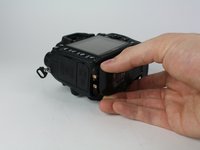
    • Remove the following 5 screws securing the bottom cover to the camera body:

    • Four 6 mm J000 screws.

    • One 8 mm J000 screw (under lens mount).

    Ask FixBot

    Add Comment

  2. Nikon D7000 Motherboard Replacement: step 2, image 1 of 1
    • Remove three 6 mm J000 screws from under the battery cover.

    Ask FixBot

    Add Comment

  3. Nikon D7000 Motherboard Replacement: step 3, image 1 of 2 Nikon D7000 Motherboard Replacement: step 3, image 2 of 2
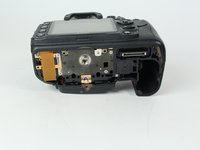
    • Gently pull the bottom cover off of the camera body.

    Ask FixBot

    Add Comment

  4. Nikon D7000 Motherboard Replacement: step 4, image 1 of 1
    • Remove the following screws from the port area:

    • Two 3.5 mm J000 screws.

    • One 6 mm J000 screw (right above ports).

    Ask FixBot

    Add Comment

  5. Nikon D7000 Motherboard Replacement: step 5, image 1 of 1
    Tool used on this step:
    Tweezers
    $4.99
    Buy
    • Peel the rear rubber piece off with tweezers.

    Ask FixBot

    Add Comment

  6. Nikon D7000 Motherboard Replacement: step 6, image 1 of 1
    • Remove one 4.25 mm J000 screw from behind the rear rubber piece.

    Ask FixBot

    Add Comment

  7. Nikon D7000 Motherboard Replacement: step 7, image 1 of 1
    • Pull the eyepiece cover up to remove it.

    Ask FixBot

    Add Comment

  8. Nikon D7000 Motherboard Replacement: step 8, image 1 of 1
    • Remove two 6 mm J000 screws from behind the eyepiece cover.

    • On D7100 models, there is an additional screw holding the back plate on. This screw is located in the diopter (dial with + - on it). This screw can be accessed by peeling up this sticker on the diopter.
    Ask FixBot

    Add Comment

  9. Nikon D7000 Motherboard Replacement: step 9, image 1 of 1
    • Open the SD card cover by pushing slightly down with your thumb and sliding up.

    Ask FixBot

    Add Comment

  10. Nikon D7000 Motherboard Replacement: step 10, image 1 of 1
    • Remove four 6 mm J000 screws that secure the SD card cover.

    Ask FixBot

    Add Comment

  11. Nikon D7000 Motherboard Replacement: step 11, image 1 of 1
    • Gently pull the SD card cover off.

    Ask FixBot

    Add Comment

  12. Nikon D7000 Motherboard Replacement: step 12, image 1 of 1
    • Remove the following screws that secure the back case:

    • One 6 mm J000 screw.

    • One 3 mm J000 screw.

    Ask FixBot

    Add Comment

  13. Nikon D7000 Motherboard Replacement: step 13, image 1 of 1
    • Carefully lift the back case off.

    Ask FixBot

    Add Comment

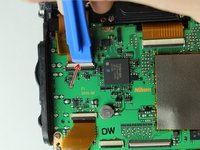
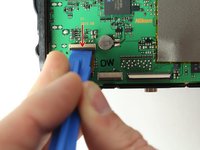
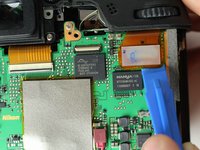
  14. Nikon D7000 Motherboard Replacement: step 14, image 1 of 3 Nikon D7000 Motherboard Replacement: step 14, image 2 of 3 Nikon D7000 Motherboard Replacement: step 14, image 3 of 3
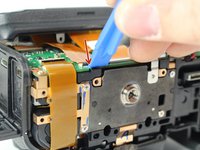
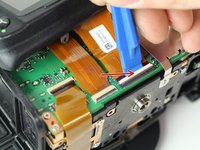
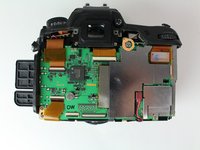
    • Disconnect the following two ribbon cables from the motherboard.

    • See our Cable Connector Guide for help with ribbon cable connectors!

    Ask FixBot

    Add Comment

  15. Nikon D7000 Motherboard Replacement: step 15, image 1 of 2 Nikon D7000 Motherboard Replacement: step 15, image 2 of 2
    • Remove the following screws securing the left motherboard shield:

    • One 2 mm J000 screw (on the bottom).

    • One 3.5 mm J000 screw (on the back).

    • Be careful of the grounding clips on the motherboard.

    Ask FixBot

    Add Comment

  16. Nikon D7000 Motherboard Replacement: step 16, image 1 of 1
    • Gently pry and lift the left motherboard shield off.

    Ask FixBot

    Add Comment

  17. Nikon D7000 Motherboard Replacement: step 17, image 1 of 1
    • Remove one 3.5 mm J000 screw securing the right motherboard shield.

    Ask FixBot

    Add Comment

  18. Nikon D7000 Motherboard Replacement: step 18, image 1 of 1
    • Gently lift the right motherboard shield off with the tip of a spudger.

    Ask FixBot

    Add Comment

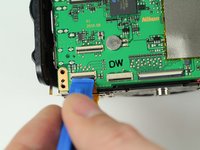
  19. Nikon D7000 Motherboard Replacement: step 19, image 1 of 3 Nikon D7000 Motherboard Replacement: step 19, image 2 of 3 Nikon D7000 Motherboard Replacement: step 19, image 3 of 3
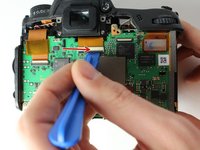
    • Disconnect remaining ribbon cables.

    Ask FixBot

    Add Comment

  20. Nikon D7000 Motherboard Replacement: step 20, image 1 of 2 Nikon D7000 Motherboard Replacement: step 20, image 2 of 2
    • Disconnect remaining ribbon cables.

    Ask FixBot

    Add Comment

  21. Nikon D7000 Motherboard Replacement: step 21, image 1 of 1
    • Carefully disconnect the red connector with tweezers.

    Ask FixBot

    Add Comment

  22. Nikon D7000 Motherboard Replacement: step 22, image 1 of 1
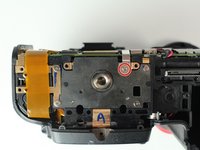
    • Remove four 3.5 mm J000 screws securing the motherboard.

    Ask FixBot

    Add Comment

  23. Nikon D7000 Motherboard Replacement: step 23, image 1 of 1
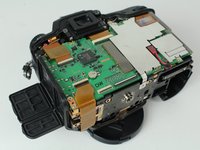
    • Gently pull the port side cover away from the motherboard.

    Ask FixBot

    Add Comment

  24. Nikon D7000 Motherboard Replacement: step 24, image 1 of 1
    • Lift the motherboard off.

    Ask FixBot

    Add Comment

Conclusion

To reassemble your device, follow these instructions in reverse order.

Cancel: I did not complete this guide.

9 other people completed this guide.

Jed Chen

Member since: 04/01/15

1,865 Reputation

3 Guides authored

Team

Cal Poly, Team 24-6, Lancaster Spring 2015 Member of Cal Poly, Team 24-6, Lancaster Spring 2015

CPSU-LANCASTER-S15S24G6

3 Members

6 Guides authored

6 Guide Comments

Hi thank you.

winnaingsoe - Reply Share
perfekt. Thank you! Had to replace the board because the GPS port was brocken.

Georges Hamlet - Reply Share

Hi, thanks for the detailed instructions! I just replaced my main board and the new one did not boot. The battery is charged, but the LCD shows nothing when battery is in and when the power is on. Is that a problem with the replacement main board or does it need to be programmed? I expected it to power up once the power is available.

serget - Reply Share

Have you resolved your issue?

Bhaskar vedula - Reply Share

Any luck of fixing it?

Boris Rapoport - Reply Share

Add Comment

View Statistics:

Past 24 Hours: 0

Past 7 Days: 15

Past 30 Days: 53

All Time: 7,522