Free Shipping on Domestic Orders $75+

Nikon Coolpix S9700 Screen Replacement

What you need

  1. Nikon Coolpix S9700 Screen Replacement, Battery: step 1, image 1 of 2 Nikon Coolpix S9700 Screen Replacement, Battery: step 1, image 2 of 2
    • Press the ON/OFF button to power off the S9700.

    • Not doing so can damage the S9700 or cause electric shock.

    Ask FixBot
    Add Comment

  2. Nikon Coolpix S9700 Screen Replacement: step 2, image 1 of 3 Nikon Coolpix S9700 Screen Replacement: step 2, image 2 of 3 Nikon Coolpix S9700 Screen Replacement: step 2, image 3 of 3
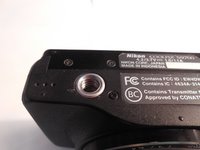
    • Place the S9700 upside down

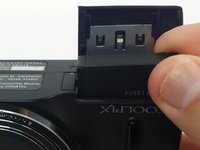
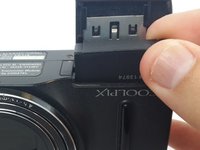
    • Place your finger on the battery compartment cover and gently push toward the front of the S9700.

    • The cover will open up by itself.

    Ask FixBot
    Add Comment

  3. Nikon Coolpix S9700 Screen Replacement: step 3, image 1 of 3 Nikon Coolpix S9700 Screen Replacement: step 3, image 2 of 3 Nikon Coolpix S9700 Screen Replacement: step 3, image 3 of 3
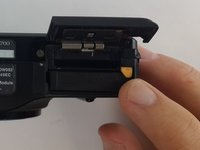
    • Push the yellow tab inside the battery compartment in the direction of the arrow. This will allow the battery to spring up.

    Ask FixBot

    Add Comment

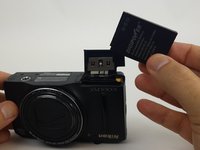
  4. Nikon Coolpix S9700 Screen Replacement: step 4, image 1 of 2 Nikon Coolpix S9700 Screen Replacement: step 4, image 2 of 2
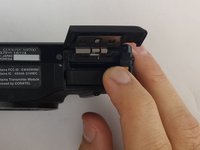
    • Grab the battery and pull out.

    Ask FixBot

    Add Comment

  5. Nikon Coolpix S9700 Screen Replacement, Back Panel: step 5, image 1 of 2 Nikon Coolpix S9700 Screen Replacement, Back Panel: step 5, image 2 of 2
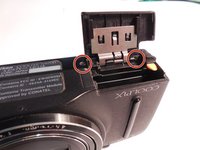
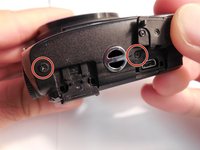
    • Remove the two 4-mm and three 3-mm J000 screws from the bottom of the S9700.

    • Three 3-mm screws are on the side opposite the battery compartment.

    • Two 4-mm screws are on the side with the battery compartment. One of these screws is in the battery compartment. Open it up for access.

    Ask FixBot

    Add Comment

  6. Nikon Coolpix S9700 Screen Replacement: step 6, image 1 of 2 Nikon Coolpix S9700 Screen Replacement: step 6, image 2 of 2
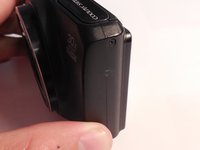
    • Remove the one 3-mm J000 screw on the left side of the S9700 (side with no ports).

    • Remove the two 3-mm J000 screws on the right side (side with HDMI and charging ports).

    • One of these screws is underneath the HDMI port cover. Lift the port cover up to access.

    Ask FixBot
    Add Comment

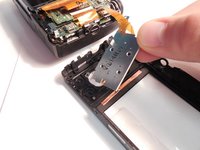
  7. Nikon Coolpix S9700 Screen Replacement: step 7, image 1 of 3 Nikon Coolpix S9700 Screen Replacement: step 7, image 2 of 3 Nikon Coolpix S9700 Screen Replacement: step 7, image 3 of 3
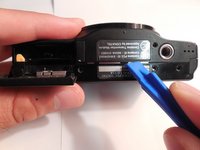
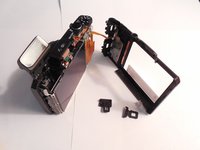
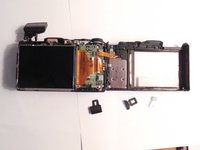
    • Insert the plastic opening tool on the bottom of the S9700 between the front panel and the back panel.

    • Twist the plastic opening tool so that both halves separate.

    • When both halves are separated, the HDMI cover, charging cover, and the ON/OFF switch will fall out.

    • There is a flex ribbon attached to the back panel. Forcing the back panel off may rip it.

    Ask FixBot
    Add Comment

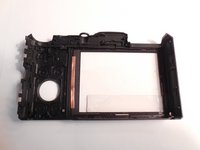
  8. Nikon Coolpix S9700 Screen Replacement: step 8, image 1 of 3 Nikon Coolpix S9700 Screen Replacement: step 8, image 2 of 3 Nikon Coolpix S9700 Screen Replacement: step 8, image 3 of 3
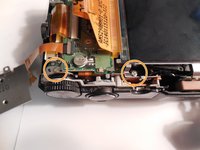
    • Remove the three silver 3-mm J000 screws on the back panel holding the silver button / dial component to the panel and ribbon.

    • Gently remove the back panel.

    Ask FixBot
    Add Comment

  9. Nikon Coolpix S9700 Screen Replacement, Screen: step 9, image 1 of 3 Nikon Coolpix S9700 Screen Replacement, Screen: step 9, image 2 of 3 Nikon Coolpix S9700 Screen Replacement, Screen: step 9, image 3 of 3
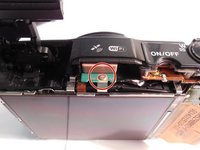
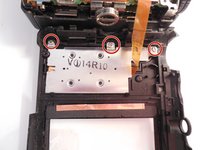
    • Remove the 2-mm J000 screw located at the top of the S9700 just below the satellite picture and Wi-Fi marking.

    • Remove the two 4-mm J000 screws right below the zoom dial.

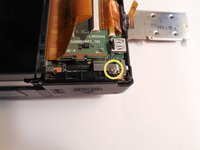
    • Remove the 4-mm J000 screw just above the battery compartment.

    Ask FixBot

    Add Comment

  10. Nikon Coolpix S9700 Screen Replacement: step 10, image 1 of 3 Nikon Coolpix S9700 Screen Replacement: step 10, image 2 of 3 Nikon Coolpix S9700 Screen Replacement: step 10, image 3 of 3
    Tool used on this step:
    Tweezers
    $4.99
    Buy
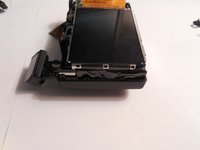
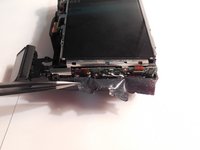
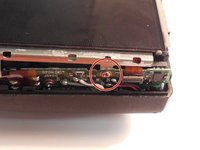
    • Remove the black film on the left side of the monitor using tweezers.

    • Remove the 2-mm J000 screw from underneath the black film.

    Ask FixBot

    Add Comment

  11. Nikon Coolpix S9700 Screen Replacement: step 11, image 1 of 3 Nikon Coolpix S9700 Screen Replacement: step 11, image 2 of 3 Nikon Coolpix S9700 Screen Replacement: step 11, image 3 of 3
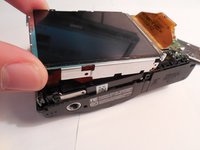
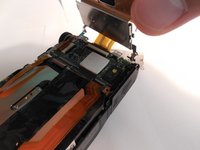
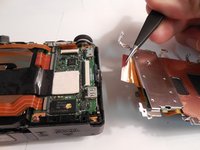
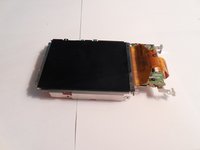
    • Lift the monitor from the rest of the S9700.

    • There is a ribbon cable attached to the monitor. Lift it very carefully.

    • Carefully lay the monitor down for full view of the ribbon

    Ask FixBot

    Add Comment

  12. Nikon Coolpix S9700 Screen Replacement: step 12, image 1 of 3 Nikon Coolpix S9700 Screen Replacement: step 12, image 2 of 3 Nikon Coolpix S9700 Screen Replacement: step 12, image 3 of 3
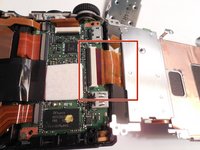
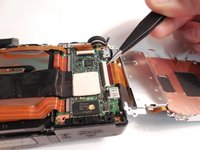
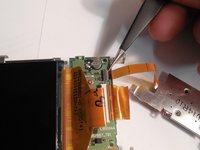
    • Use tweezers to remove the ribbon. Grab as close as you can to where it plugs in to avoid ripping it.

    • Go from side to side with the tweezers, pulling only a little bit at a time.

    • Be very careful when working with the ribbon. The S9700 may not work if any of it is damaged.

    Ask FixBot

    Add Comment

  13. Nikon Coolpix S9700 Screen Replacement: step 13, image 1 of 3 Nikon Coolpix S9700 Screen Replacement: step 13, image 2 of 3 Nikon Coolpix S9700 Screen Replacement: step 13, image 3 of 3
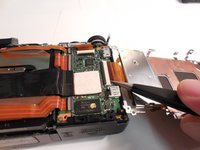
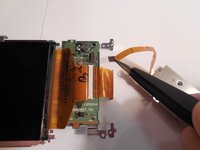
    • Remove the ribbon cable connecting the monitor and the silver button / dial component. Do this the same way that you did the other ribbon cable.

    • Be very careful working with ribbon cables. The S9700 may not work if you damage it in any way.

    Ask FixBot

    Add Comment

Conclusion

To reassemble your device, follow these instructions in reverse order.

Cancel: I did not complete this guide.

8 other people completed this guide.

Matt Staubus

Member since: 10/05/16

849 Reputation

5 Guides authored

Team

USF Tampa, Team 9-5, Lacy Fall 2016 Member of USF Tampa, Team 9-5, Lacy Fall 2016

USFT-LACY-F16S9G5

4 Members

10 Guides authored

0 Guide Comments

Add Comment

View Statistics:

Past 24 Hours: 1

Past 7 Days: 8

Past 30 Days: 45

All Time: 3,120