Introduction
If your Nikon Coolpix S6000's LCD screen is glitched or cracked and needs to be replaced, follow these steps. The display features the playback mode button and the menu control dial. This guide includes opening the camera and removing all aspects of the frame, which also means if you needed to open the camera to access other components (such as the flash or to replace the camera lens), you can do so as well. Before starting, be sure to remove the batteries and the SD card.
What you need
-
-
Using a Phillips #000 screwdriver, remove the two 3.1 mm screws on the side chrome bar on the left side of the camera (with the screen facing you).
 Ask FixBot
-
-
-
Using the small plastic spudger, remove the edge piece off the left side of the camera (with the screen side facing you).
-
-
-
Using the small plastic spudger, remove the edge piece that surrounds the shutter button off of the camera.
-
Remove the large chrome bar connected to the shutter button positioned on top of the camera.
-
-
-
Using the Phillips #000 screwdriver, remove the two 3.9 mm screws from the chrome bar on the right side of the camera (with the screen side facing you).
-
-
-
-
Lift the HDMI connector cover.
-
Remove the 3.9 mm screw under the HDMI connector cover using the Phillips #000 screwdriver.
-
Pop the HDMI connector cover and the chrome bar off.
-
-
-
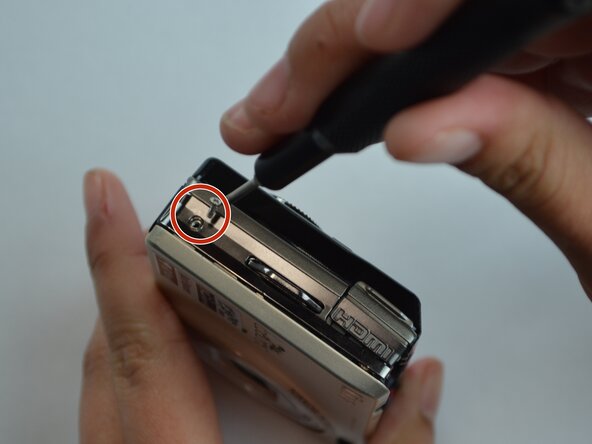
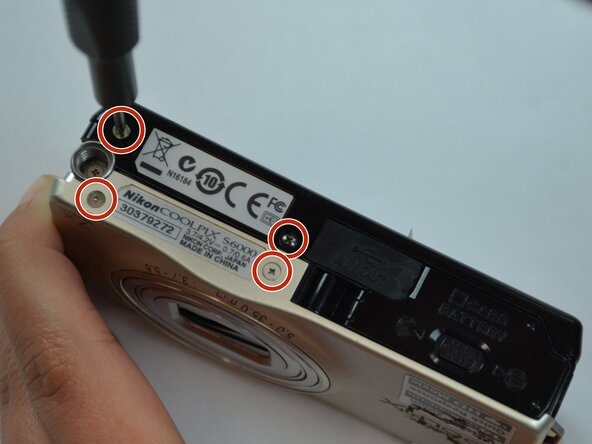
Using the Phillips #000 screwdriver, remove the four 2.7 mm screws from the bottom of the camera.
-
-
-
On the left side of the camera (with the screen facing you), remove the two 1.8 mm screws using a Phillips #000 screwdriver.
-
-
-
On the right side of the camera (with the screen facing you), remove the single 1.8 mm screw using a Phillips #000 screwdriver.
-
Remove the four smaller screws.
-
-
-
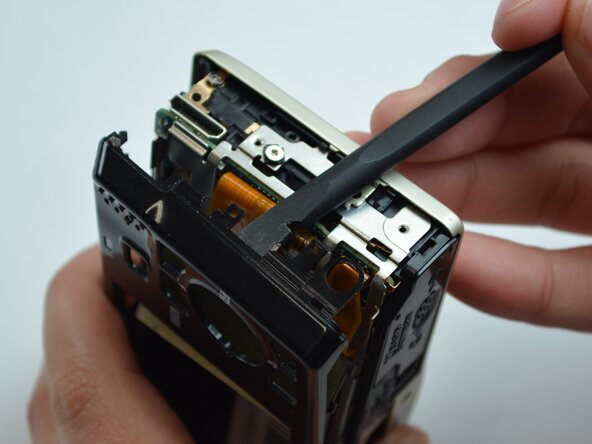
On the back side of the camera, use the small plastic spudger to remove the black screen frame.
-
-
-
Using the tweezers, gently disconnect all three ribbons on the right side of the camera (screen facing you) from the circuit board. This will remove the "ok" (apply selection) button from the body of the camera, along with the LCD screen.
-








To reassemble your device, follow these instructions in reverse order.
Cancel: I did not complete this guide.
One other person completed this guide.

Team

Texas Tech, Team 16-1, Samson Spring 2026 Member of Texas Tech, Team 16-1, Samson Spring 2026
TTU-SAMSON-S26S16G1
5 Members
2 Guides authored
