Free Shipping on Domestic Orders $75+

Nikon Coolpix S5300 Outer Casing Replacement

What you need

    1. Nikon Coolpix S5300  Outer Casing Replacement, Battery: step 1, image 1 of 1
      • Turn the camera upside down and locate the battery compartment.

      • Slide the compartment open following the direction of the arrow.

      Ask FixBot

      Add Comment

    2. Nikon Coolpix S5300  Outer Casing Replacement: step 2, image 1 of 1
      • Press the orange release button to release and remove the battery.

      • Replace or insert battery in it's respective terminals

      Ask FixBot

      Add Comment

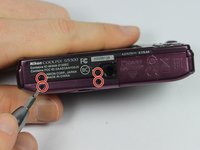
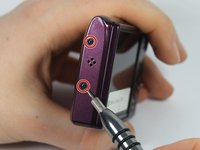
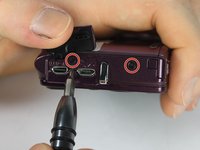
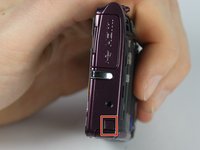
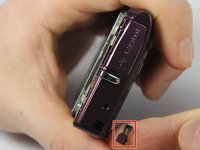
    1. Nikon Coolpix S5300  Outer Casing Replacement, Outer Casing: step 3, image 1 of 3 Nikon Coolpix S5300  Outer Casing Replacement, Outer Casing: step 3, image 2 of 3 Nikon Coolpix S5300  Outer Casing Replacement, Outer Casing: step 3, image 3 of 3
      • Remove the four 0.1mm screws from the bottom of the camera using the phillips head screwdriver

      • Using the same screwdriver, remove the 2 screws on the side of the camera.

      • Remove the 2 screws from the other side of the camera.

      • One of the screws is under the I/O port cover.

      Ask FixBot

      Add Comment

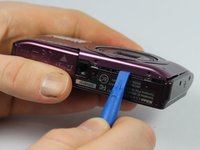
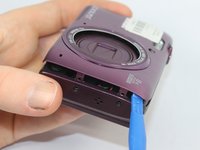
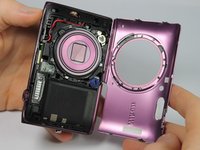
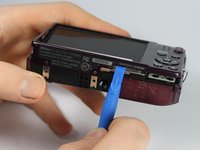
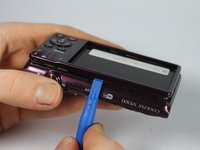
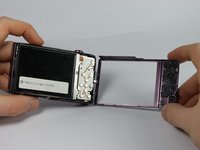
    2. Nikon Coolpix S5300  Outer Casing Replacement: step 4, image 1 of 3 Nikon Coolpix S5300  Outer Casing Replacement: step 4, image 2 of 3 Nikon Coolpix S5300  Outer Casing Replacement: step 4, image 3 of 3
      • Use the plastic opening tool to carefully separate the cover from the camera.

      • Work the plastic opening tool around all the edges of the front plate.

      • Pull the purple plastic cover off gently from the screen.

      Ask FixBot

      Add Comment

    3. Nikon Coolpix S5300  Outer Casing Replacement: step 5, image 1 of 3 Nikon Coolpix S5300  Outer Casing Replacement: step 5, image 2 of 3 Nikon Coolpix S5300  Outer Casing Replacement: step 5, image 3 of 3
      • Turn the camera over so the LCD screen is facing you.

      • Carefully remove the front shell by gently prying around the corners with the plastic opening tool until it releases.

      Ask FixBot

      Add Comment

    4. Nikon Coolpix S5300  Outer Casing Replacement: step 6, image 1 of 2 Nikon Coolpix S5300  Outer Casing Replacement: step 6, image 2 of 2
      • Be careful to keep track of little pieces of the outside casing.

      Ask FixBot

      Add Comment

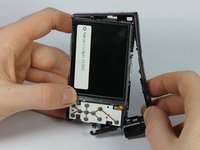
    5. Nikon Coolpix S5300  Outer Casing Replacement: step 7, image 1 of 2 Nikon Coolpix S5300  Outer Casing Replacement: step 7, image 2 of 2
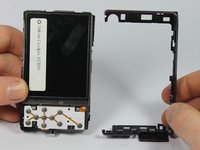
      • Carefully remove the top button casing by pulling it away from main camera.

      Ask FixBot

      Add Comment

Conclusion

To reassemble your device, follow these instructions in reverse order.

Cancel: I did not complete this guide.

Riordan McCole

Member since: 03/04/16

307 Reputation

3 Guides authored

Team

0 Guide Comments

Add Comment

View Statistics:

Past 24 Hours: 0

Past 7 Days: 3

Past 30 Days: 18

All Time: 468