Free Shipping on Domestic Orders $75+

Nikon Coolpix L330 LCD Screen Replacement

What you need

  1. Nikon Coolpix L330 LCD Screen Replacement, Back Housing: step 1, image 1 of 3 Nikon Coolpix L330 LCD Screen Replacement, Back Housing: step 1, image 2 of 3 Nikon Coolpix L330 LCD Screen Replacement, Back Housing: step 1, image 3 of 3
    • There are six screws attaching the back housing to the camera. Remove the screws from the body with a PH000 screw head.

    • Two 1.5x2.5mm screws on the right side.

    • Two 1.5x2.5mm screws on the underside.

    • Two 1.5x2.5mm screw on the left side.

    Ask FixBot

    Add Comment

  2. Nikon Coolpix L330 LCD Screen Replacement: step 2, image 1 of 2 Nikon Coolpix L330 LCD Screen Replacement: step 2, image 2 of 2
    • After removing the screws, use a metal spudger or plastic opening tool to push the back cover out.

    • The metal spudger can damage the plastic housing, so use caution when applying any pressure to it. Use a plastic opening tool to reduce the risk of damage to the housing.

    • Remove the back housing of the camera by lifting it directly up.

    • The back cover may be slightly tight, therefore more force may be needed to lift it up.

    Ask FixBot

    Add Comment

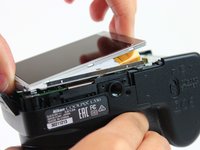
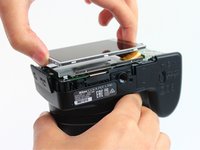
  3. Nikon Coolpix L330 LCD Screen Replacement, LCD Screen: step 3, image 1 of 2 Nikon Coolpix L330 LCD Screen Replacement, LCD Screen: step 3, image 2 of 2
    • Insert the tips of your fingers into the space between the screen and back-plate.

    • Gently lift the screen up and out of the frame.

    • The screen is still held by a flexible display cable, therefore only lift the screen 0.5'' out of the back-plate.

    Ask FixBot

    Add Comment

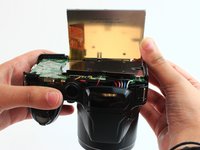
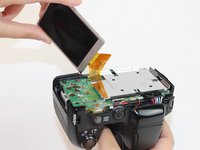
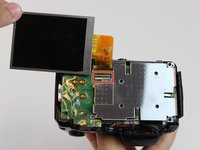
  4. Nikon Coolpix L330 LCD Screen Replacement: step 4, image 1 of 2 Nikon Coolpix L330 LCD Screen Replacement: step 4, image 2 of 2
    • Tilt the screen so that the display cable forms a hinge with the backplate.

    • Rotate the display 180 degrees so that it faces you.

    Ask FixBot

    Add Comment

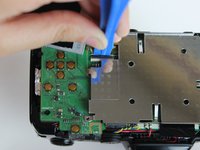
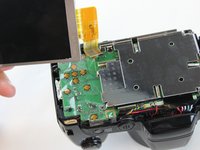
  5. Nikon Coolpix L330 LCD Screen Replacement: step 5, image 1 of 3 Nikon Coolpix L330 LCD Screen Replacement: step 5, image 2 of 3 Nikon Coolpix L330 LCD Screen Replacement: step 5, image 3 of 3
    • The display cable has a ZIF (zero insertion force) connector on the end. This has a tab that has to be pushed out before the cable can be safely removed.

    • Using a plastic opening tool or fingernail, pop up the black clip holding the display cable. This will release the cable.

    • Slide the display cable out of the connector.

    • The display cable can be damaged due to excessive bending, therefore avoid putting unnecessary strain on it.

    Ask FixBot

    Add Comment

Conclusion

To reassemble your device, follow these instructions in reverse order.

Cancel: I did not complete this guide.

5 other people completed this guide.

Rajeev

Member since: 02/09/16

623 Reputation

4 Guides authored

Team

USF Tampa, Team 2-10, Cagle Spring 2016 Member of USF Tampa, Team 2-10, Cagle Spring 2016

USFT-CAGLE-S16S2G10

4 Members

14 Guides authored

1 Guide Comment

Thank you, saved me money and time

Mihai Alexandru Fustos - Reply Share

Add Comment

View Statistics:

Past 24 Hours: 1

Past 7 Days: 12

Past 30 Days: 34

All Time: 2,431