Free Shipping on Domestic Orders $75+

Nikon Coolpix B700 Lens Assembly Replacement

What you need

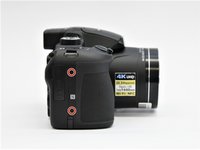
  1. Nikon Coolpix B700 Lens Assembly Replacement, Back Frame Assembly: step 1, image 1 of 1
    • Use the Phillips screwdriver to remove the two 5.5 mm screws on the left side of the camera.

    Ask FixBot

    Add Comment

  2. Nikon Coolpix B700 Lens Assembly Replacement: step 2, image 1 of 1
    • Use the Phillips screwdriver to remove seven 5.5 mm screws from the bottom of the camera.

    Ask FixBot

    Add Comment

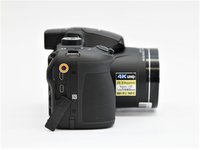
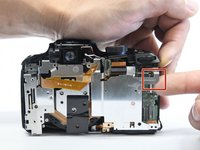
  3. Nikon Coolpix B700 Lens Assembly Replacement: step 3, image 1 of 2 Nikon Coolpix B700 Lens Assembly Replacement: step 3, image 2 of 2
    • Use the Phillips screwdriver to remove the two 5.5mm screws on the right side of the camera.

    • Open the HDMI flap to remove a 5.5mm screw.

    • Don't forget to replace the hidden screw under the HDMI flap during reassembly.

    Ask FixBot

    Add Comment

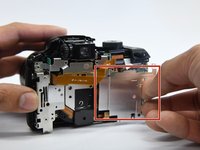
  4. Nikon Coolpix B700 Lens Assembly Replacement: step 4, image 1 of 1
    • Use the Phillips screwdriver to remove the two 5.5mm screws under the LCD panel.

    Ask FixBot

    Add Comment

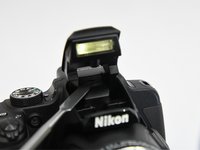
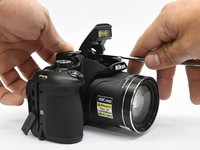
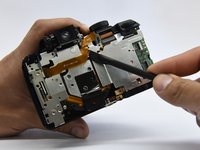
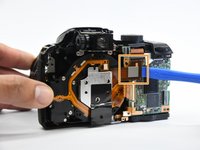
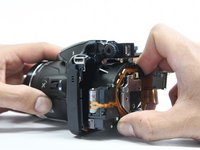
  5. Nikon Coolpix B700 Lens Assembly Replacement: step 5, image 1 of 3 Nikon Coolpix B700 Lens Assembly Replacement: step 5, image 2 of 3 Nikon Coolpix B700 Lens Assembly Replacement: step 5, image 3 of 3
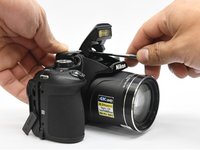
    • Open the flash assembly and insert the spudger into the slot under the flash unit and twist.

    • While twisting, pry apart the shell to split the camera in half.

    Ask FixBot

    Add Comment

  6. Nikon Coolpix B700 Lens Assembly Replacement: step 6, image 1 of 1
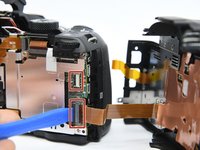
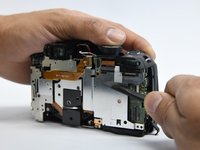
    • Be careful not to damage the ribbons that connect the halves together.

    Ask FixBot

    Add Comment

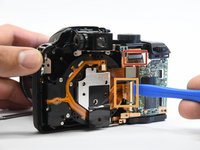
  7. Nikon Coolpix B700 Lens Assembly Replacement: step 7, image 1 of 2 Nikon Coolpix B700 Lens Assembly Replacement: step 7, image 2 of 2
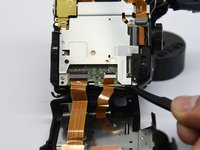
    • Place the pry tool under the black latch. Lift gently until the latch flips up.

    • Gently pull the ribbon away from the latch.

    • Be gentle when taking ribbons out and apart because they are fragile.

    Ask FixBot

    Add Comment

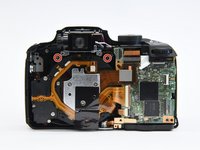
  8. Nikon Coolpix B700 Lens Assembly Replacement, Internal Bracket: step 8, image 1 of 1
    • Use the Phillips screwdriver to remove the remaining five 5.55mm screws.

    • Remove the single 6mm screw.

    Ask FixBot

    Add Comment

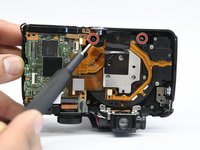
  9. Nikon Coolpix B700 Lens Assembly Replacement: step 9, image 1 of 1
    • Insert the pry tool under the latch and gently lift up to remove the ribbon.

    Ask FixBot

    Add Comment

  10. Nikon Coolpix B700 Lens Assembly Replacement: step 10, image 1 of 1
    • Move the ribbon out of the way to reveal the hidden screw.

    Ask FixBot

    Add Comment

  11. Nikon Coolpix B700 Lens Assembly Replacement: step 11, image 1 of 1
    • Lift the button assembly gently to give access to remove the 4mm screw.

    Ask FixBot

    Add Comment

  12. Nikon Coolpix B700 Lens Assembly Replacement: step 12, image 1 of 1
    • On the top of the camera, remove the 6mm screw.

    Ask FixBot

    Add Comment

  13. Nikon Coolpix B700 Lens Assembly Replacement: step 13, image 1 of 2 Nikon Coolpix B700 Lens Assembly Replacement: step 13, image 2 of 2
    • With the spudger tool gently pry off the white tap holding in the bracket.

    • Use the same tool to remove the glued-on ribbon.

    Ask FixBot

    Add Comment

  14. Nikon Coolpix B700 Lens Assembly Replacement: step 14, image 1 of 2 Nikon Coolpix B700 Lens Assembly Replacement: step 14, image 2 of 2
    • Gently lift up the button assembly to slide the bracket out.

    Ask FixBot

    Add Comment

  15. Nikon Coolpix B700 Lens Assembly Replacement: step 15, image 1 of 2 Nikon Coolpix B700 Lens Assembly Replacement: step 15, image 2 of 2
    • With the pry tool gently lift up the latch and pull the cable toward the lens assembly.

    • Use the pry tool again and place it under the ribbon and lift straight up to disconnect the ribbon.

    Ask FixBot

    Add Comment

  16. Nikon Coolpix B700 Lens Assembly Replacement, Lens Assembly: step 16, image 1 of 2 Nikon Coolpix B700 Lens Assembly Replacement, Lens Assembly: step 16, image 2 of 2
    • Use the Phillips screwdriver to remove the four 6 mm screw that hold on the bracket housing.

    Ask FixBot

    Add Comment

  17. Nikon Coolpix B700 Lens Assembly Replacement: step 17, image 1 of 1
    • Remove the tripod mount from it's slot.

    Ask FixBot

    Add Comment

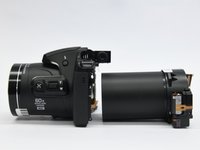
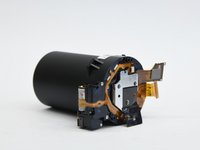
  18. Nikon Coolpix B700 Lens Assembly Replacement: step 18, image 1 of 3 Nikon Coolpix B700 Lens Assembly Replacement: step 18, image 2 of 3 Nikon Coolpix B700 Lens Assembly Replacement: step 18, image 3 of 3
    • Now you just have to slide the lens assembly out of the housing.

    Ask FixBot

    Add Comment

Conclusion

To reassemble your device, follow these instructions in reverse order.

Cancel: I did not complete this guide.

9 other people completed this guide.

2 Guide Comments

how to reset an objective error on B700 ? the lens is stopped in the middle of a hike

Per Benny Paulsen - Reply Share
how to reset an objective error? the lens is stopped in the middle of a hike

Per Benny Paulsen - Reply Share
Add Comment

View Statistics:

Past 24 Hours: 1

Past 7 Days: 5

Past 30 Days: 56

All Time: 3,927