Introduction
This guide provides shows you how to replace your LCD screenon your Nikon Coolpix 4100 with step-by-step instructions and photographs.
What you need
-
-
Tool on left - PH000 screwdriver
-
Tool on right - iPod fix-it tool
-
Soldering Iron
 Ask FixBot
-
-
-
Locate the 3 black screws on the bottom of the camera and the 2 gray screws on each side of the camera. Remove them with a PH000 screwdriver.
-
-
-
Locate the gray band that you removed the screws from; this holds the two halves of the camera together. Use an iPod fix-it tool to pry the gray band loose and remove it.
-
-
-
-
Use the iPod fix-it tool to carefully pry the screen from the logic board.
-
-
-
Flip the screen down. To disconnect the ribbon cable from the logic board, rock each end of the brown metal retainer that holds the ribbon cable in place until the ribbon disconnects.
-
-
-
Remove the two screws on the top edge of the circuit board to the right of the viewfinder.
-
-
-
To connect the new screen, solder the wires in place and connect the ribbon cable to the logic board.
-
-
-
Unthread the four wires running across the top of the viewfinder from the plastic brackets holding them in place.
-
-
-
Remove the two black screws threaded vertically into the top of the viewfinder. Loosen the flash and circuit board for more accessibility. This will allow for the viewfinder to be replaced.
-


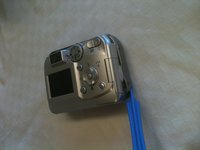
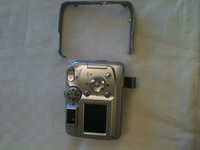


To reassemble your device, follow these instructions in reverse order.

Team

Ohio State, Team 1-2, Buehl Fall 2012 Member of Ohio State, Team 1-2, Buehl Fall 2012
OSU-BUEHL-F12S1G2
3 Members
5 Guides authored
