
Nikon COOLPIX S610c LCD Replacement

Kevin Backers and 3 other contributors
Last updated on Jan 28, 2014
Views: 1.2K
View statistics:
- Past 24 Hours:
- 1
- Past 7 Days:
- 18
- Past 30 Days:
- 93
- All Time:
- 1,233
Comments: 0
No one has left comments on this guide. Will you be first?
Go to guide commentsCompleted: 0 1
No one has marked this guide "completed." Will you be the first?
1 person has marked this guide "completed." It's you — great job!
Favorites: 0 1
No one has favorited (and subscribed to) this guide. Will you be the first?
1 person has favorited (and subscribed to) this guide — and that's you!
Action Shots
Be an action hero! This guide needs images that better demonstrate how to perform specific actions.
Step Trimmer
This guide has unnecessary steps. Trim them to be more concise!
Introduction
Go to step 1 ↓If your screen has stopped working or needs to be replaced for some other reason, follow this guide to remove your current screen.
What you need
Tools
-
Spudger4.9


-
-
-
Slide the orange switch to the right as shown. Now the battery can be pulled out. Reverse these steps to re-install.
-
-
-
-
Remove the 5x3mm screw holding down the panel on the side closest to the lens.
-
-
-
Remove the 4x3mm on the opposite side near the selector wheel.
-
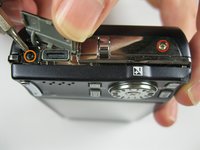
Remove the 2x2mm and 3x2mm screws underneath the a/v flap.
-
-
-
-
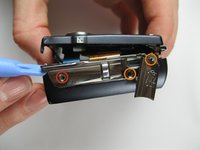
Pry the back panel away from the body of the camera, using the space you just opened up.
-
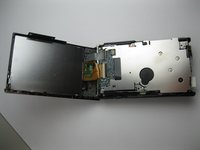
A small piece of the frame of the camera may fall off, but it can be easily put back into place during reassembly.
-
-
-
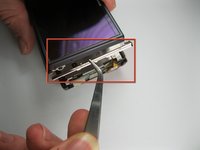
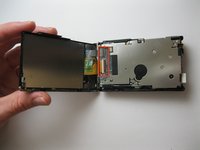
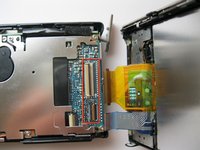
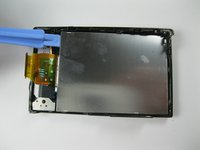
Pry up the plastic ribbon connectors on the body of the camera to release the ribbon cables.
-
-

 Ask FixBot








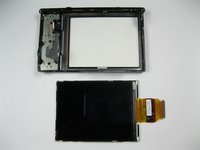
To reassemble your device, follow these instructions in reverse order.

Team

Cal Poly, Team 9-5, Regan Winter 2012 Member of Cal Poly, Team 9-5, Regan Winter 2012
CPSU-REGAN-W12S9G5
5 Members
72 Guides authored
