Free Shipping on Domestic Orders $75+

Nikon COOLPIX S610c Front Casing Replacement

What you need

  1. Nikon COOLPIX S610c Front Casing Replacement, Battery: step 1, image 1 of 1
    • On the bottom right of the camera, locate the battery flap switch.

    Ask FixBot

    Add Comment

  2. Nikon COOLPIX S610c Front Casing Replacement: step 2, image 1 of 1
    • Move this switch to the right so the battery flap can flip open.

    Ask FixBot

    Add Comment

  3. Nikon COOLPIX S610c Front Casing Replacement: step 3, image 1 of 1
    • Slide the orange switch to the right as shown. Now the battery can be pulled out. Reverse these steps to re-install.

    Ask FixBot
    Add Comment

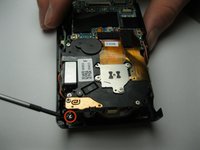
  4. Nikon COOLPIX S610c Front Casing Replacement, Rear Casing: step 4, image 1 of 1
    • Remove the three 3x3mm screws attached to the rear casing.

    Ask FixBot
    Add Comment

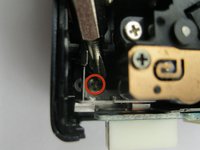
  5. Nikon COOLPIX S610c Front Casing Replacement: step 5, image 1 of 1
    • The panel can be identified by the wifi logo on its upper half on the camera's side.

    • Remove the 5x3mm screw holding down the panel on the side closest to the lens.

    Ask FixBot

    Add Comment

  6. Nikon COOLPIX S610c Front Casing Replacement: step 6, image 1 of 1
    • Pry the panel off from the bottom using your fingernail.

    Ask FixBot

    Add Comment

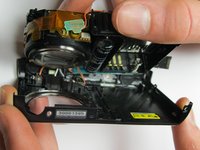
  7. Nikon COOLPIX S610c Front Casing Replacement: step 7, image 1 of 1
    • Remove the 3x2mm screw underneath the panel near the top of the camera.

    Ask FixBot
    Add Comment

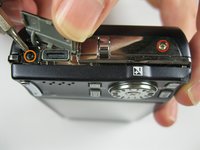
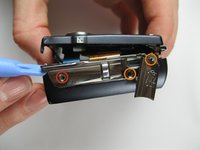
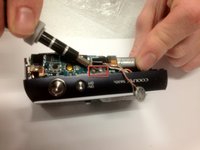
  8. Nikon COOLPIX S610c Front Casing Replacement: step 8, image 1 of 2 Nikon COOLPIX S610c Front Casing Replacement: step 8, image 2 of 2
    • Remove the 4x3mm on the opposite side near the selector wheel.

    • Remove the 2x2mm and 3x2mm screws underneath the a/v flap.

    Ask FixBot
    Add Comment

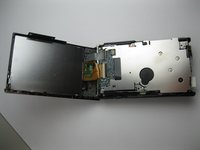
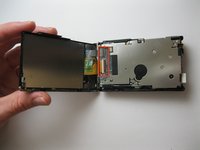
  9. Nikon COOLPIX S610c Front Casing Replacement: step 9, image 1 of 2 Nikon COOLPIX S610c Front Casing Replacement: step 9, image 2 of 2
    • Pry the back panel away from the body of the camera, using the space you just opened up.

    • Be careful not to damage the ribbon cable on the opposite end of the camera.

    • A small piece of the frame of the camera may fall off, but it can be easily put back into place during reassembly.

    Ask FixBot

    Add Comment

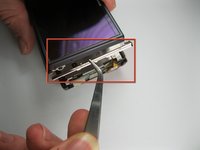
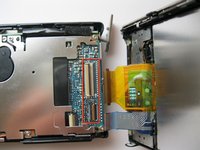
  10. Nikon COOLPIX S610c Front Casing Replacement: step 10, image 1 of 2 Nikon COOLPIX S610c Front Casing Replacement: step 10, image 2 of 2
    • Pry up the plastic ribbon connectors on the body of the camera to release the ribbon cables.

    • The center connector is detached by flipping the black latch up and away from the center of the camera.

    • The smaller connector is detached by flipping the tan latch up and away from the edge of the camera.

    Ask FixBot

    Add Comment

  11. Nikon COOLPIX S610c Front Casing Replacement, Front Casing: step 11, image 1 of 1
    • Remove the three 3x3mm screws that attach the front casing to the bottom.

    Ask FixBot

    Add Comment

  12. Nikon COOLPIX S610c Front Casing Replacement: step 12, image 1 of 1
    • Remove the two 3x2 screws and two 3.5x2.5 screws attaching the rear panel to the motherboard.

    Ask FixBot

    Add Comment

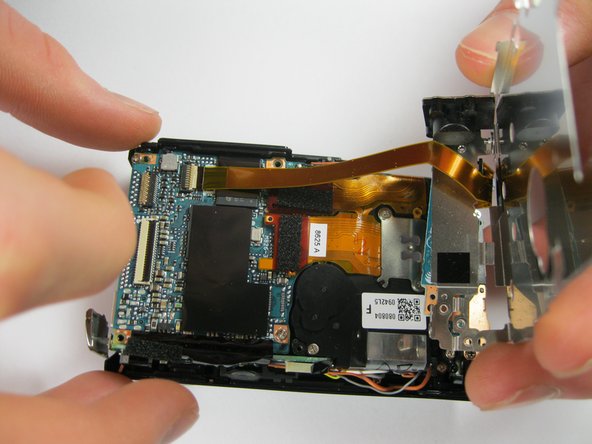
  13. Nikon COOLPIX S610c Front Casing Replacement: step 13, image 1 of 2 Nikon COOLPIX S610c Front Casing Replacement: step 13, image 2 of 2
    • Lift the back panel off the motherboard.

    • Be careful not to damage the ribbon cable that attaches the mother board to the rear panel.

    Ask FixBot

    Add Comment

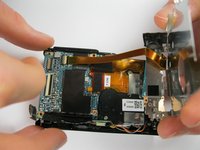
  14. Nikon COOLPIX S610c Front Casing Replacement: step 14, image 1 of 2 Nikon COOLPIX S610c Front Casing Replacement: step 14, image 2 of 2
    • Detach the ribbon cable from the motherboard by flipping up the latch on the ribbon connector.

    • Note that the white ribbon connector latch flips away from the ribbon cable.

    Ask FixBot

    Add Comment

  15. Nikon COOLPIX S610c Front Casing Replacement: step 15, image 1 of 2 Nikon COOLPIX S610c Front Casing Replacement: step 15, image 2 of 2
    • Remove the final 4x3mm screw at the top of the camera near the lens.

    Ask FixBot

    Add Comment

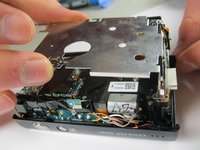
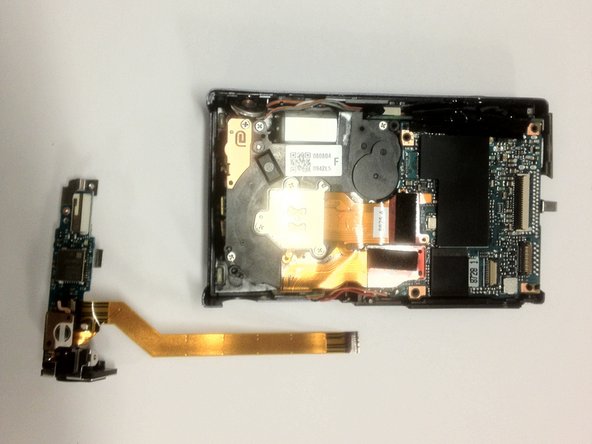
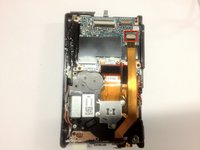
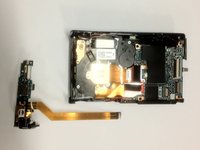
  16. Nikon COOLPIX S610c Front Casing Replacement: step 16, image 1 of 2 Nikon COOLPIX S610c Front Casing Replacement: step 16, image 2 of 2
    • Pry the front casing away from the body of the camera.

    • Be careful not to damage the wires that attach the front panel to the motherboard.

    • Short the leads on the capacitor near the flash to avoid a nasty shock when separating the casing from the body.

    Ask FixBot

    Add Comment

  17. Nikon COOLPIX S610c Front Casing Replacement: step 17, image 1 of 1
    • Unscrew the three 3x2mm screws that attach the cables to the front casing.

    Ask FixBot

    Add Comment

Conclusion

To reassemble your device, follow these instructions in reverse order.

Cancel: I did not complete this guide.

Bryan Bell

Member since: 01/26/12

40 Reputation

1 Guide authored

Team

Cal Poly, Team 9-5, Regan Winter 2012 Member of Cal Poly, Team 9-5, Regan Winter 2012

CPSU-REGAN-W12S9G5

5 Members

12 Guides authored

0 Guide Comments

Add Comment

View Statistics:

Past 24 Hours: 1

Past 7 Days: 7

Past 30 Days: 33

All Time: 1,503