
Nikon COOLPIX P7700 Back Casing Replacement

Dustin Wahl and 4 other contributors
Last updated on Jul 10, 2024
Views: 2.5K
View statistics:
- Past 24 Hours:
- 2
- Past 7 Days:
- 14
- Past 30 Days:
- 97
- All Time:
- 2,539
Comments: 10
10 comments on steps.
Completed: 2 3
2 people have marked this guide "completed." Will you be next?
3 people have marked this guide "completed." Including you — great job!
Favorites: 2 3
2 people have favorited (and subscribed to) this guide. Will you be next?
3 people have favorited (and subscribed to) this guide — including you!
Introduction
Go to step 1 ↓This guide showcases how to replace the back casing on a Nikon COOLPX p7700 camera. By following these seven simple steps, you should comfortably be able to remove the casing on the camera to get to the inside.
What you need
Tools

-
-
-
Turn camera to the left side and remove the two 4.3 mm black side screws using the Phillips #00 screwdriver.
-
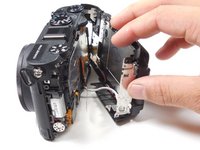
Remove the side panel.
 Ask FixBot
-
-
-
Open the touch screen, and remove the three 4.3 mm black screws inside using the Phillips #00 screwdriver.
-
-
-
Remove the 4.3 mm black screw on top of the camera, right above where the screen folds out. Use the Phillips #00 screwdriver.
-
-
-
Remove the two 4.3 mm black screws on the right side of the camera using the Phillips #00 screwdriver.
-
-
-
Remove the 4.3 mm black screws on the bottom of the camera using the Phillips #00 screwdriver.
-
-
-


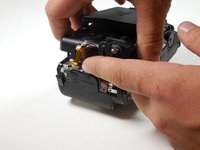

To reassemble your device, follow these instructions in reverse order.
Cancel: I did not complete this guide.
2 other people completed this guide.

Team

Colorado Springs, Team 2-7, Panko Spring 2015 Member of Colorado Springs, Team 2-7, Panko Spring 2015
UCCS-PANKO-S15S2G7
3 Members
60 Guides authored
