Free Shipping on Domestic Orders $75+

Nexus 9 Speakers Replacement

What you need

  1. Nexus 9 Speakers Replacement, Rear Case: step 1, image 1 of 3 Nexus 9 Speakers Replacement, Rear Case: step 1, image 2 of 3 Nexus 9 Speakers Replacement, Rear Case: step 1, image 3 of 3
    • With your fingers, carefully pry off the back plastic casing. Starting at the corners is usually the easiest.

    • The rear-facing camera seems to fit a little too snugly in its compartment on the rear case; so make sure that it stays connected to the motherboard.

    Ask FixBot

    Add Comment

  2. Nexus 9 Speakers Replacement, Battery: step 2, image 1 of 2 Nexus 9 Speakers Replacement, Battery: step 2, image 2 of 2
    • Carefully peel up the copper shielding with your fingers.

    • Before fully removing the copper shielding, make sure that the blue antenna cable is out of the way of the copper tab.

    Ask FixBot

    Add Comment

  3. Nexus 9 Speakers Replacement: step 3, image 1 of 1
    • Using the spudger tool, carefully remove the bottom of the battery from it's location below the logic boards.

    • The battery is attached to the motherboard with some adhesive, so you may need an iOpener to loosen up the adhesive. Check out the iOpener guide for info on how to do it.

    • Do not pull the battery from the tablet yet, as it is still connected to the motherboard.

    Ask FixBot

    Add Comment

  4. Nexus 9 Speakers Replacement: step 4, image 1 of 1
    • Now remove the metal clip covering the battery's connector cable located above the top left of the battery with the spudger.

    • After the metal clip is wiggled free, the battery's connector cable can be easily removed by just gently tugging it free.

    Ask FixBot

    Add Comment

  5. Nexus 9 Speakers Replacement: step 5, image 1 of 1
    • The battery should now lift free of the tablet.

    Ask FixBot

    Add Comment

  6. Nexus 9 Speakers Replacement, Antenna Board: step 6, image 1 of 2 Nexus 9 Speakers Replacement, Antenna Board: step 6, image 2 of 2
    • This step is not necessary if you have already removed the battery.

    • Carefully peel up the copper shielding with your fingers.

    • Before fully removing the copper shielding, make sure that the blue antenna cable is out of the way of the copper tab.

    Ask FixBot

    Add Comment

  7. Nexus 9 Speakers Replacement: step 7, image 1 of 1
    • Unscrew the three 3 mm Torx T5 screws on the antenna board.

    • This step and the next show the battery removed, but it is not necessary to remove it if you are only replacing the antenna board.

    Ask FixBot

    Add Comment

  8. Nexus 9 Speakers Replacement: step 8, image 1 of 1
    Tool used on this step:
    Tweezers
    $4.99
    Buy
    • Use your fingers or a pair of tweezers to disconnect the blue antenna cable from the motherboard.

    • When reinstalling the antenna, be sure to clean it with a degreaser such as windex or isopropyl alcohol. The oils on your fingers have the potential to create wireless interference.

    • The antenna board should now lift free of the motherboard.

    Ask FixBot

    Add Comment

  9. Nexus 9 Speakers Replacement, Speakers: step 9, image 1 of 1
    • Use a spudger or your fingers to remove the first speaker. The speaker may be heavily glued in and require heat to lift. Be careful as you can pull the speaker apart.

    Ask FixBot

    Add Comment

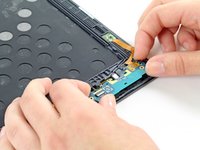
  10. Nexus 9 Speakers Replacement: step 10, image 1 of 1
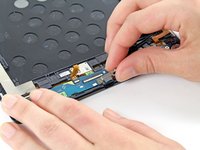
    • Disconnect the two ZIF connectors attached to the daughterboards.

    • Gently pull on the ribbon cable to remove it.

    Ask FixBot

    Add Comment

  11. Nexus 9 Speakers Replacement: step 11, image 1 of 2 Nexus 9 Speakers Replacement: step 11, image 2 of 2
    Tool used on this step:
    Tweezers
    $4.99
    Buy
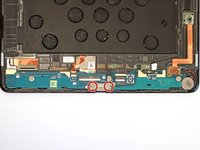
    • Remove the two 3mm T5 Torx screws securing the metal USB port bracket.

    • Use your fingers or a pair of tweezers to remove the bracket.

    Ask FixBot

    Add Comment

  12. Nexus 9 Speakers Replacement: step 12, image 1 of 3 Nexus 9 Speakers Replacement: step 12, image 2 of 3 Nexus 9 Speakers Replacement: step 12, image 3 of 3
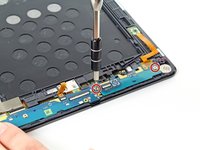
    • Unscrew the two 3mm T5 Torx screws securing the daughterboard to the device.

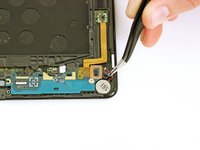
    • Use a pair of tweezers to disconnect the vibrator cable. It will lift straight up from the daughterboard connector.

    • Use your fingers to lift the daughterboard upward and out of the device.

    Ask FixBot

    Add Comment

  13. Nexus 9 Speakers Replacement: step 13, image 1 of 1
    • The daughterboard has an orange ribbon cable that is adhered to the device. Gently pull the ribbon up and remove the daughtboard.

    Ask FixBot

    Add Comment

  14. Nexus 9 Speakers Replacement: step 14, image 1 of 1
    • Use a spudger to remove the second speaker.

    Ask FixBot

    Add Comment

Conclusion

To reassemble your device, follow these instructions in reverse order.

Cancel: I did not complete this guide.

One other person completed this guide.

Lauren Williams

Member since: 01/22/15

121 Reputation

1 Guide authored

Team

Cal Poly, Team 19-11, Maness Winter 2015 Member of Cal Poly, Team 19-11, Maness Winter 2015

CPSU-MANESS-W15S19G11

5 Members

9 Guides authored

0 Guide Comments

Add Comment

View Statistics:

Past 24 Hours: 1

Past 7 Days: 8

Past 30 Days: 55

All Time: 1,715