Free Shipping on Domestic Orders $75+

Nexus 5X Motherboard Assembly Replacement

Views: 431

View statistics:

Past 24 Hours:
2
Past 7 Days:
7
Past 30 Days:
22
All Time:
431
Comments: 0

No one has left comments on this guide. Will you be first?

Go to guide comments
Completed: 0

No one has marked this guide "completed." Will you be the first?

Favorites: 0

No one has favorited (and subscribed to) this guide. Will you be the first?

Time Required: No estimate
Difficulty: Moderate
In Progress

This guide is a work in progress. Reload periodically to see the latest changes!

Nexus 5X Motherboard Assembly Replacement
Prerequisite Only This is a prerequisite-only guide! This guide is part of another procedure and isn’t meant to be used alone.

Introduction

Go to step 1 ↓

pre req only

What you need

Tools

  • iOpener
    $24.95
    4.8
  • Spudger
    4.9
    1. Nexus 5X Motherboard Assembly Replacement, Motherboard Assembly: step 1, image 1 of 1
      • Use an iOpener to loosen the adhesive beneath the rear facing camera. Place the iOpener across the top part of the phone for about 30 seconds.

      Ask FixBot

      Add Comment

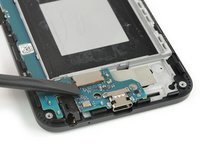
    2. Nexus 5X Motherboard Assembly Replacement: step 2, image 1 of 2 Nexus 5X Motherboard Assembly Replacement: step 2, image 2 of 2
      • Apply the flat end of a spudger to the left side of the rear facing camera and carefully lever it up. Make sure all of the adhesive underneath is loosened.

      Ask FixBot

      Add Comment

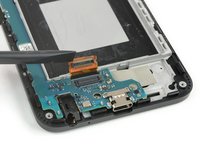
    3. Nexus 5X Motherboard Assembly Replacement: step 3, image 1 of 2 Nexus 5X Motherboard Assembly Replacement: step 3, image 2 of 2
      • Use the flat end of a spudger to pry up the display flex connector.

      Ask FixBot

      Add Comment

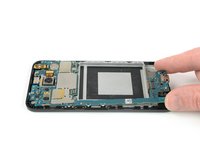
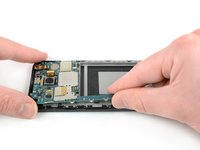
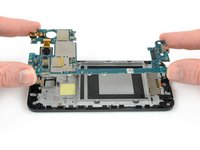
    4. Nexus 5X Motherboard Assembly Replacement: step 4, image 1 of 3 Nexus 5X Motherboard Assembly Replacement: step 4, image 2 of 3 Nexus 5X Motherboard Assembly Replacement: step 4, image 3 of 3
      • Grip the lower part of the motherboard with your fingers and carefully lift it upwards.

      • There's a small plastic clip next to the rear-facing camera that holds the motherboard in place.

      • Gently pull the motherboard towards the bottom edge to free it from the plastic clip next to the rear-facing camera.

      • Carefully lift the motherboard out of the frame.

      • Be careful—the two cameras are still connected to the board.

      Ask FixBot

      Add Comment

Conclusion

To reassemble your device, follow these instructions in reverse order.

Cancel: I did not complete this guide.

Dominik Schnabelrauch

Member since: 11/23/16

266,195 Reputation

682 Guides authored

Team

iFixit Member of iFixit

Staff

121 Members

72,885 Guides authored

0 Guide Comments

Add Comment

View Statistics:

Past 24 Hours: 2

Past 7 Days: 7

Past 30 Days: 22

All Time: 431