Free Shipping on Domestic Orders $75+

Nextbook 8 Camera Replacement

What you need

  1. Nextbook 8 Camera Replacement, Battery: step 1, image 1 of 2 Nextbook 8 Camera Replacement, Battery: step 1, image 2 of 2
    • Use the plastic opening tool to remove the back cover. Carefully slide the tool between the front glass and back cover.

    • Slide the tool along the edge to work the back cover off.

    • It helps to have an extra tool to stick in the gap and keep the back cover separated from the glass as you slide the other tool.

    Ask FixBot

    Add Comment

  2. Nextbook 8 Camera Replacement: step 2, image 1 of 2 Nextbook 8 Camera Replacement: step 2, image 2 of 2
    • Remove the tape covering the motherboard.

    • Remove the silver tape holding the white ribbon cables to the battery.

    Ask FixBot

    Add Comment

  3. Nextbook 8 Camera Replacement: step 3, image 1 of 2 Nextbook 8 Camera Replacement: step 3, image 2 of 2
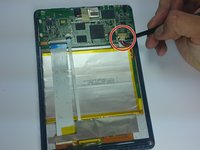
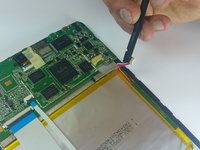
    • Use a spudger to carefully disconnect the battery connector from the motherboard.

    • When working with electronics, it's important to choose a tool that's ESD-safe to avoid accidental damage to the device. The regular black nylon spudger or a plastic opening tool should be used whenever possible.

    Ask FixBot

    Add Comment

  4. Nextbook 8 Camera Replacement: step 4, image 1 of 1
    Tool used on this step:
    Tweezers
    $4.99
    Buy
    • Use a spudger to lift up the black bar on the two ZIF connectors located above the battery.

    • Pull the ribbon cables out of the connectors with tweezers or two fingers.

    Ask FixBot

    Add Comment

  5. Nextbook 8 Camera Replacement: step 5, image 1 of 2 Nextbook 8 Camera Replacement: step 5, image 2 of 2
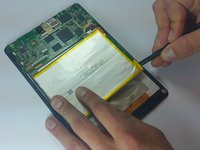
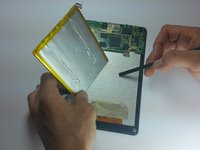
    • Using the flat end of a spudger, carefully work the spudger under the battery, lifting it off of the device.

    • The battery is very malleable, so do not try to pull it off all at once.

    Ask FixBot

    Add Comment

  6. Nextbook 8 Camera Replacement, Camera: step 6, image 1 of 1
    • Slowly pull up masking tape by pulling down from the top.

    • Be careful because both the front and rear cameras are attached to each other.

    Ask FixBot

    Add Comment

  7. Nextbook 8 Camera Replacement: step 7, image 1 of 1
    • Peel the bottom part of the masking tape off to reveal the ribbon connector.

    Ask FixBot

    Add Comment

  8. Nextbook 8 Camera Replacement: step 8, image 1 of 1
    • Pull both camera lenses out of the holes.

    Ask FixBot

    Add Comment

  9. Nextbook 8 Camera Replacement: step 9, image 1 of 1
    • Use a spudger to disconnect the two camera lenses from the device.

    • Carefully lift the black connector to release the cameras.

    Ask FixBot

    Add Comment

  10. Nextbook 8 Camera Replacement: step 10, image 1 of 1
    • Pull both camera lenses out of the ribbon connector.

    Ask FixBot

    Add Comment

Conclusion

To reassemble your device, follow these instructions in reverse order.

Cancel: I did not complete this guide.

Dylan Wiese

Member since: 03/11/15

1,889 Reputation

5 Guides authored

Team

0 Guide Comments

Add Comment

View Statistics:

Past 24 Hours: 0

Past 7 Days: 5

Past 30 Days: 30

All Time: 1,565