-
-
-
The black rubber ring can be easily lifted with a pick or very small flat head. The rubber ring has adhesive on the back side and will go back in place at the end. There is also a thin plastic layer under the black rubber on top of the 4 small Phillips screws holding the bottom(inside of the rubber ring in the photo, it fell apart upon removal).
 Ask FixBot
-
-
-
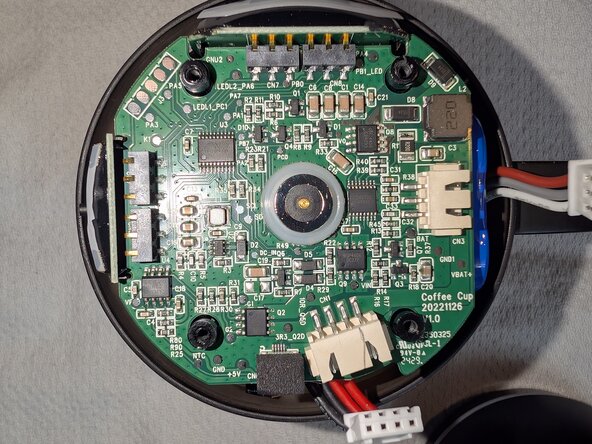
After carefully prying the bottom off, being careful to not damage the seal around the edge of the bottom case, we get our first look at the inner workings. In this photo I have already disconnected the battery and the heating element wires from the main board. There is a tiny ribbon cable that i was not able to disconnect, but it wasn't necessary.
-
-
-
-
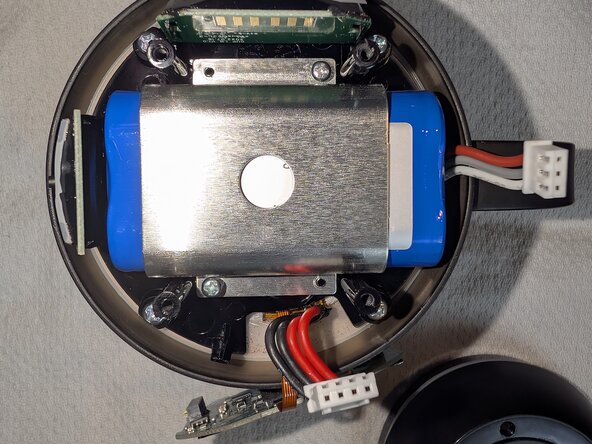
After carefully lifting the main board and letting it hang over the side by the ribbon cable, we have access to the battery and it's hold down bracket.
-
-
-
The battery pack after removing it from the mug. Using the part number, search your favorite sources for a replacement. Assembly is the reverse of disassembly.
-
-


To reassemble your device, follow these instructions in reverse order.

