Introduction
Damage to the charging port of the New Nintendo 2DS XL (MODEL NUMBER) may render the device to eventual power failure. Any poor charging connections or inability to insert the cable into the port may suggest for the removal of the port from the device. This guide offers a suggested coarse of action in safely removing and replacing the charging port.
Inspect the port for any foreign debris that may be desturbing the connection between charging cable and port. Also, inspect the charging chord to ensure that there is no considerable damage to that may affect its performance. Please ensure that the port is the most possible problem before attempting to remove from the device.
Step 7 does require soldering of three pins that allow for the mounting of the charging port onto the circuit board.
Before beginning disassembly, fully power off the device and disconnect any chargin ports or input devices.
What you need
-
-
Before starting the disassembly, remove
-
The stylus
-
Any game cartridge
-
The microSD card
-
-
-
Use a tri‑point Y00 screwdriver to unscrew the four 6 mm‑long screws located at the four corners of the bottom panel.
-
-
-
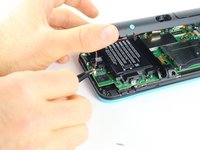
Using a spudger, separate the back panel from the front casing by gently prying around the panel.
-
There are many clips along the hinge of the case, so it is recommended to work your way along one short side and the two long sides before finishing the last short side.
-
-
-
-
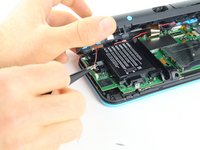
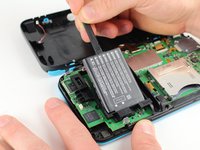
Use the flat end of a spudger to gently pry the battery out of its plastic enclosure.
-
-
Tool used on this step:Tweezers$4.99
-
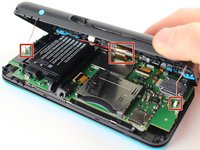
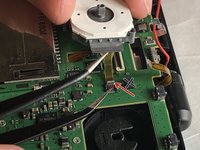
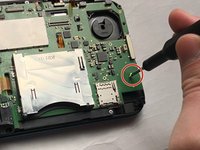
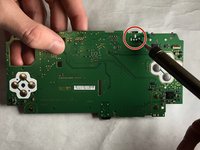
There are 8 ribbon cables that need to be removed as shown in the picture.
-
For the remaining 6 (in red), use a pair of tweezers to flip the latches up and pull the ribbon cable out.
-
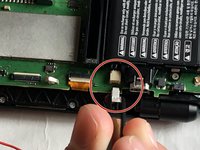
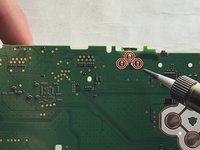
Note that the second picture shows a broken ribbon connector next to the joystick ribbon connector (to the right of the red arrow). Do not attempt to unlatch this connector as shown in the picture!
-
-
-
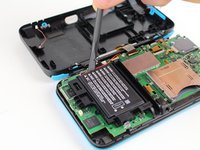
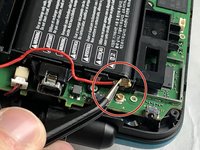
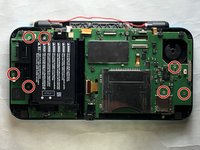
Remove the motherboard and locate the charging port. Flip the the motherboard over.
-


To reassemble your device, follow these instructions in reverse order.
Cancel: I did not complete this guide.
One other person completed this guide.
Team

IUPUI, Team S1-G4, Harley Fall 2019 Member of IUPUI, Team S1-G4, Harley Fall 2019
IUPUI-HARLEY-F19S1G4
3 Members
8 Guides authored