Introduction
My Netatmo Smart Doorbell started making clickety noises as the relay switched on/off in a rapid way. We can still push the button to ding the wall bell inside as the transformer and the circuit itself still works, but taking the Netatmo off the wall it was kind of hot to the touch, probably because it was trying to charge a dead battery.
There is big capacitors on it, so it takes some time before it loses power after being disconnected.
I took the battery out from the casing and mounted it up again without it to see how it works without a battery.
OBS: It seems it does not work, the LED flashes green, and the chimes button no longer triggers the bell inside. It connected and disconnected continuously, so it needs the battery power source to function.
The plan was to source a new battery, but I did not find a suitable one.
In the end I replaced the battery with a 4.2V power source that hopefully will last forever, but it is not a modification for everyone to make. Please do not try to do this if you do not have the experience or the tools. I will not help you with entry level problems and the warranty will be void if you open it.
What you need
-
-
It needs to be unmounted from the bottom side by unscrewing the one screw with a triangle bit that was included in the package.
-
There is a hook on top, so loosen the screw first and pull the bottom out to open the casing and disconnect the connector wires, then unhook it from the top.
 Ask FixBot
-
-
-
Before doing anything else the SD card must be removed and also the fuse needs to be pulled out.
-
-
-
There are 2 short phillips head screws in the opening besides the SD card slot and 8 longer ones. They are all easy to spot when the sticker is removed.
-
Removing the sticker will void warranty, but there is no warranty after 5yrs anyway.
-
-
-
There is a tight silicon gasket around that you want to be intact when remounting the lid.
-
-
-
-
Be aware of the speaker wire in the middle and the antenna wire on top. They are glued in there, so do not rip them out.
-
-
-
The double sided tape gives way, just hold the pressure for some time.
-
Maybe store the tape and use it for the new battery mounting.
-
-
-
There is some sort of glue sealant on all plugs..
-
-
-
I have contacted vendors, but at this point I do not have any new batteries available..
-
If you know where to source them in Norway / EU / Asia in numbers of 1-2, please leave a comment.
-
Turns out that finding a battery with NTC (3 wires) in this size is a problem. There are some in china with erratic names, but I did not order any. Size does matter here. A larger battery like 1000mAh would not fit.
-
If you have a similar form factor new battery without the NTC, you could probably move the battery controller over from the old battery to a new one, but I have not tried this.
-
I gave up on the battery replacement as I do have a 5V power source on the other side of the wall, check the next step on how I did that. It might not be something you want to do..
-
-
-
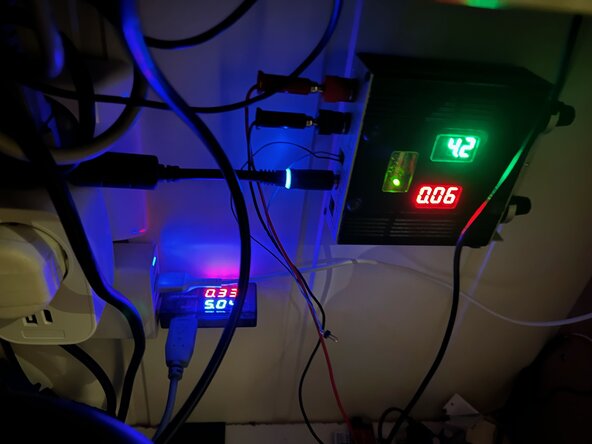
As I do have a 5V USB PSU on the inside of the wall for other IoT devices I drilled a hole in the wall, removed the battery from the cable, modified the battery cable and soldered on a regulator that I adjusted to 4.2V which seems to be the level there is no charging going on from the battery circuit.
-
As there is no charging anymore to heat up a battery, I soldered in a 10K resistor between GND/black and the yellow cable for the battery connector.
-
I was thinking a big capacitor would be nice, but the space was constrained and the regulator board has some big ones onboard so it seems to be good enough.
-
There is a micro USB port (for diagnostic, I suppose) on the doorbell also, that I used instead of the ringer cable cable while testing this out.
-
Is seems that the power draw is around 3-400mA at most from the ringer cable/USB and about the same from the "battery" when the doorbell needs a boost when handling video calls.
-
-
-
I wanted a plug to be able to disconnect it, so I soldered on a tiny socket and plug.
-
I have this 3mm thick microphone wire with shielding that I use for projects where the wire does not need to be seen and drilling a 4mm hole from inside the house worked nicely.
-
I added Superlube on all gaskets and also into the USB port and SD card, like Netatmo suggests, and closed everything up.
-


If you just open it up and change the battery, this is a short and easy job.
If you are not able to find a replacement battery that fits, it takes a soldering iron, a 10K resistor, a 4.2V 1Aish regulator, shrink tube, wires, connectors, doublesided tape and some hours doing everything.
To reassemble your device, follow these instructions in reverse order.
