
Nest Hello Button Replacement

Daniel Moore and 3 other contributors
Last updated on Jan 20, 2025
Views: 4.4K
View statistics:
- Past 24 Hours:
- 2
- Past 7 Days:
- 23
- Past 30 Days:
- 97
- All Time:
- 4,398
Comments: 21
19 comments on steps, 2 guide comments.
Go to guide commentsCompleted: 1 2
1 person has marked this guide "completed." Will you be next?
2 people have marked this guide "completed." Including you — great job!
Favorites: 0 1
No one has favorited (and subscribed to) this guide. Will you be the first?
1 person has favorited (and subscribed to) this guide — and that's you!
Needs More Images
A few more images would make this guide's procedures crystal clear.
Missing Steps
Oops! This guide is currently missing one or more important steps.
Introduction
Go to step 1 ↓If the doorbell button on your Nest Hello is cracked or leaking, this guide will help you access and replace it. During disassembly, it is easy to damage the waterproofing O-Ring, so plan on replacing that as well. This does involve removing all of the internals from the device using the iFixit opening picks, Phillips #000 screwdriver, and tweezers. Be sure to take your time and keep track of screws and other parts.
What you need
Tools
-
Spudger4.9
-
-


-
-
-
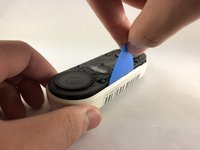
Insert the pick between the black faceplate and white casing of the Nest Hello.
-
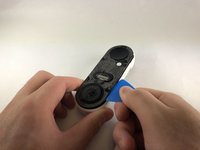
Pry the faceplate away from the device with the opening pick.
-
Completely remove the faceplate from the device, do not be afraid to pull hard.
 Ask FixBot
-
-
-
Peel back the cover stickers and use the Phillips #000 screwdriver to remove the four screws.
-
-
-
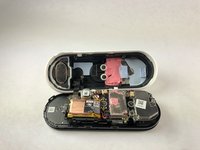
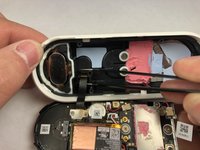
Insert opening pick between the white casing and the black internal circuitry and pry it out.
-
-
-
-
-
Use the Phillips #000 to remove the two screws holding the ribbon cable to the white casing.
-
-
Tool used on this step:Tweezers$4.99
-
Grip the connector with the tweezers as shown and pull it away from the casing.
-
-
-
Remove the six smaller screws shown with the Phillips #000 screwdriver.
-
Remove the three larger screws shown with the Phillips #000 screwdriver.
-
-
-
Holding the device as shown push the circuit board away from you and up to free it from the clips.
-
-
-
-
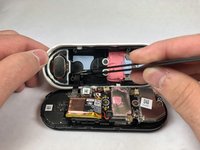
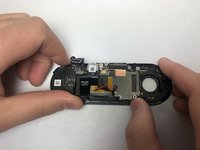
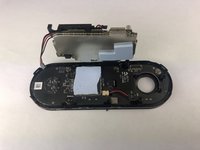
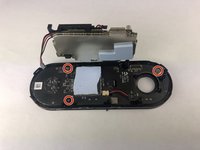
Use the Phillips #000 screwdriver to remove the three screws holding the last circuit board to the black plastic housing.
-
-
-
Insert the pick underneath the black connectors and pry them upward to disconnect them from the circuit board.
-
Work your way around the device, prying the circuit board away from the housing.
-
-
-
-
-
Once the circuitboard is free from the plastic housing, the button can be removed by pushing on it from the front side.
-
-








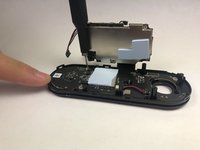

To reassemble your device, follow these instructions in reverse order.
Cancel: I did not complete this guide.
One other person completed this guide.

Team

Embry-Riddle Aeronautical University, Team S1-G7, Cromer Twal Spring 2020 Member of Embry-Riddle Aeronautical University, Team S1-G7, Cromer Twal Spring 2020
ERAU-CROMER TWAL-S20S1G7
4 Members
84 Guides authored
2 Guide Comments
Where do you get the parts. Google is no help. I’m trying to get the black faceplate from your first step. I can’t find it.
Where do I buy a button?
