
Nerf N-Strike Elite Retaliator Case Disassembly

ericharman and 4 other contributors
Last updated on Apr 30, 2018
Views: 39K
View statistics:
- Past 24 Hours:
- 7
- Past 7 Days:
- 49
- Past 30 Days:
- 171
- All Time:
- 39,259
Comments: 24
9 comments on steps, 15 guide comments.
Go to guide commentsCompleted: 29 30
29 people have marked this guide "completed." Will you be next?
30 people have marked this guide "completed." Including you — great job!
Favorites: 2 3
2 people have favorited (and subscribed to) this guide. Will you be next?
3 people have favorited (and subscribed to) this guide — including you!
Needs More Images
A few more images would make this guide's procedures crystal clear.
Introduction
Go to step 1 ↓Moving components in your blaster can be accessed by removing the outer casing. This guide shows how to access these inner components.
What you need
Tools

-
-
-
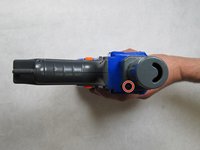
While holding the blaster, rotate the barrel assembly in the counter-clockwise direction and pull away from the blaster.
 Ask FixBot
-
-
-
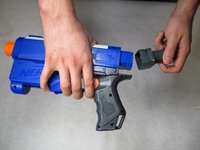
Remove the stock of the blaster by pushing the orange tabs downward while pulling the stock away from the blaster.
-
-
-
-
Remove the magazine from the blaster by forcing the sliding mechanism backwards, pushing the orange tabs downward, and pulling the magazine away.
-
-
-
Remove the stock attachment point by removing the two 8mm Phillips head screws.
-
-
-
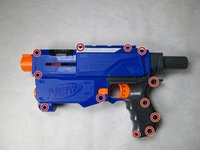
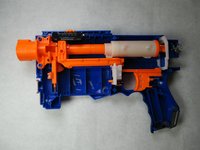
Remove the eleven 8mm and two 10mm Phillips head screws from the left side of the blaster, and carefully remove the outer casing.
-
-




Cancel: I did not complete this guide.
29 other people completed this guide.

15 Guide Comments
How do I clean the slider track?
you probably should not do that. i think its oily for a reason.
Mine had a chopped off dart head stuck in the trigger mechanism.
I had to partially disassemble in order to be able to free the slide which was covering 1 screw.
Overall, it was very easy. Only challenge is keeping track of the screws, as they're not all the same.
Leave the screws in the casing
