
Necklace Chain Repair

Stephanie Lascola and 5 other contributors
Last updated on Mar 3, 2016
Views: 6.6K
View statistics:
- Past 24 Hours:
- 3
- Past 7 Days:
- 42
- Past 30 Days:
- 165
- All Time:
- 6,557
Comments: 4
4 comments on steps.
Completed: 5 6
5 people have marked this guide "completed." Will you be next?
6 people have marked this guide "completed." Including you — great job!
Favorites: 14 15
14 people have favorited (and subscribed to) this guide. Will you be next?
15 people have favorited (and subscribed to) this guide — including you!
Introduction
Go to step 1 ↓More often than not, necklaces brake. No matter how old or how valuable, the most common breakage occurs when the jump ring slit gets pulled apart and the chain slips out. However, this is an easy fix!
What you need

-
-
-
Look closely at where the necklace chain came apart. You will see a split ring, otherwise known as a jump ring.
-
Figure A: The jump ring is located on one end of the necklace.
 Ask FixBot
-
-
-
Figures B and C: While holding the needle nose pliers in one hand, clamp onto one end of the jump ring and hold on to the other end with your thumb and index finger.
-
Carefully pull on the ends of the jump ring until the opening is large enough to accommodate one of the chain links.
-
-
-
Now that the jump ring opening is separated, you can reattach the chain. Find the end of the chain that had detached from the necklace.
-
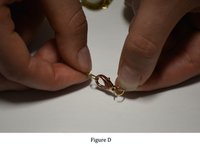
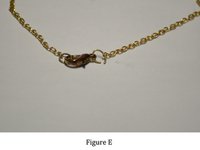
Figures D and E: While holding the jump ring in one hand and the end of the necklace in your other hand, proceed to loop the chain into the opened jump ring.
-
-
-
Figure F: Using similar methods from Step 2 Figure C, clamp onto one end of the jump ring slit with your pliers and hold on to the other end with your thumb and index finger.
-
Carefully close the opening of the jump ring.
-
-
-
-
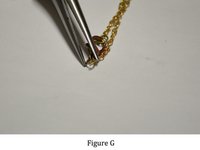
Figure G: It is time to close the jump ring. With your pliers, clamp on both ends of the jump ring and push together so the two ends of the jump ring slightly overlap.
-
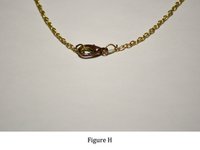
Refer to Figure H for finished assembly.
-
-




To make sure the necklace is correctly reattached, gently pull on the chain. The jump ring should be firmly closed as to prevent the chain from slipping off the jump ring.
Cancel: I did not complete this guide.
5 other people completed this guide.

Team

Cal Poly, Team 28-4, Green Spring 2015 Member of Cal Poly, Team 28-4, Green Spring 2015
CPSU-GREEN-S15S28G4
6 Members
60 Guides authored
